 Summer is certainly here, from the heat and crazy thunderstorms with tornadoes, to restless kids that leave a tornado wake behind them. I know we are all scrambling and looking for ways to keep the kids busy in constructive ways. This week, at a local camp, I’ll be teaching a class on How to Eat a Hedgehog. For all my activist friends, don’t worry, I won’t be teaching kids how to roast their pets. Instead, we’ll celebrate those cute little animals they just can’t get enough of.
We’ll start with a watermelon hedgehog. Since I’ll be teaching this in a couple of days, I thought it wise to try what I’m going to teach. So, I found the instructions online, pulled them up on the iPad and headed for the kitchen with a small melon under my arm.
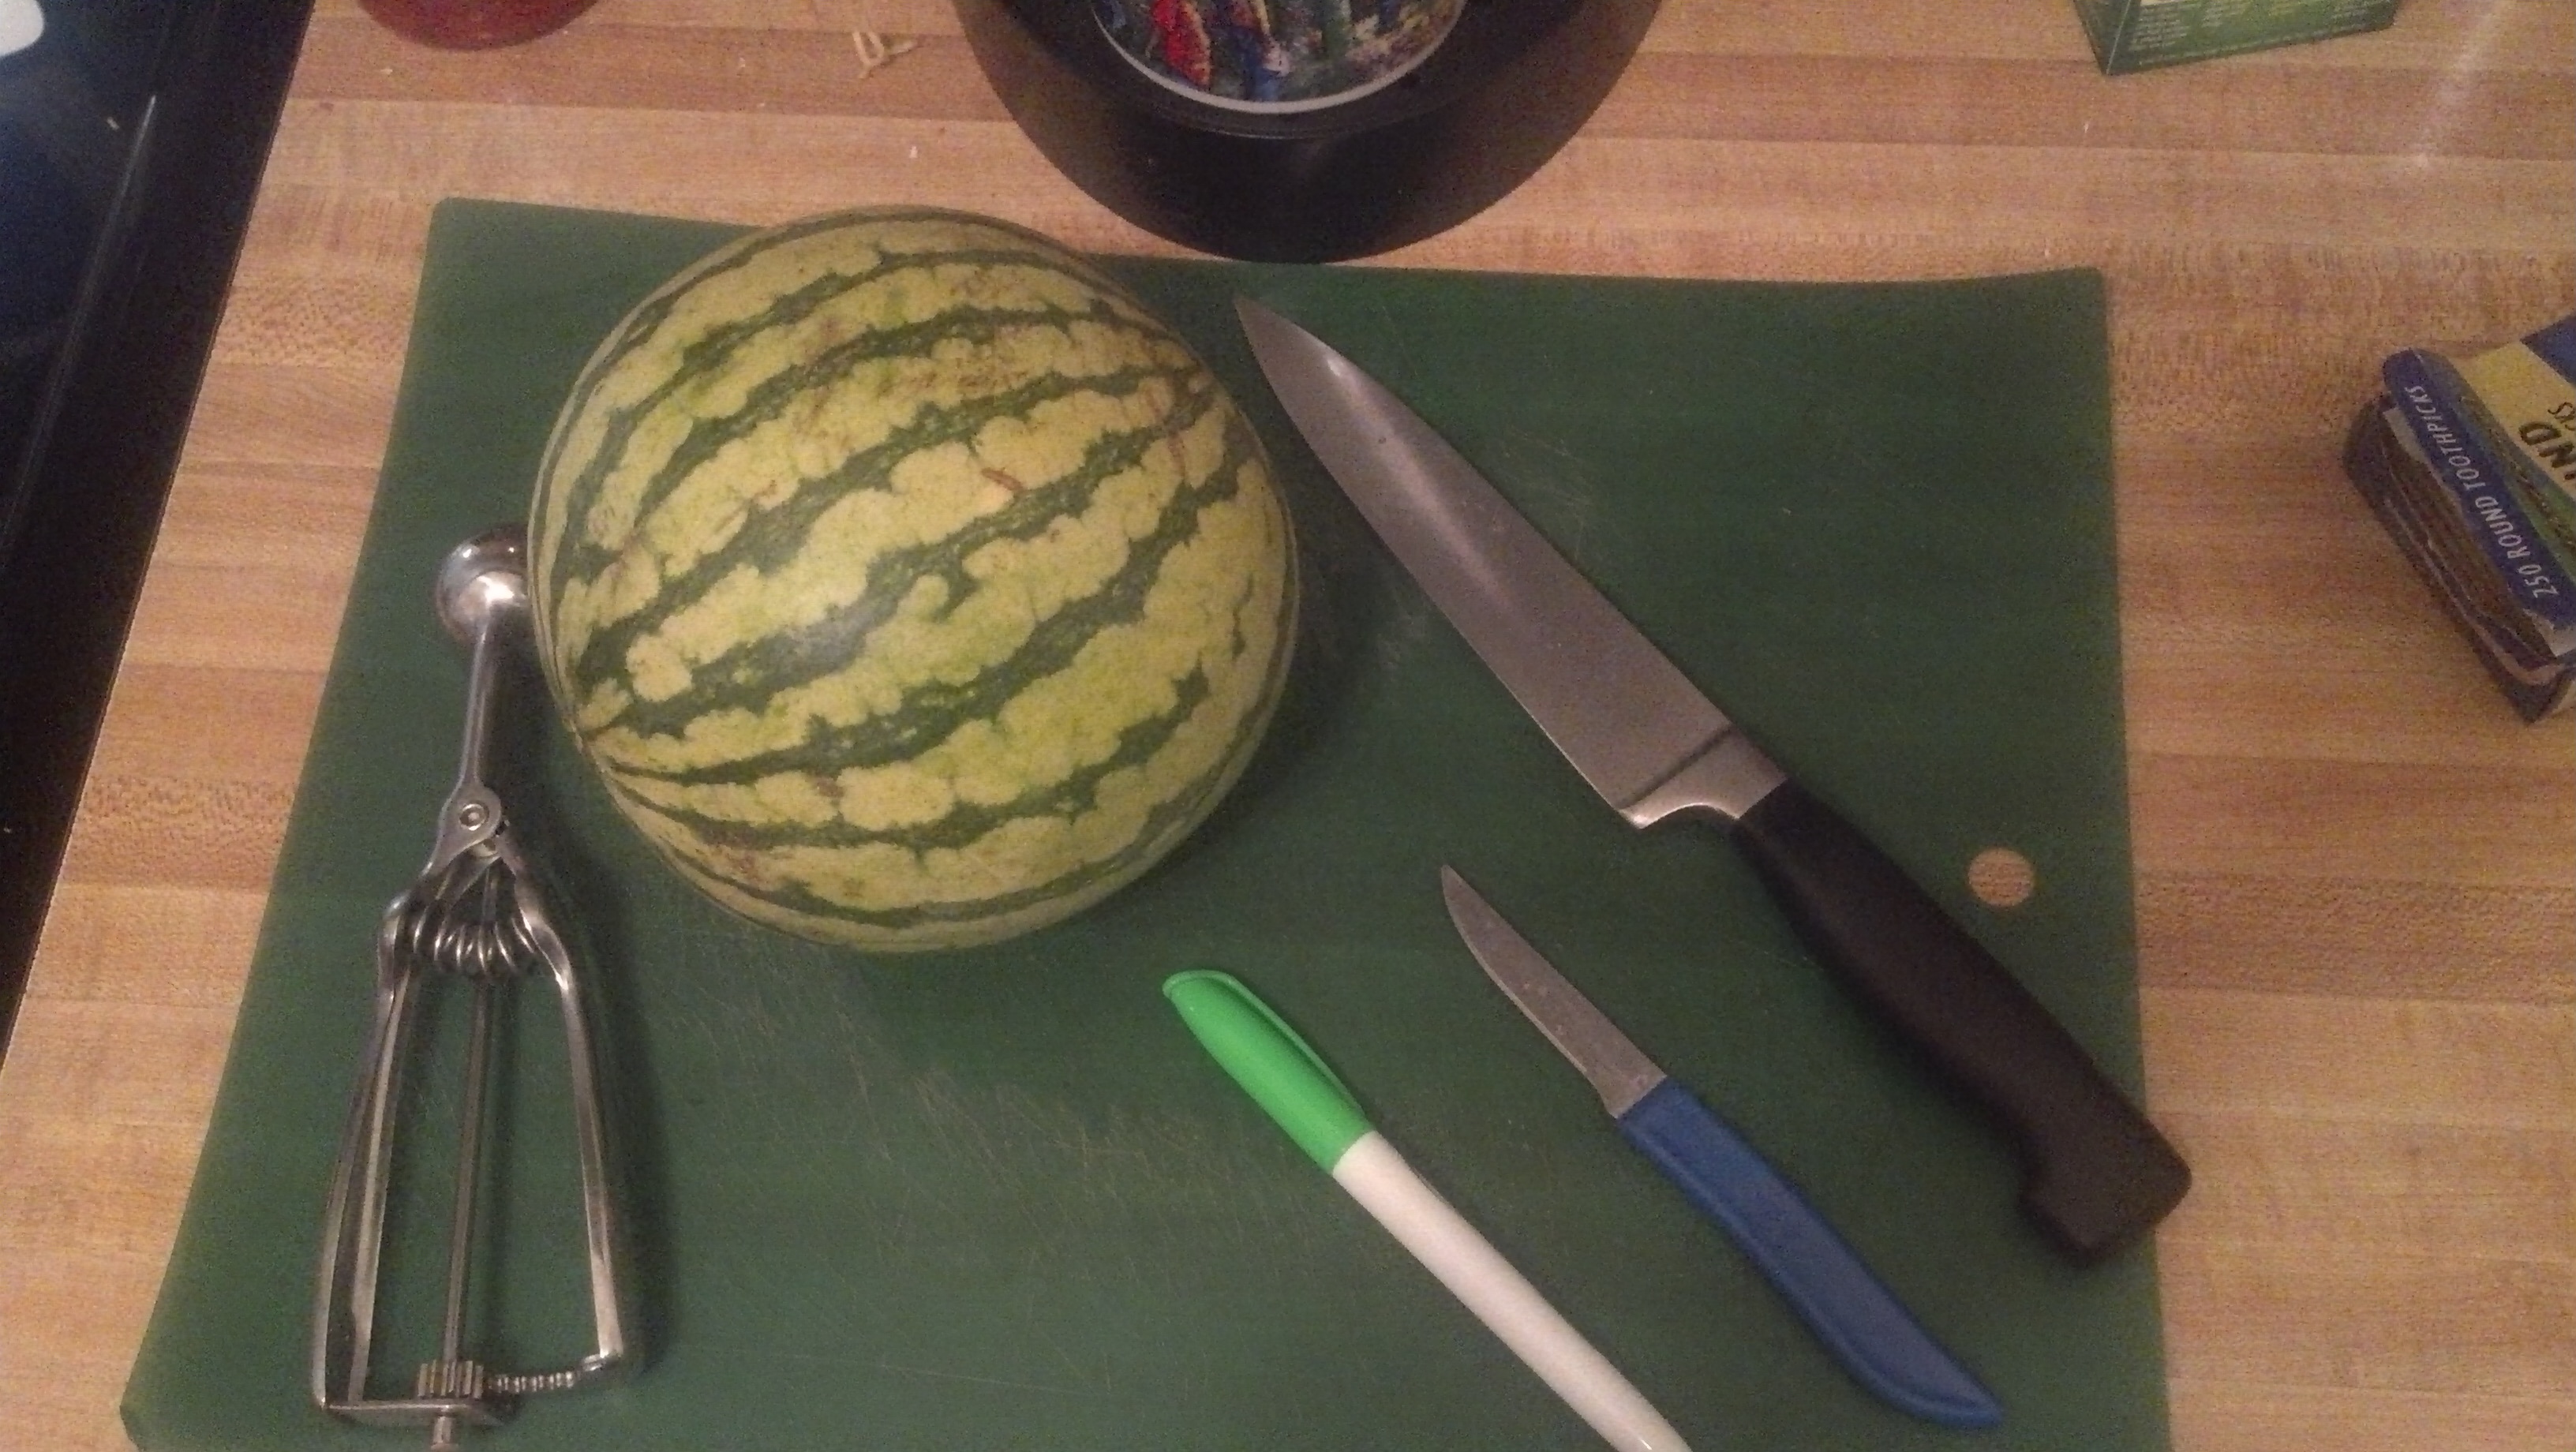
What you’ll need:
- One Watermelon
- Cutting Board/Mat
- Green Dry Erase Marker
- Large Knife
- Pairing Knife
- Melon Baller or Cookie Dough Baller
- Bowl for holding melon flesh
- toothpicks
 Start by finding the flat side of the melon. This is usually easily identified as the spot is yellow, or not as bright green as the rest of the melon. This is the side of the melon that was sitting on the ground. Cut just enough off of this side, to help the melon sit without rolling. WARNING: If you cut to deep, the watermelon will drain through your cut leaving a pool of hedgehog, err… I mean watermelon juice on the counter. I was using a small melon, so the rind, white part, was pretty thin and I had to be very careful.
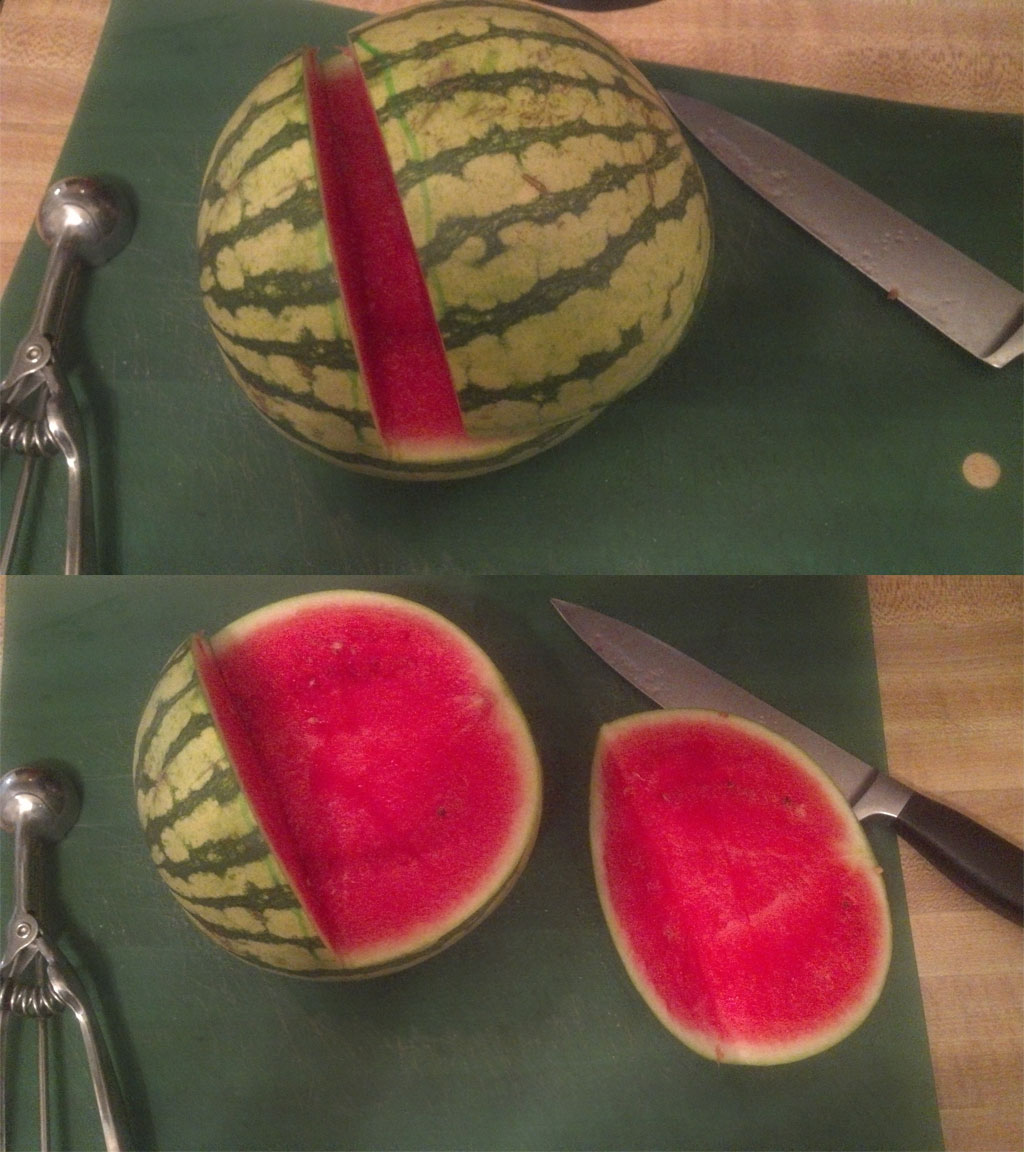
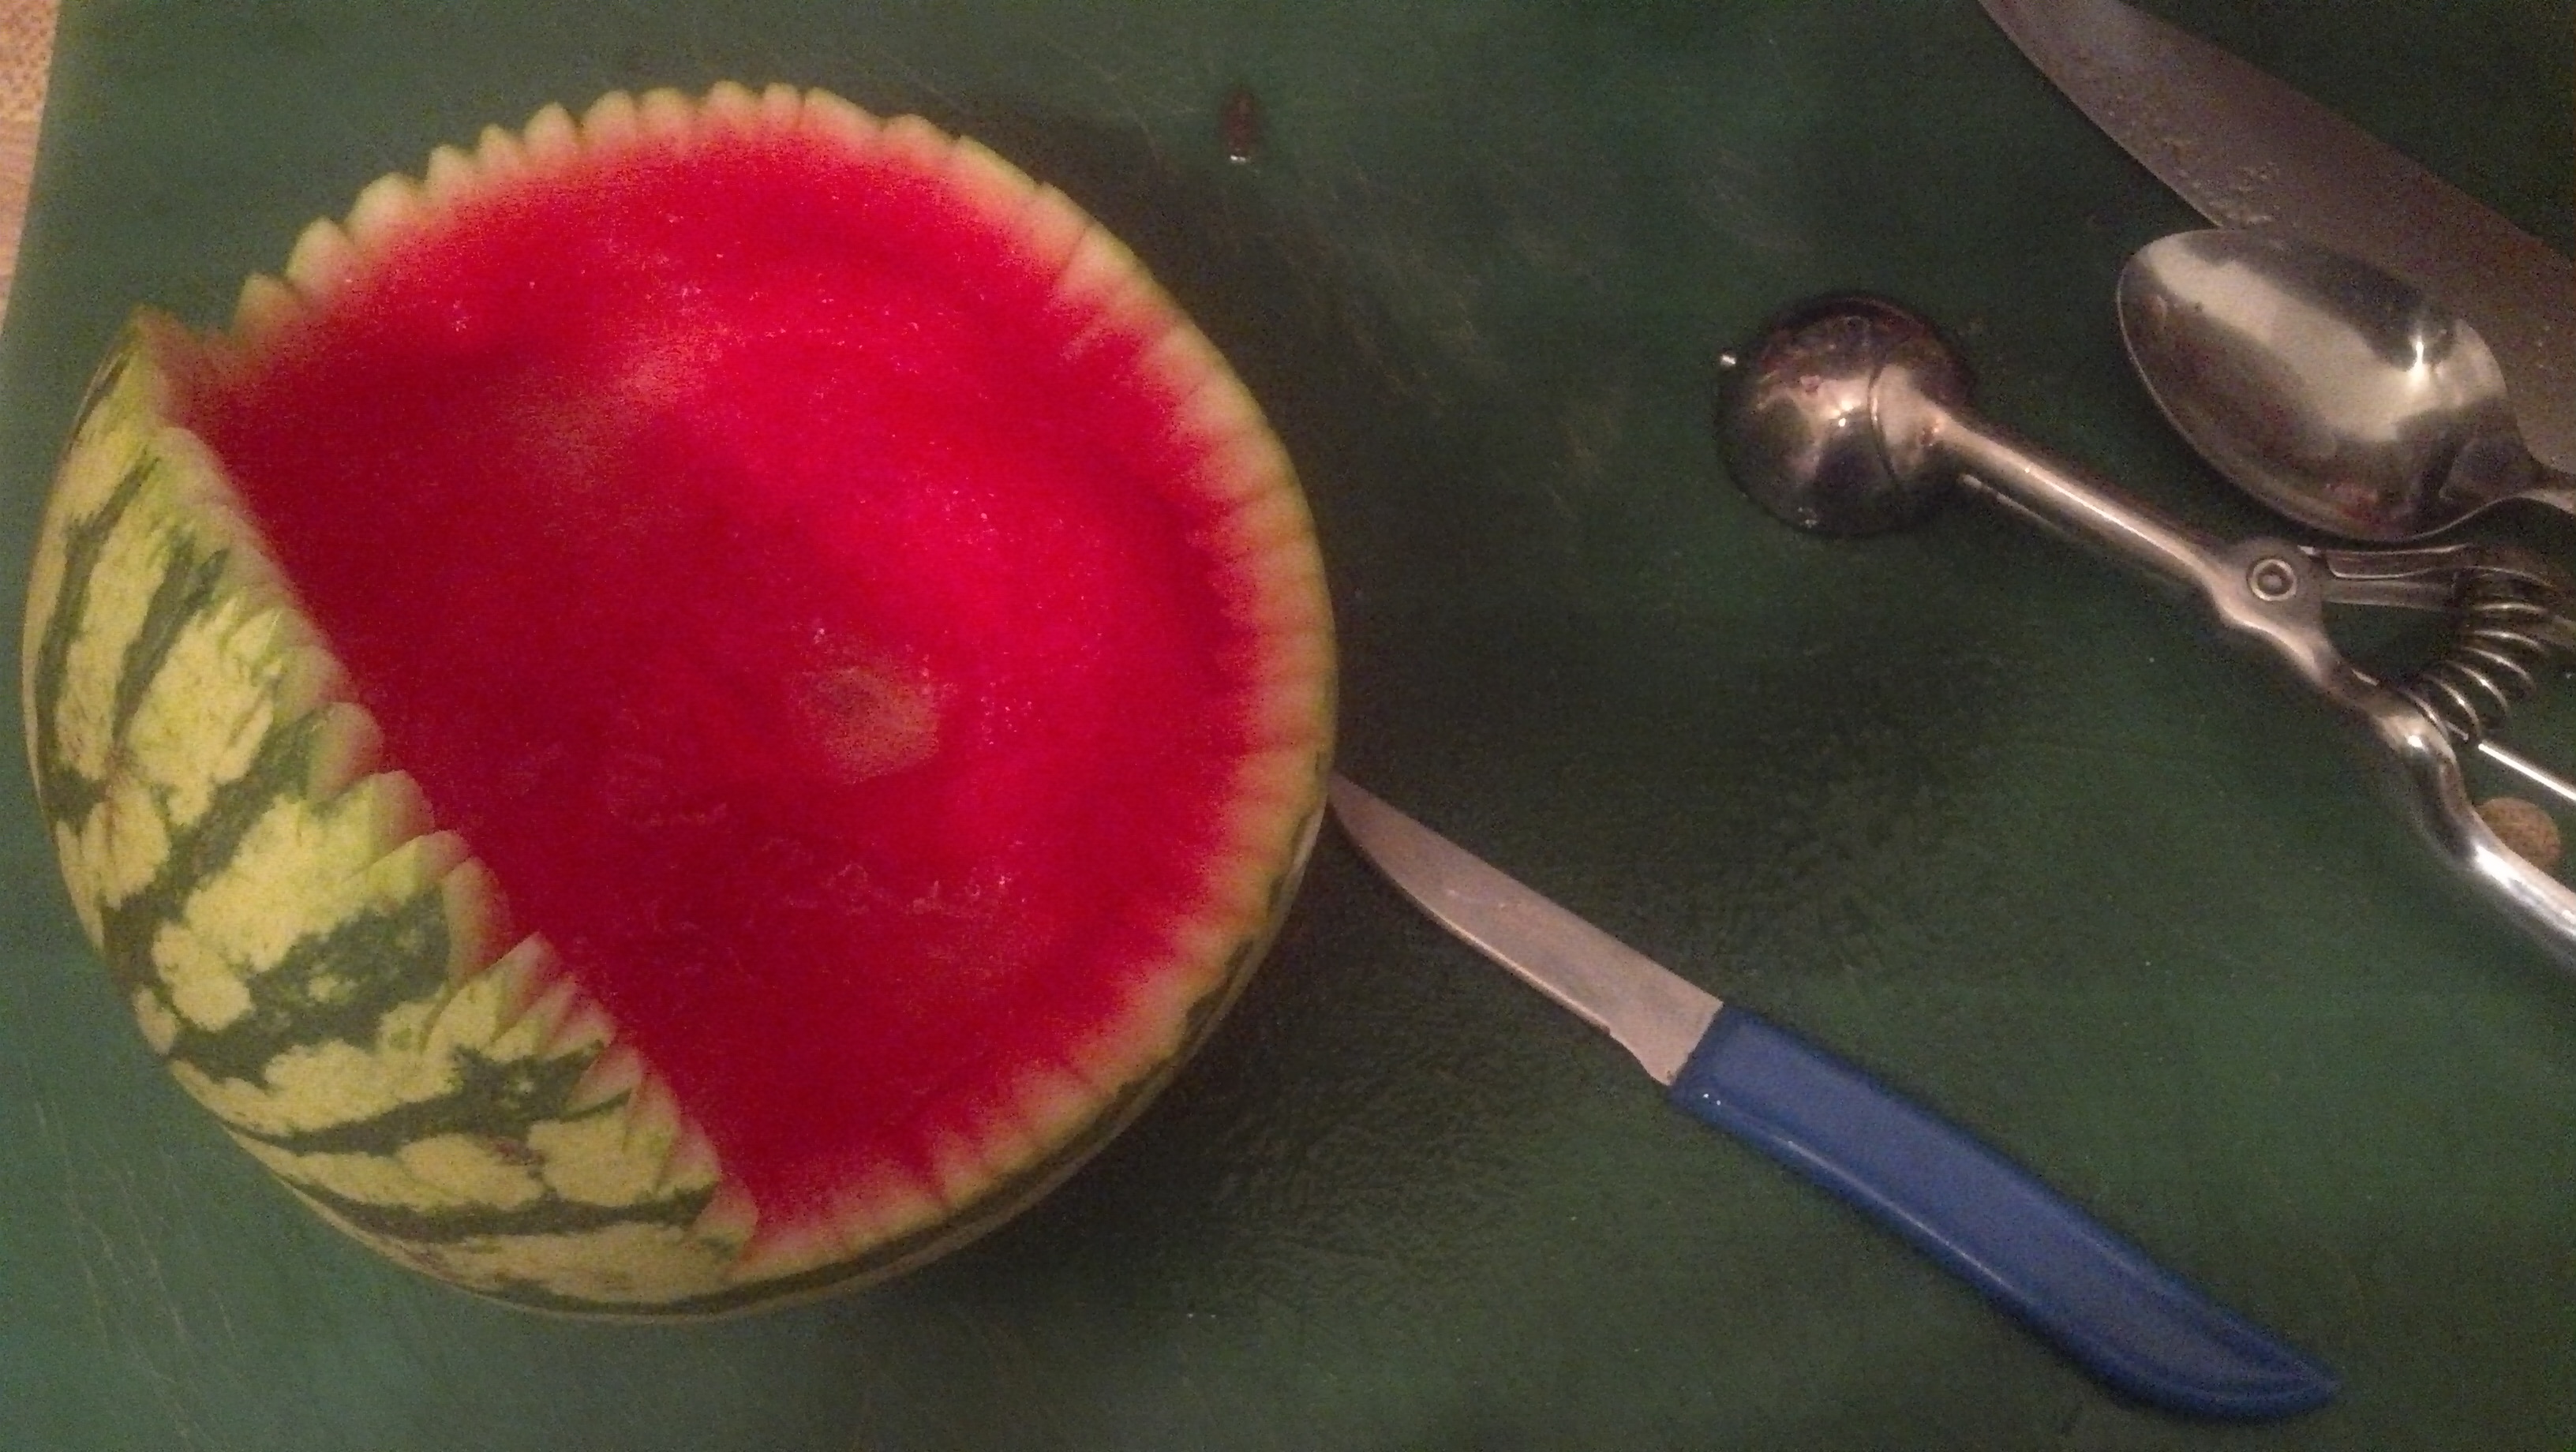
Identify the front of your hedgehog. For me, I used the stem as the placement for the nose. You may want to choose the other end depending on the shape of your melon. Next, you will want to mark your cut for the body with a green dry erase marker. I started a cut between 1/3 and 1/4 of the way back from the front of the melon. Mark from the top straight down the sides to just above half way. Then, when you are happy with your lines, cut the back off of your melon.
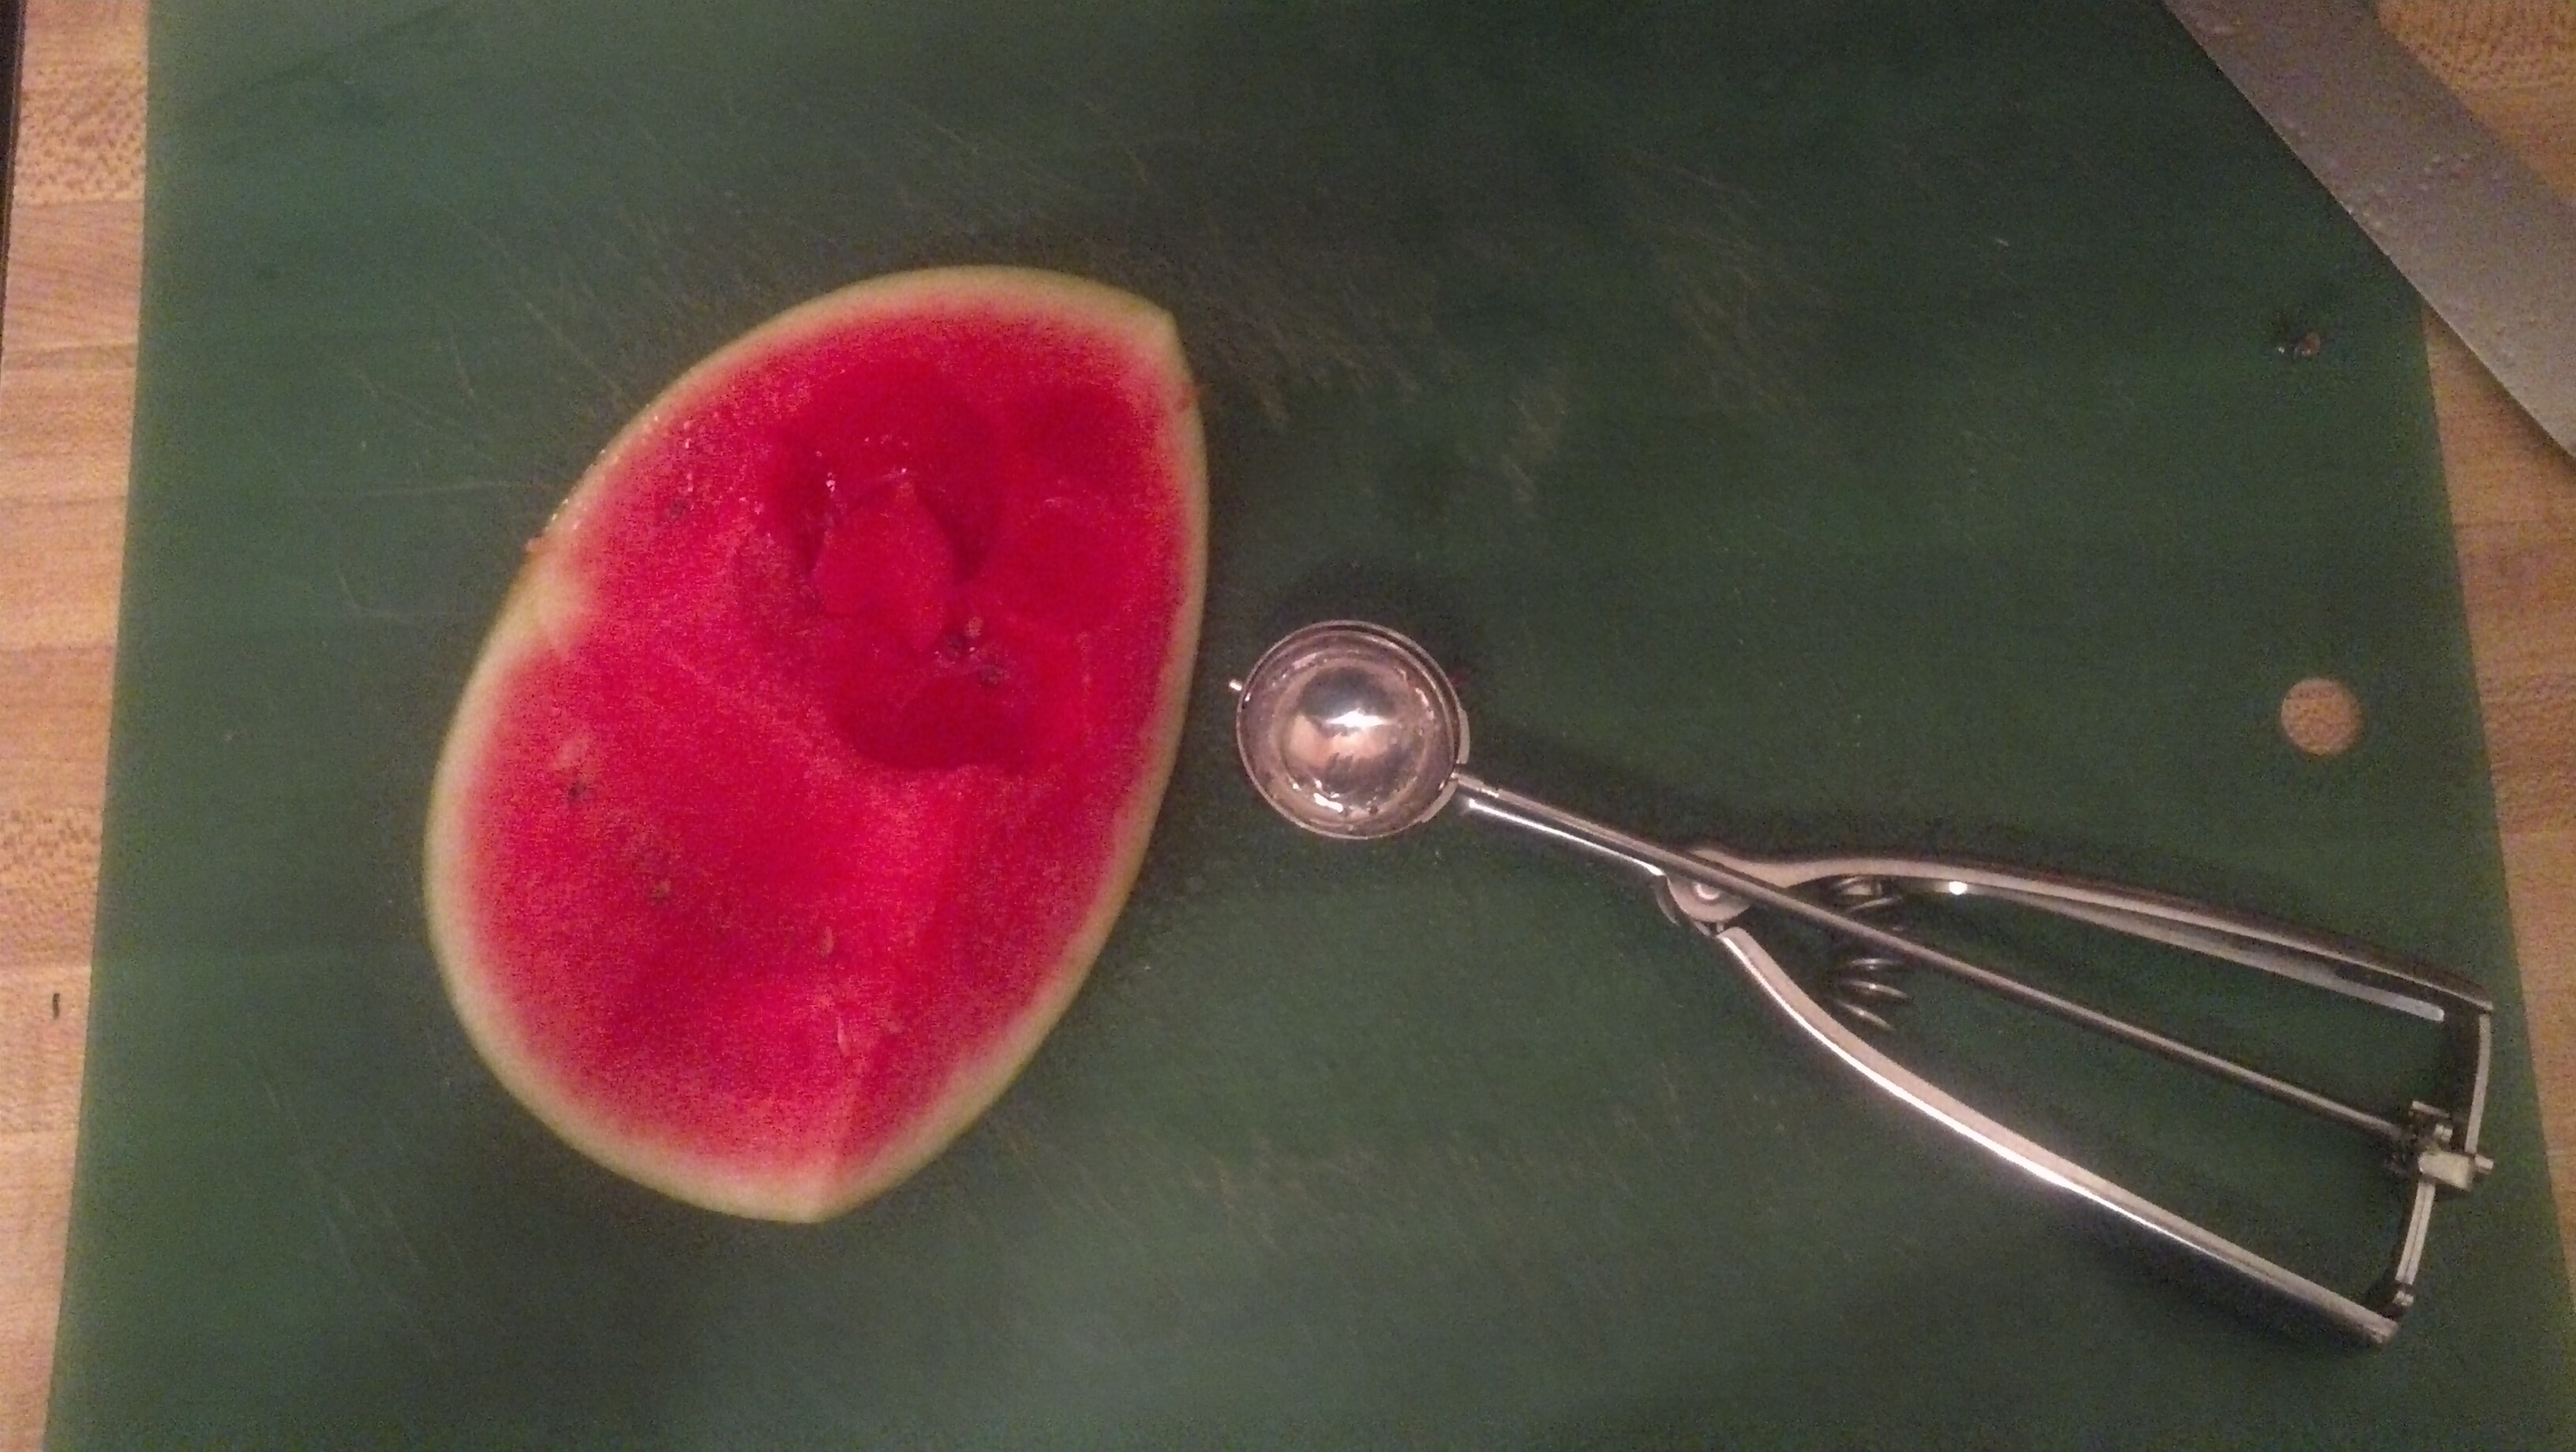 Now, go after your melon with the baller. I used a bowl to hold the melon as I cut it. The bowl also collected the juice from the cut melon and kept my counter relatively clean. Obviously not all the balls will be perfectly shaped, but that’ll be just fine. *One thing to note here, is that since I was using a small melon, the rind was quite thin. You have to be careful not to cut too deep into the rind, especially where you made your cut in the bottom or, you’ll end up with hedgehog juice all over, and nobody wants that.
 It’s time to start adding the details. Using your paring knife, make small cuts around the edges. Vary the size angles and shapes. This will help add to the look and effect. You can’t really go wrong here, as long as you don’t make your cuts too big. Have fun and add some variety. Sharp points mixed with curves and the like will do a good job resembling the fur on the hedgehog.
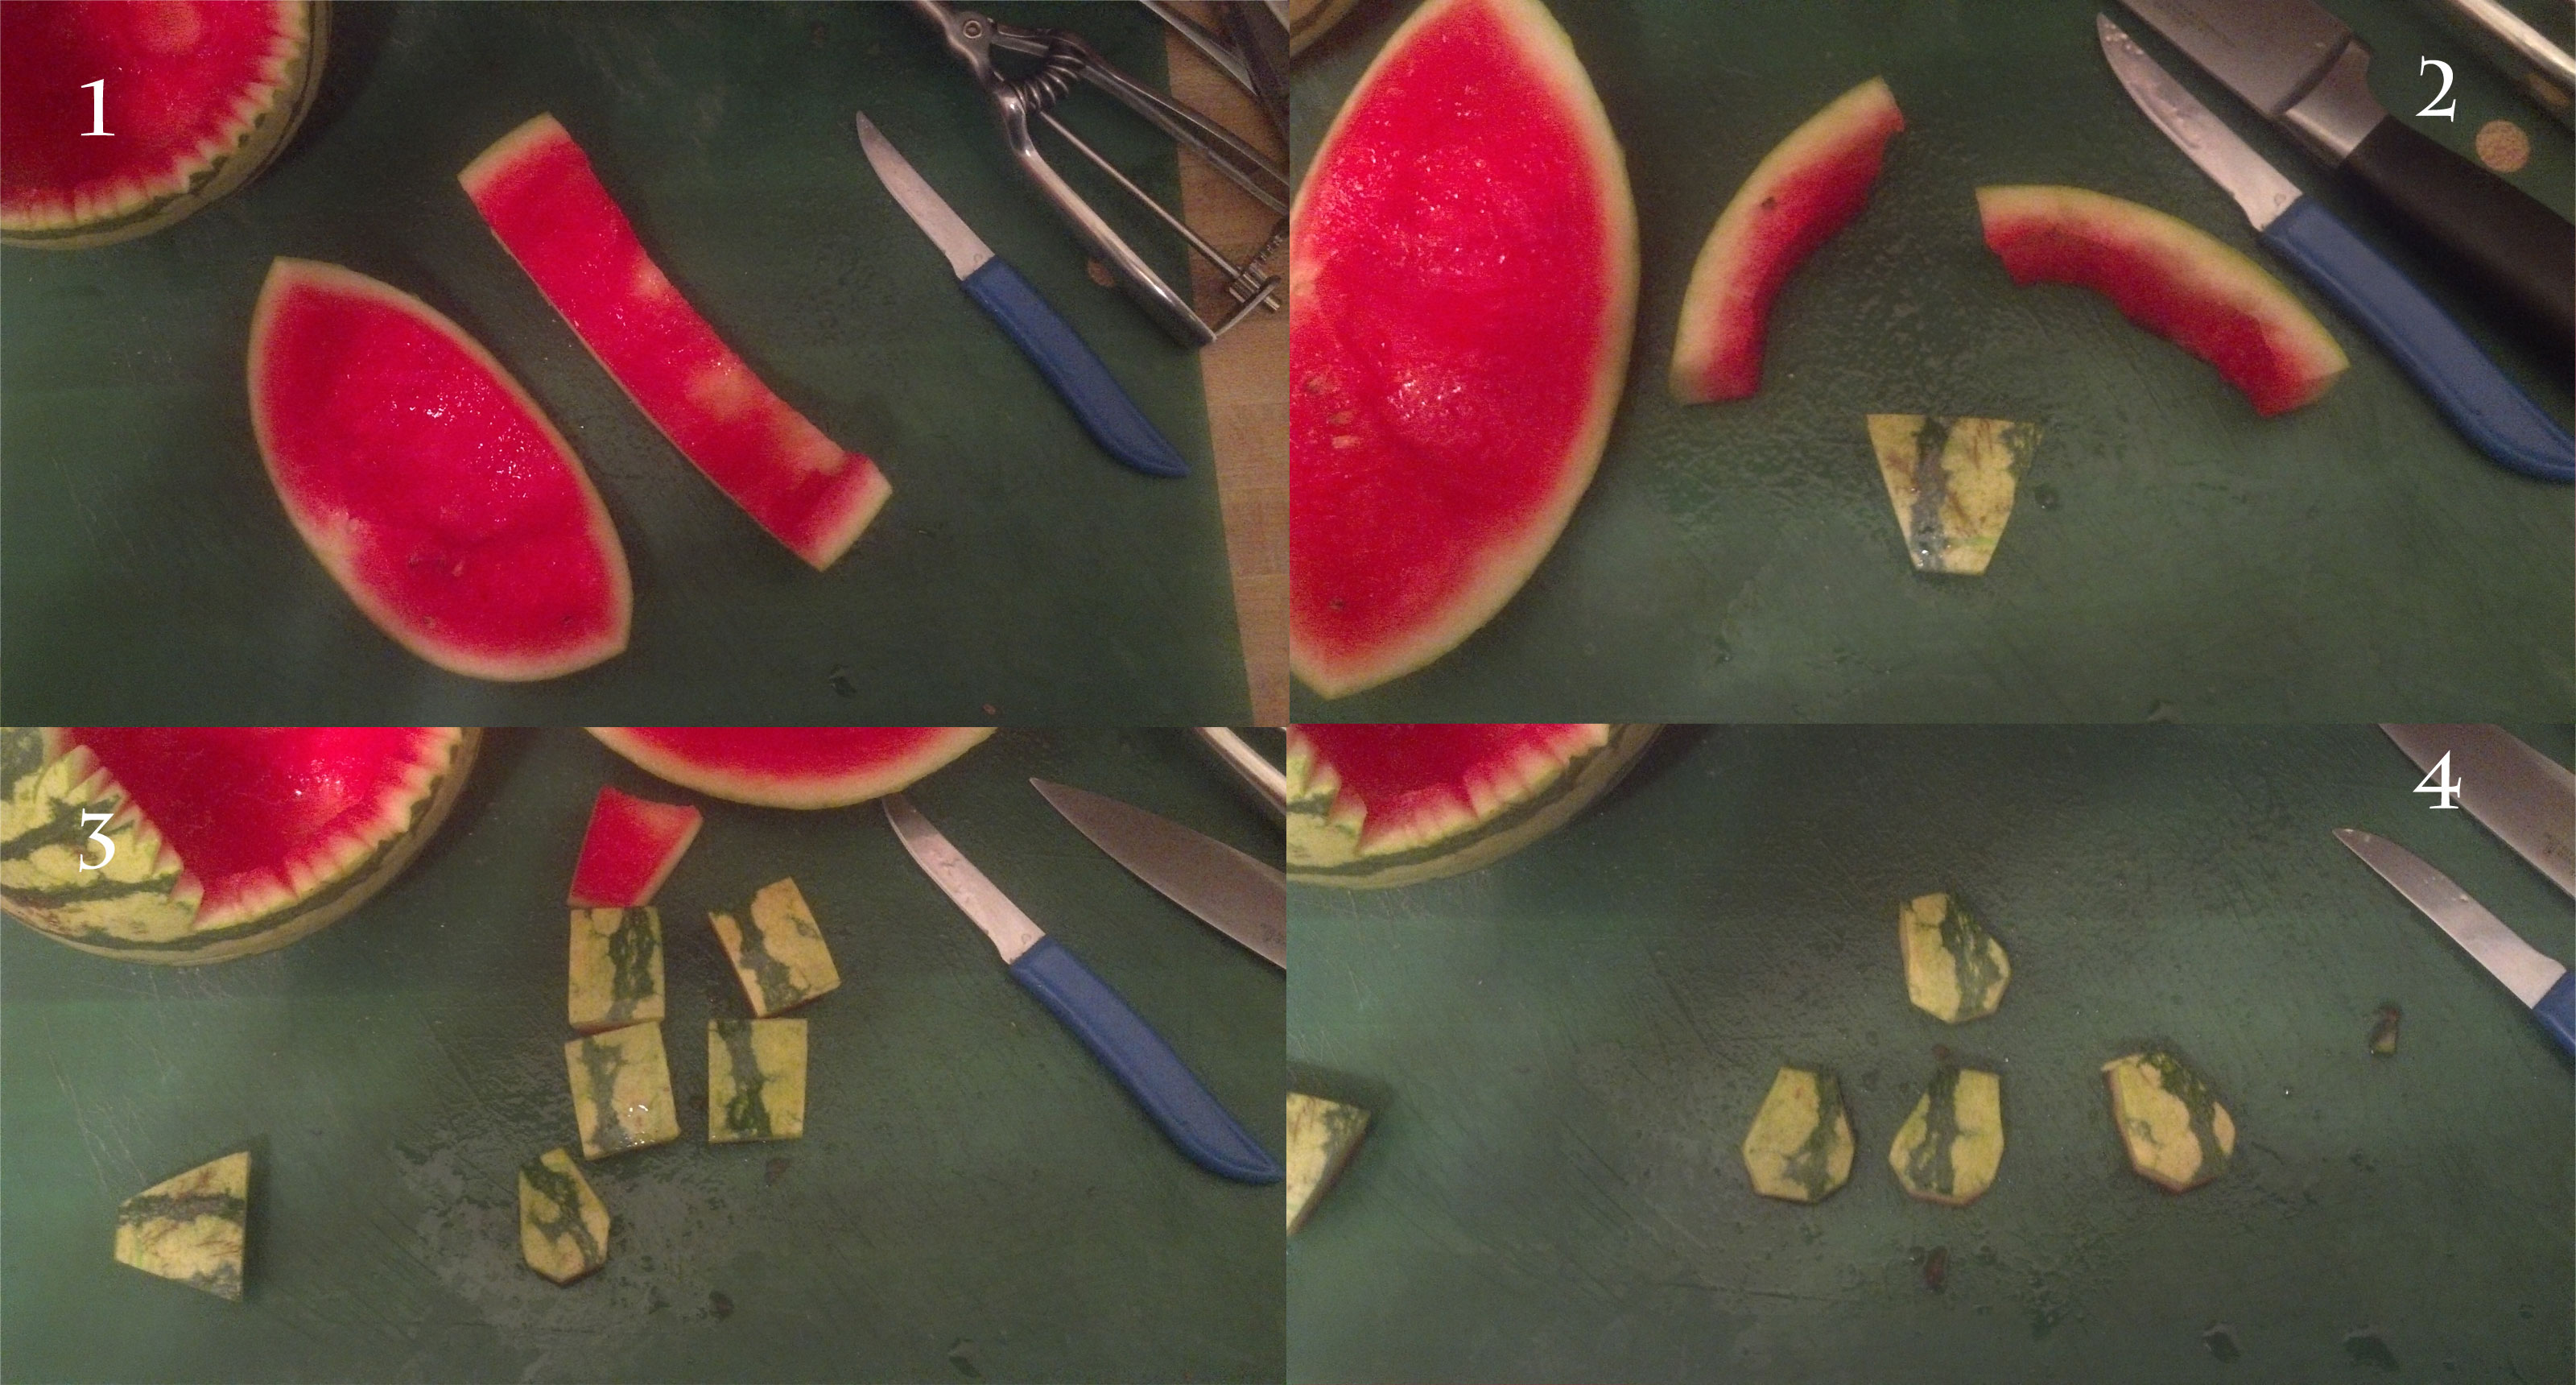 The moment you’ve been waiting for, or dreading is here. It’s time to start cutting the body parts. Don’t worry, this is easier than it looks. Start by cutting a strip off the piece you cut from the back. You will want to cut this as wide as the nose will be long. You can see how I cut mine in the corner labeled #1. Then, from the middle of this piece, cut the diagonals of the nose so one side is about 1/2 inch wide and the other side is an inch or more. By cutting the nose in this manner, the stripes from your melon should run the length of the nose. (see #2) This will look more realistic. Now, time for the feet. Cut the remaining piece of the strip into four equally sized pieces for the feet. You will want to now ‘cut the corners off’ of the feet shaping them. You want each foot to be wider in the front than in the back, so cut a long narrow section of each side of the back, then trim short equilateral corners off the front of each foot. You can see how I did this in images #3 and #4.
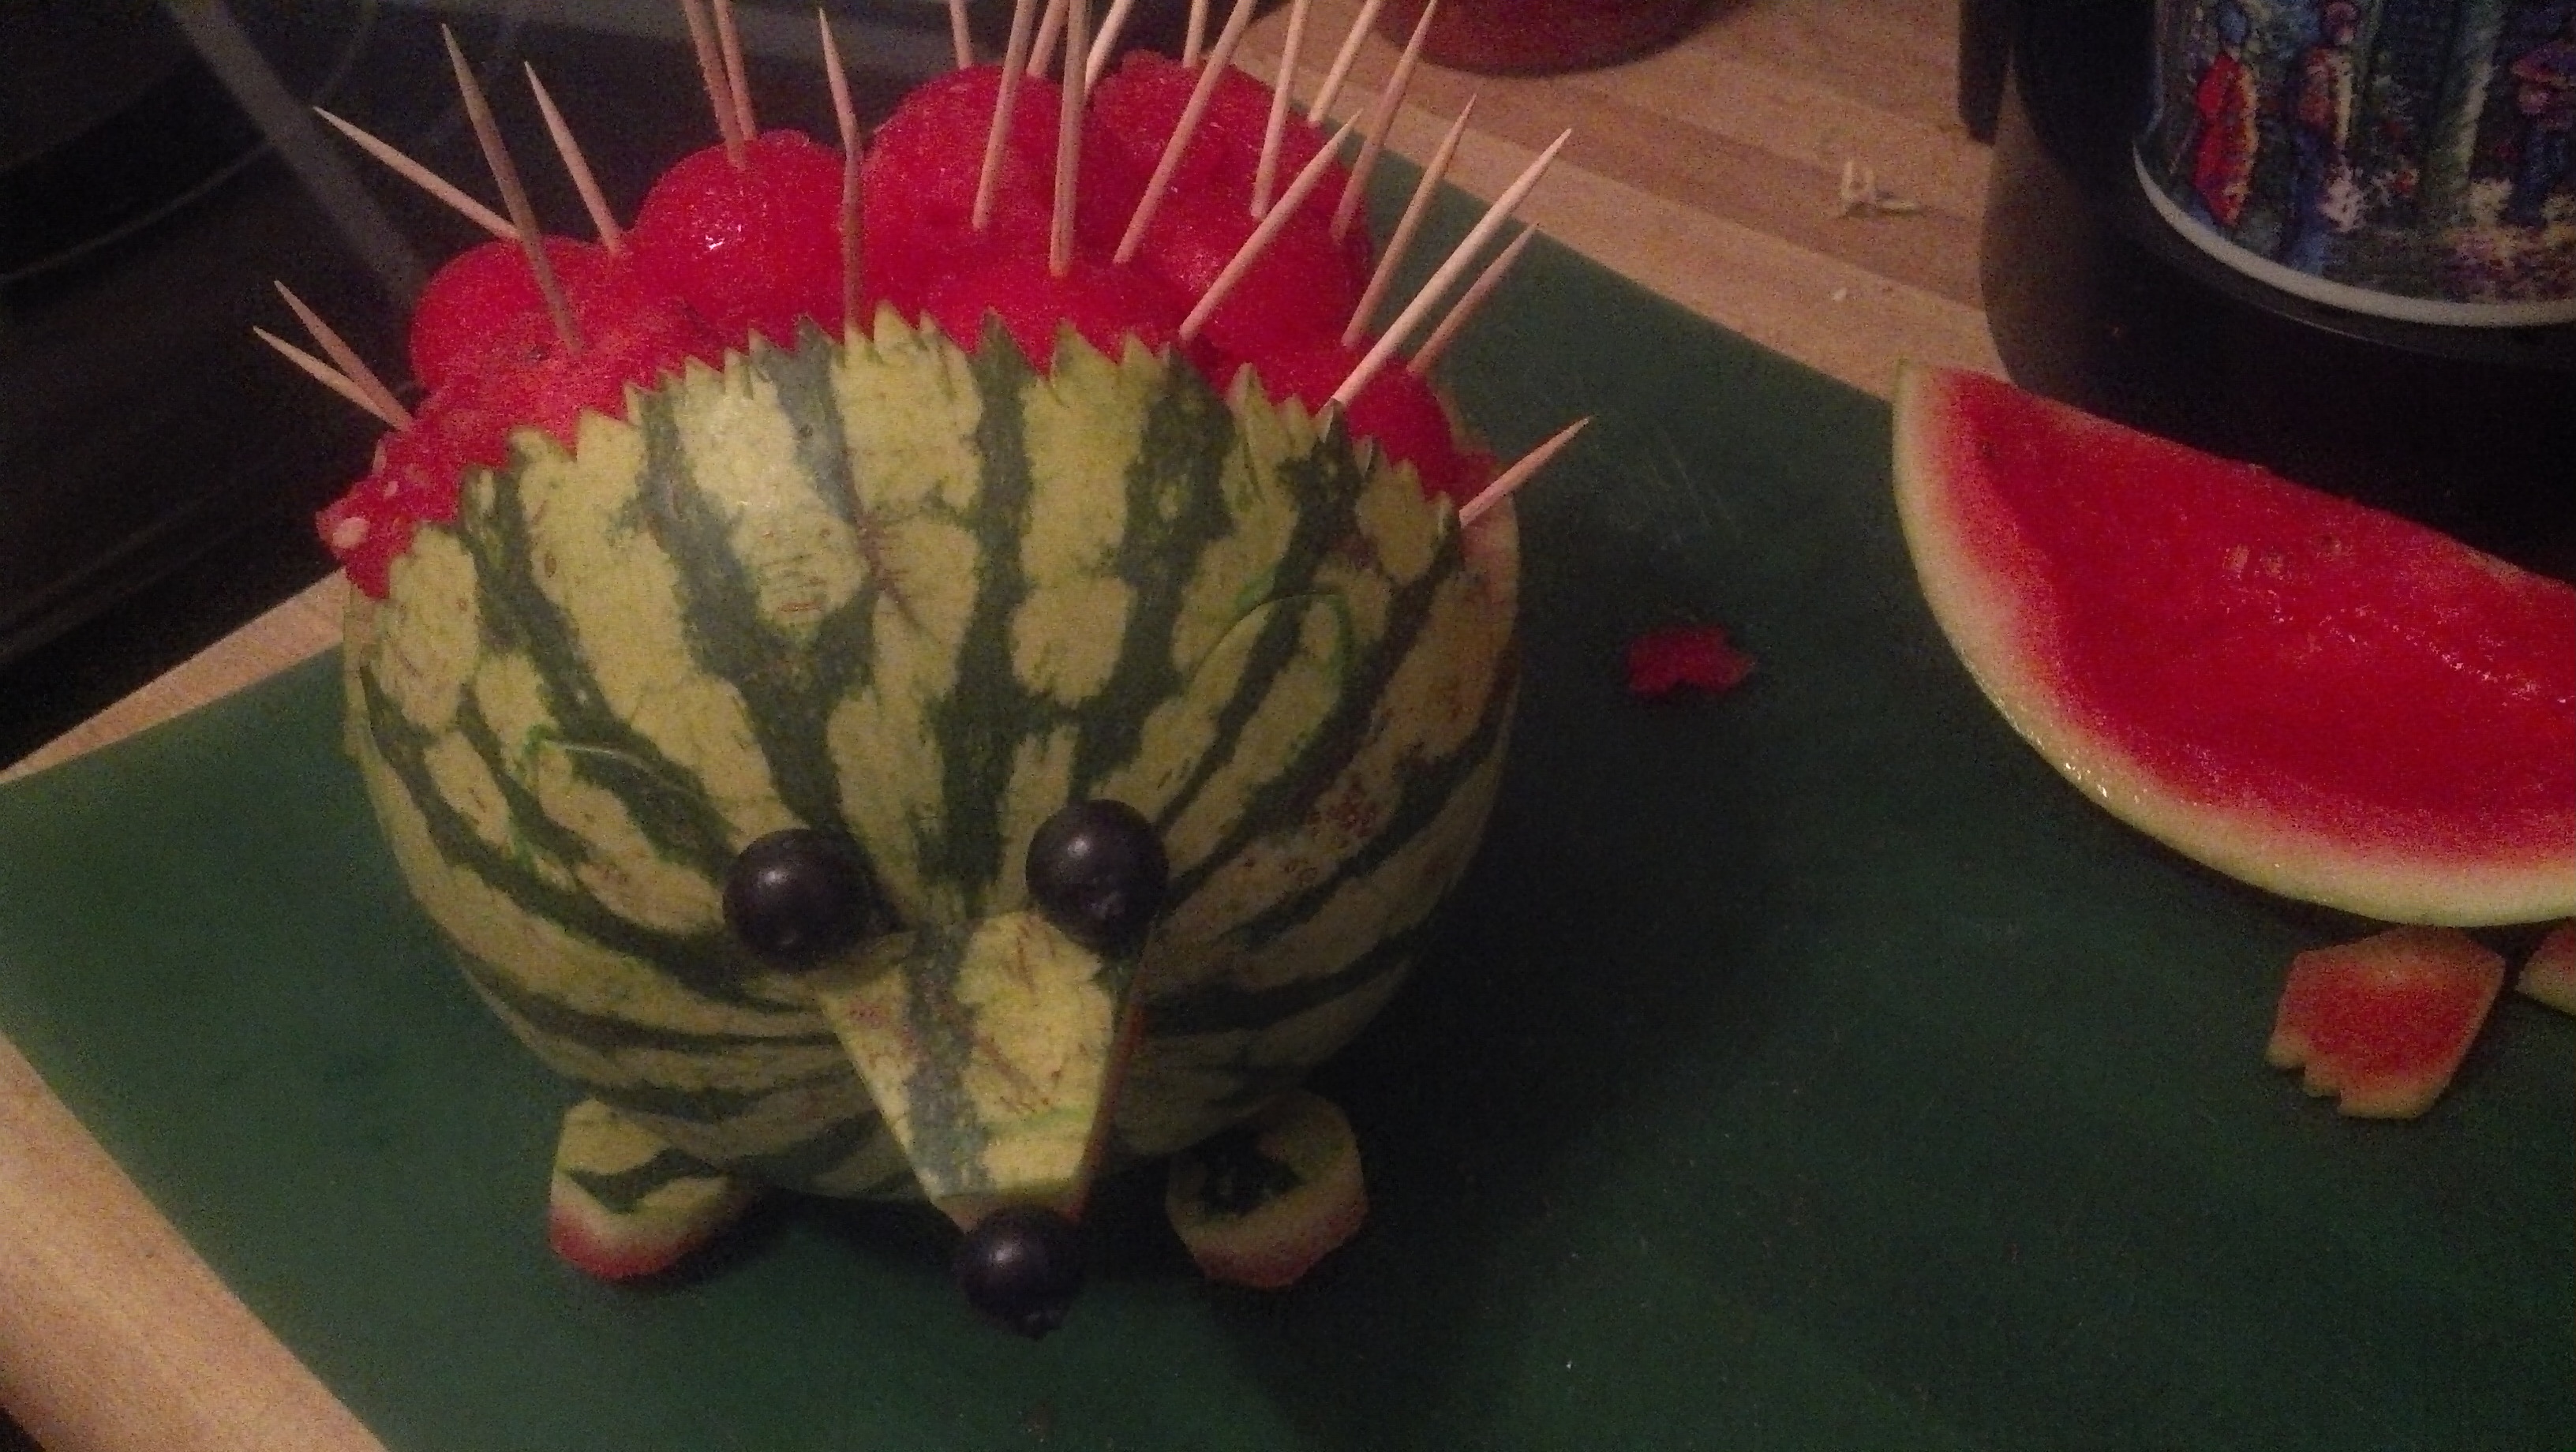
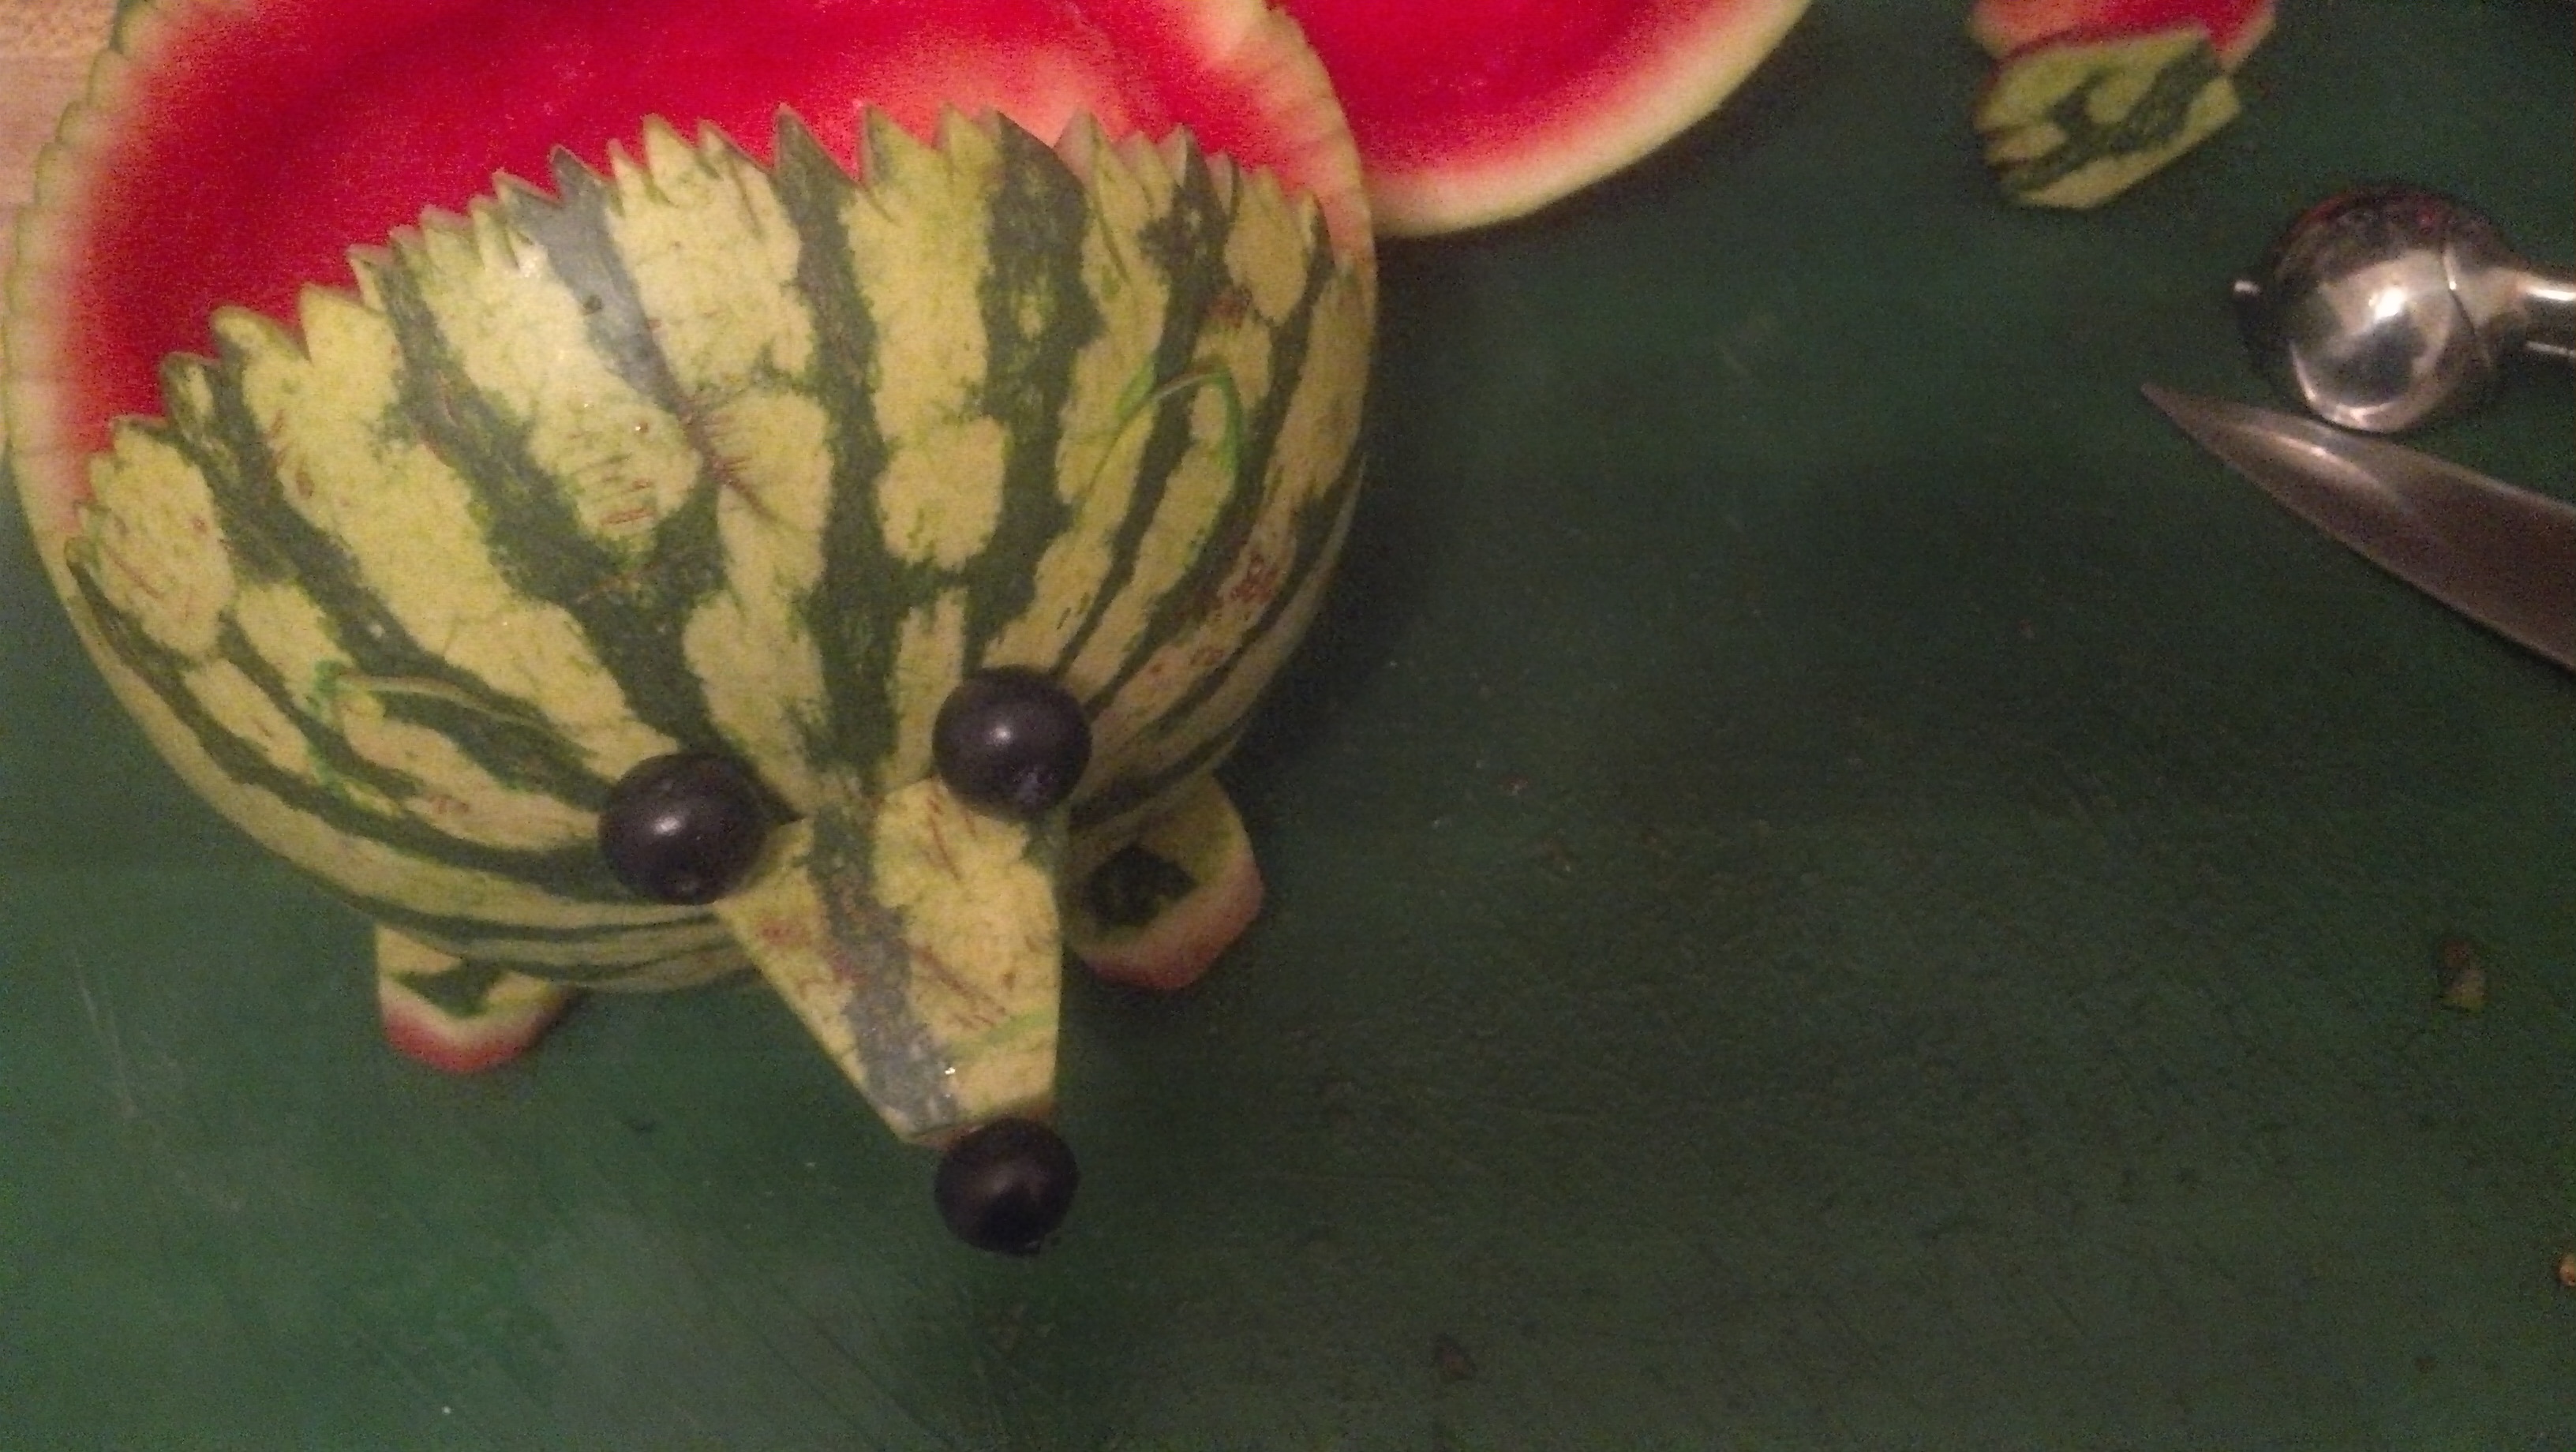
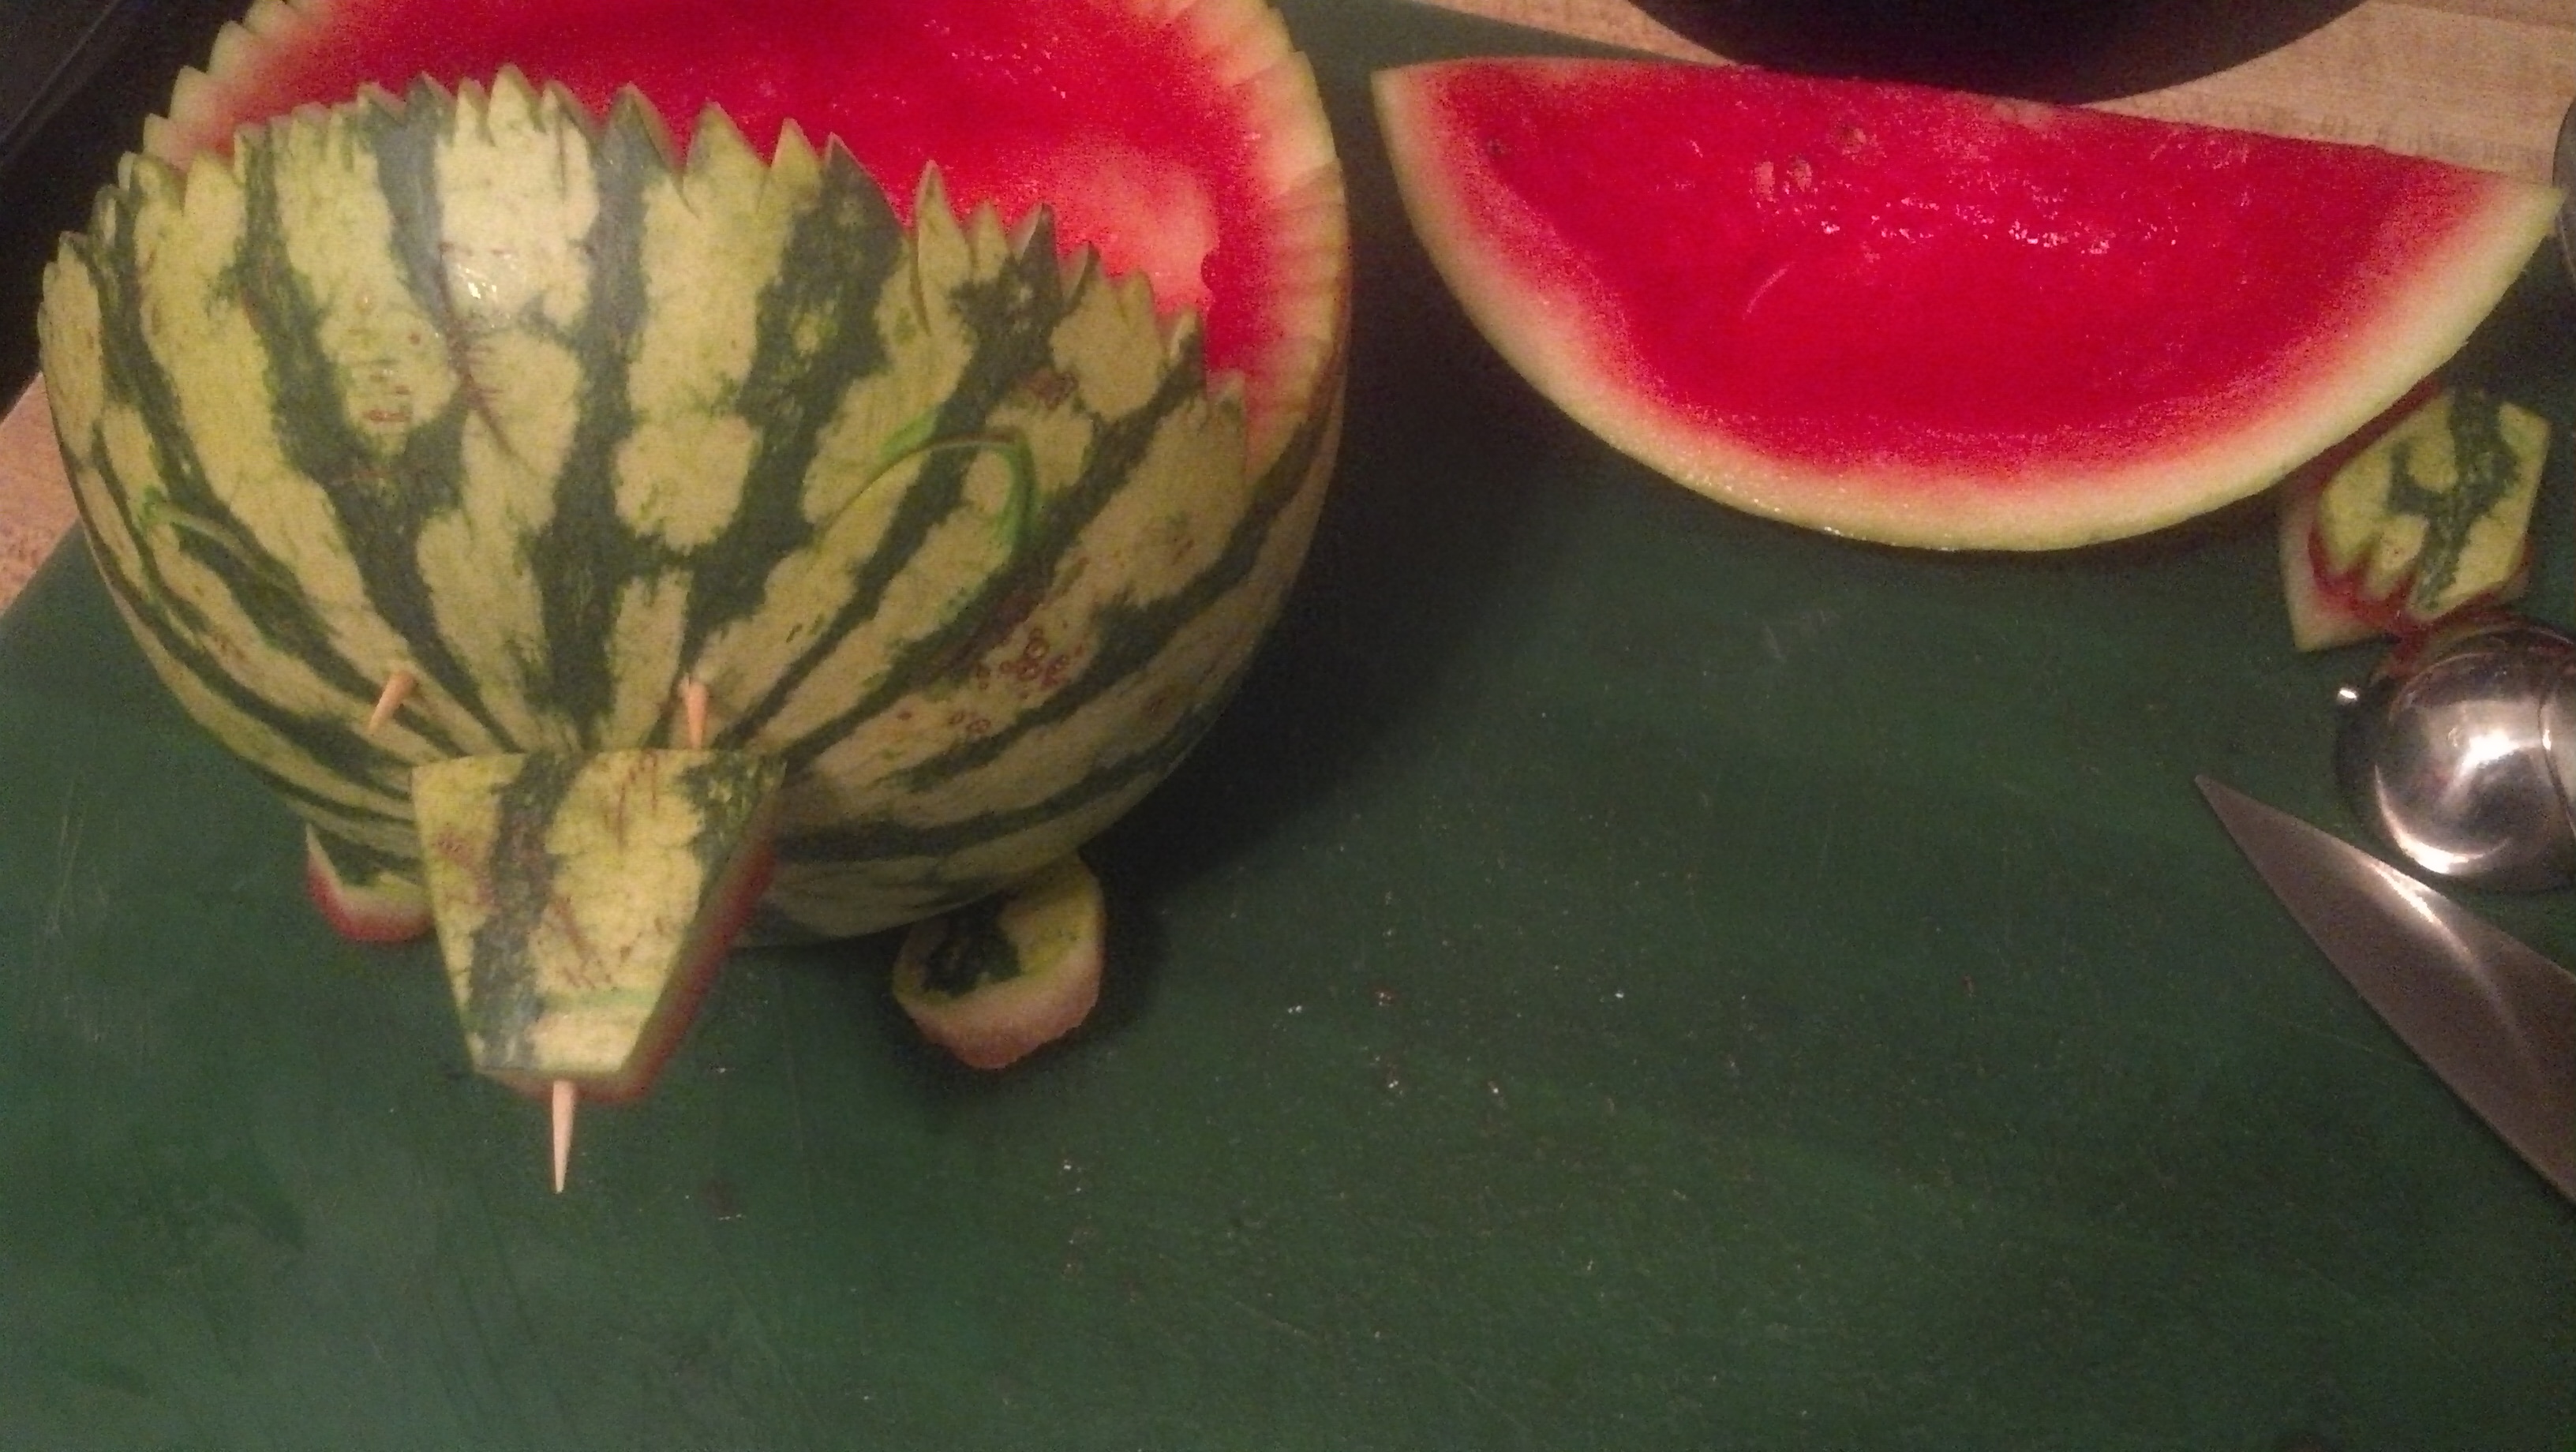 OK, now comes the tricky part, at least the most tricky part for me. Let’s assemble our creation. Start with the feet. I broke tooth picks in half since the rind was so thin. This helped prevent me having toothpicks poking up into the melon bowl. I positioned the feet in what appeared to me to be the best placement both for looks and to help prevent the melon from rolling if bumped. I then pushed one toothpick in both the foot and the base of the melon. This held the feet in place. I used two toothpicks to hold the nose on. Another half-toothpick in the tip of the nose holds a blueberry, and two half-toothpicks inserted from inside the melon hold the eyes.
 Time to finish it up. Fill the melon bowl with the melon balls you cut earlier. Then poke a toothpick into each piece that you can see. This adds to the final look of the hedgehog and makes it almost inedible. I said almost. But please try not to eat too much. I mean really. You’ve gone to all this trouble, don’t you want someone else to see it and appreciate your amazing talent before you devour this poor helpless animal. Fine, go ahead and dig in. But at least take a picture and send it to me first. That way, I can share some of your creations with the world.
I hope you enjoyed my instructions and are encouraged to make your own watermelon carving. It might be a good idea to make one at home, for let’s call it practice, then take your next, better, hedgehog to the party. You’ll be able to stand back and soak in the sun and adoration of everyone there, especially since you’ve already eaten your share of watermelon.