I’ve been teaching stomp rockets for several years now and have finally found a place to show assembly instructions for the launcher. One of the things I love about stomp rockets is that basically anyone can make them and launch them. With that in mind, I have chosen to use a launcher that is as easy to assemble and “repair” as the rockets are to make. I have done this project with children as young as 5. The hardest part of making and launching rockets is using scissors and tape to make the rockets. You can read more about making rockets as well as plans in other posts. Today I am just focusing on making the launcher. I do not permanently attach (glue) the laucher for two reasons. First is that I want it to be easy to assemble and use for all ages. Second is that it is much easier to store or transport if it can be fully disassembled. I like to keep ours in a string-type backpack. This allows it to be easily accessible and hung out of the way when not in use.
Here you see two of my favorite girls using the rocket launcher, the youngest is 5. She did an excellent job of pulling off the bottle connector and reinflating the bottle by blowing into the connector. These two spent quite a while building and launching their rockets. They were having so much fun that several of the adults made rockets of their own.
Let’s get to building the rockets. I took these photos last summer while putting together another launcher for some guests. The PVC parts we purchased at a local Big Box Home Building store. I went in with a $5 and came out with all the parts and enough change to buy a generic 2 liter of pop.
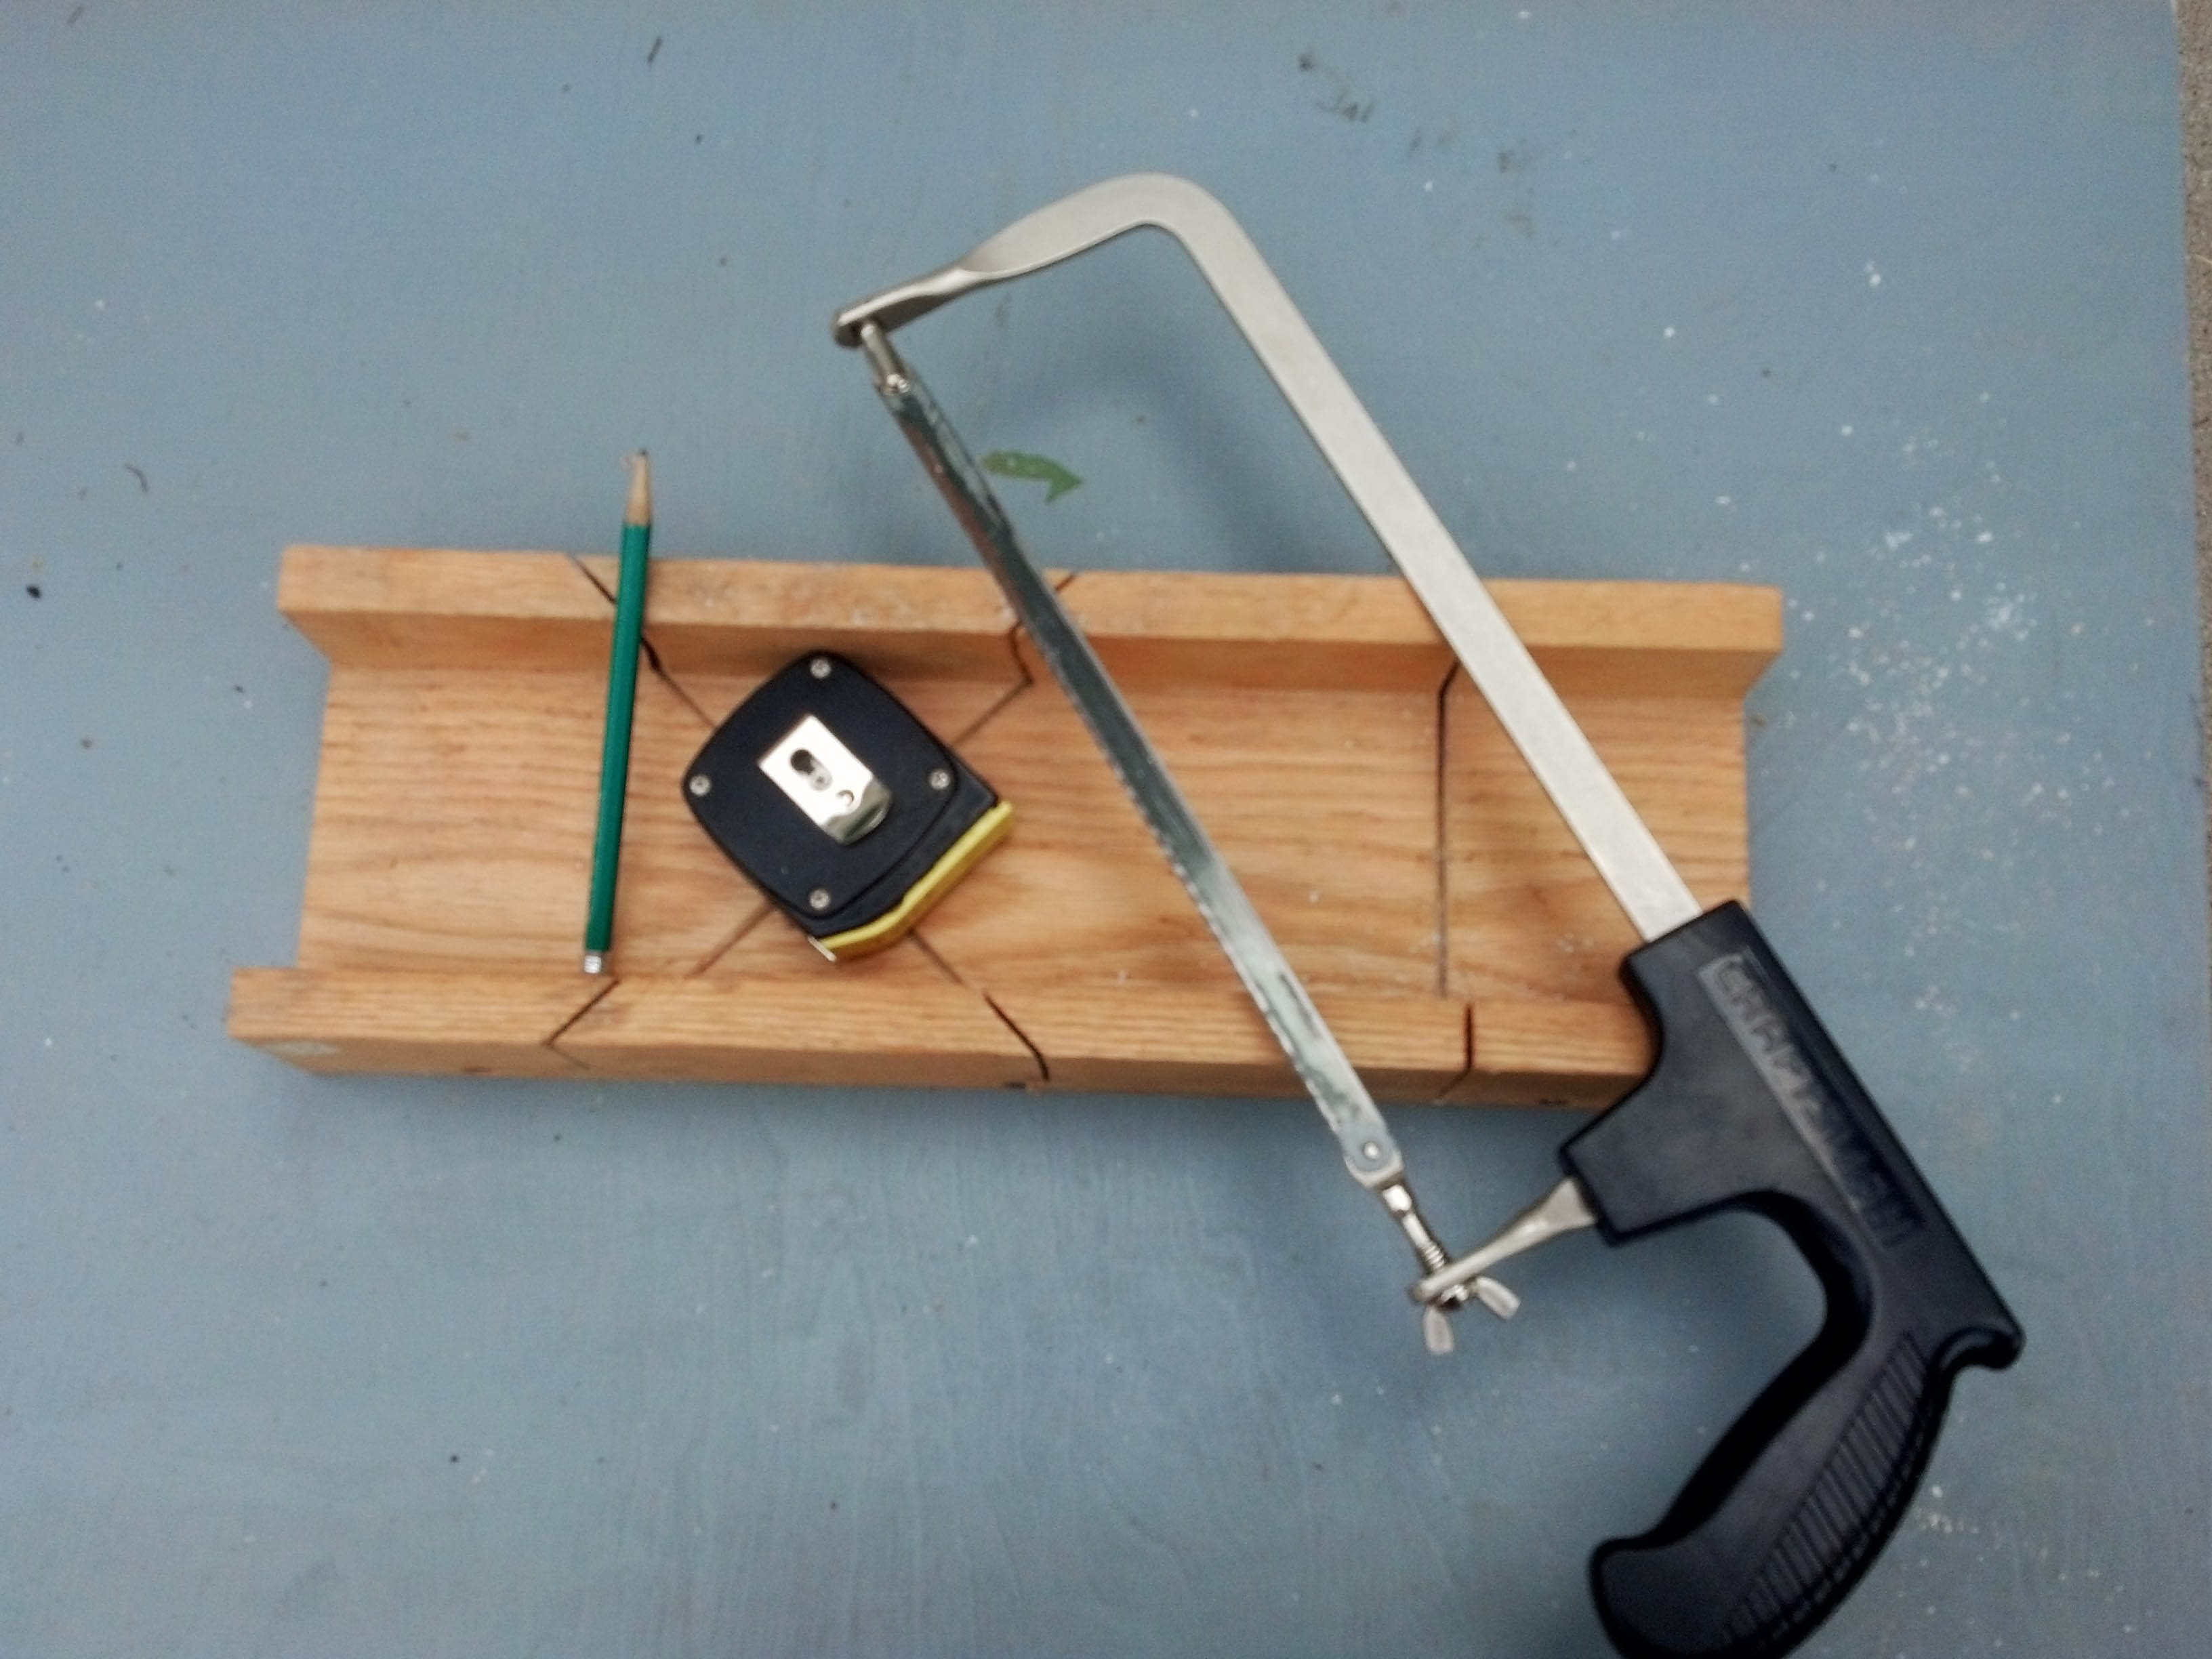
Let’s start with the tools you will need to make your own rocket launcher. These are the tools you will need to cut the PVC pipe. If you do not have these tools, don’t worry, most home building stores have a place for you to cut the pipe before you leave. If you have trouble, just find a staff person at the store to help you cut them. You will not need any glue, sealer or adhesive because you will not need or use it. All of the pieces should just push together.
Tools:
Hack Saw
Tape Measure
Pencil
Miter Box
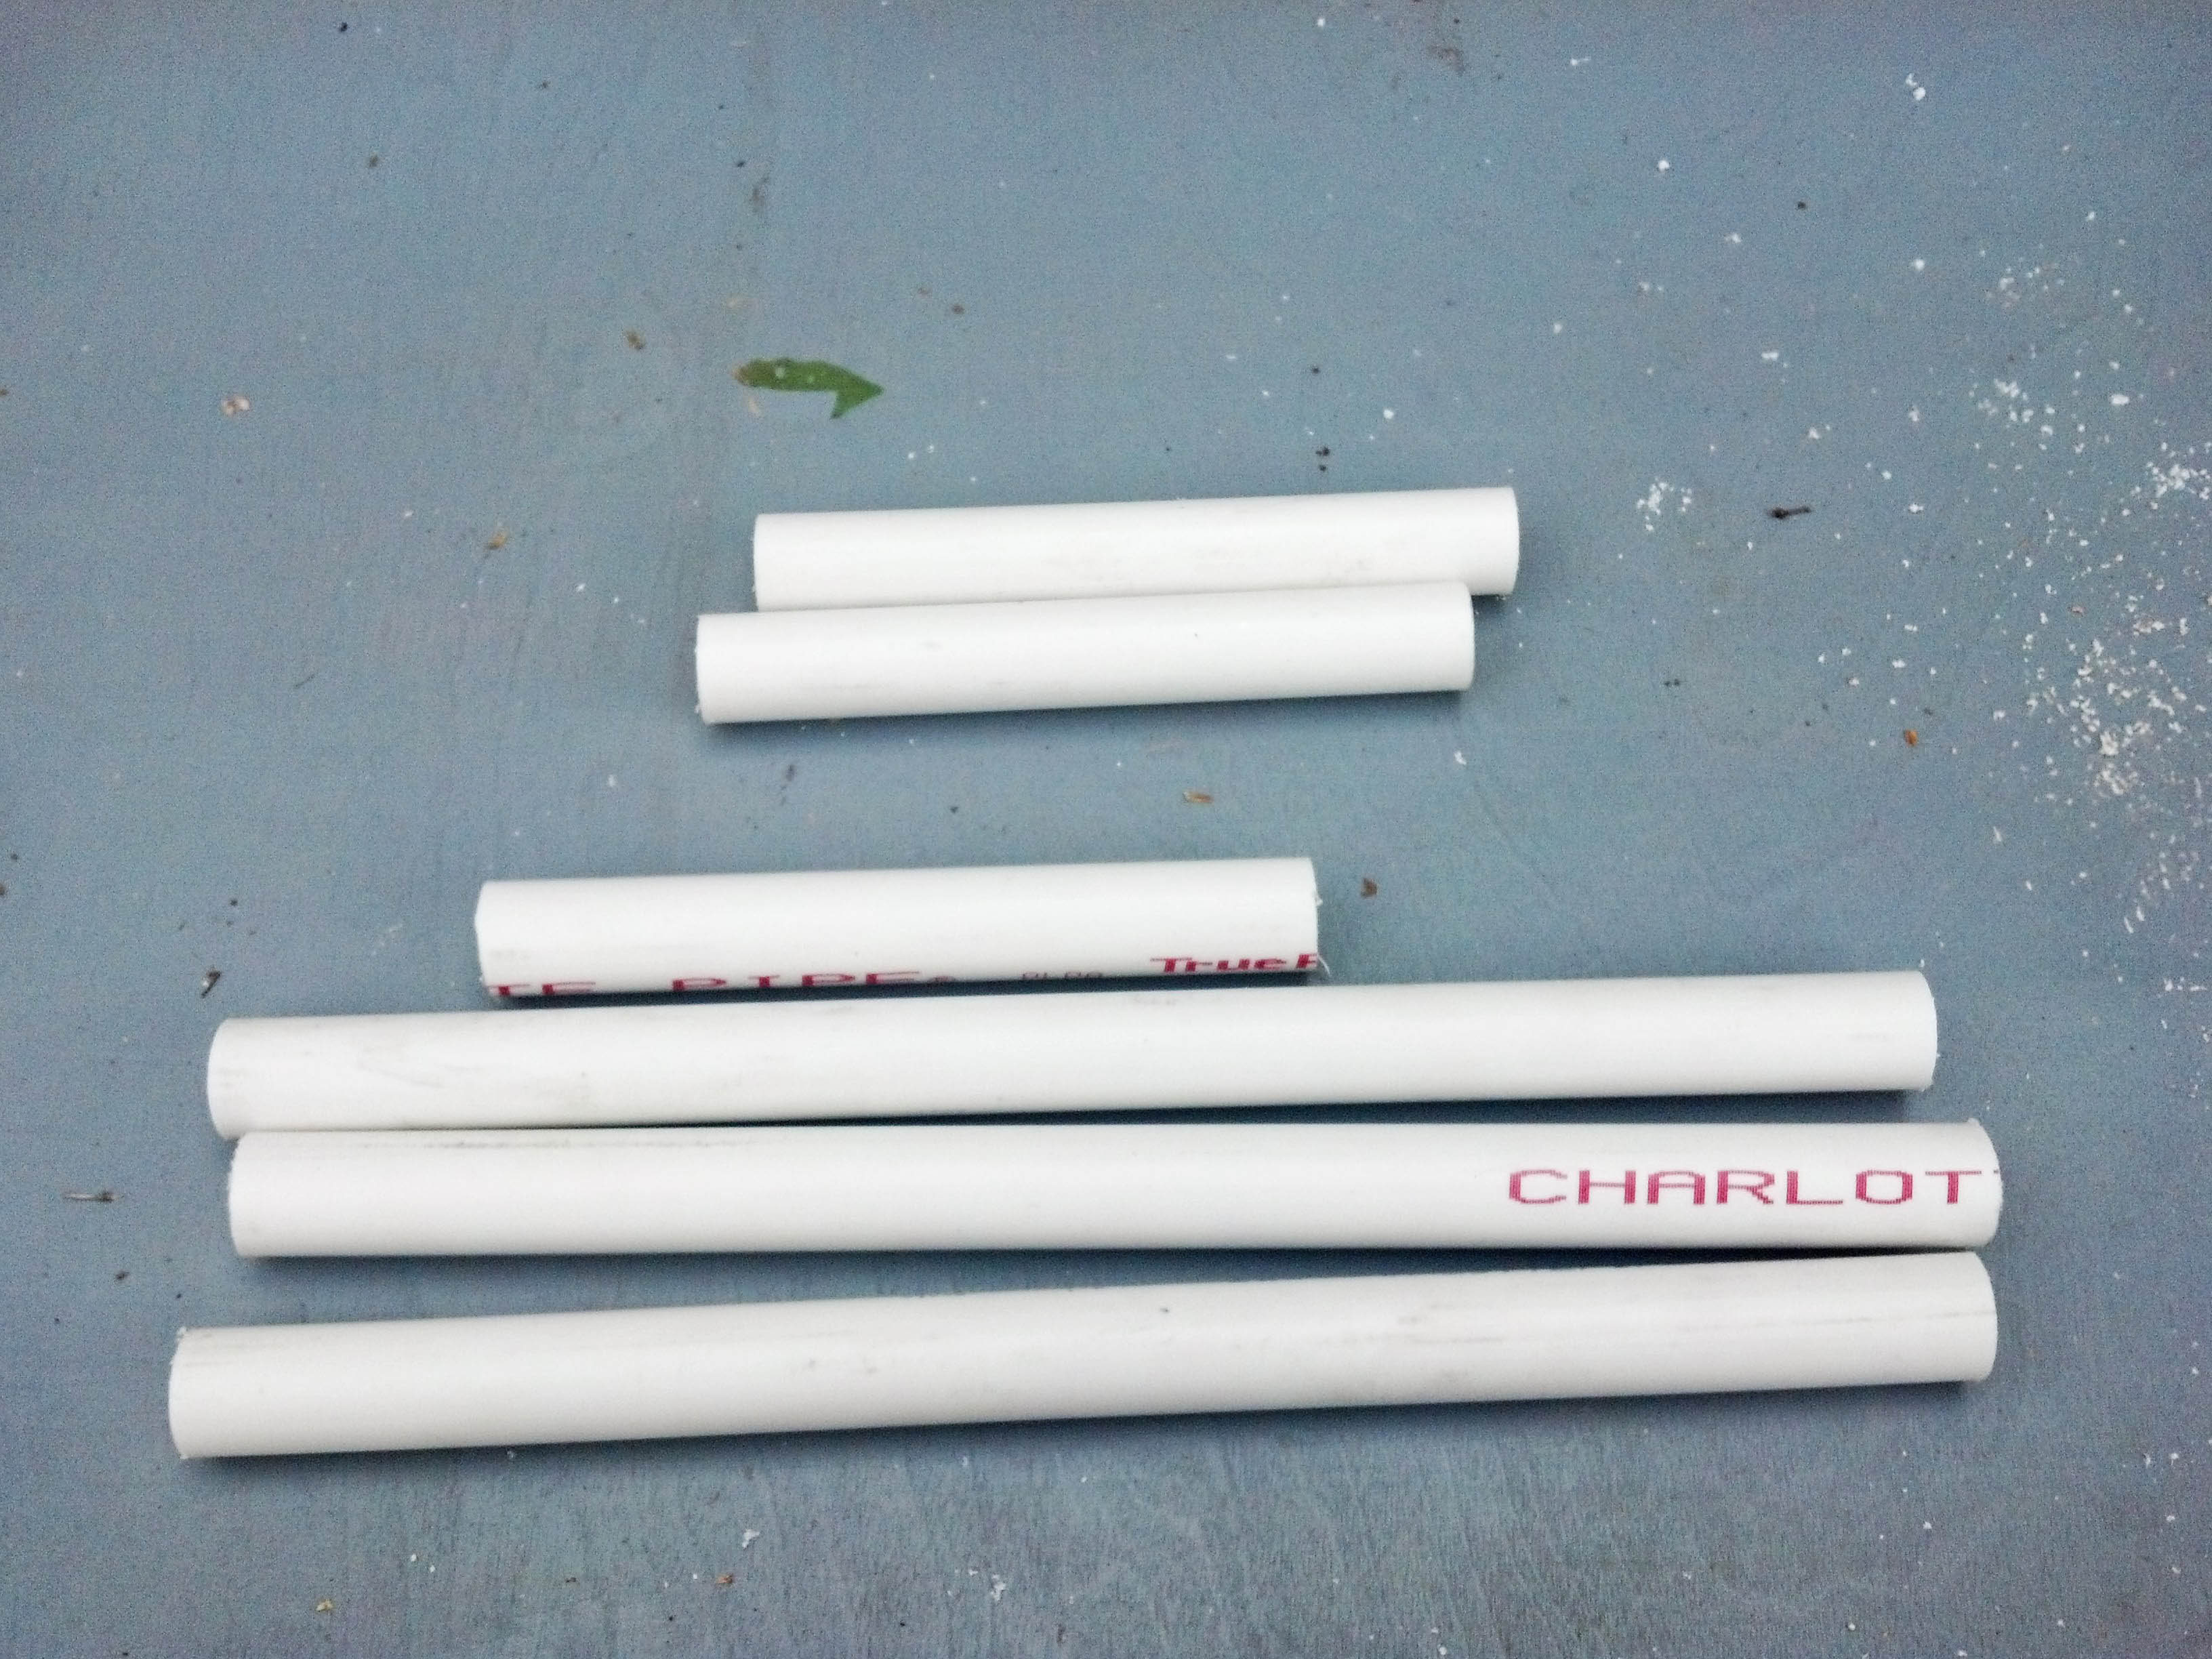
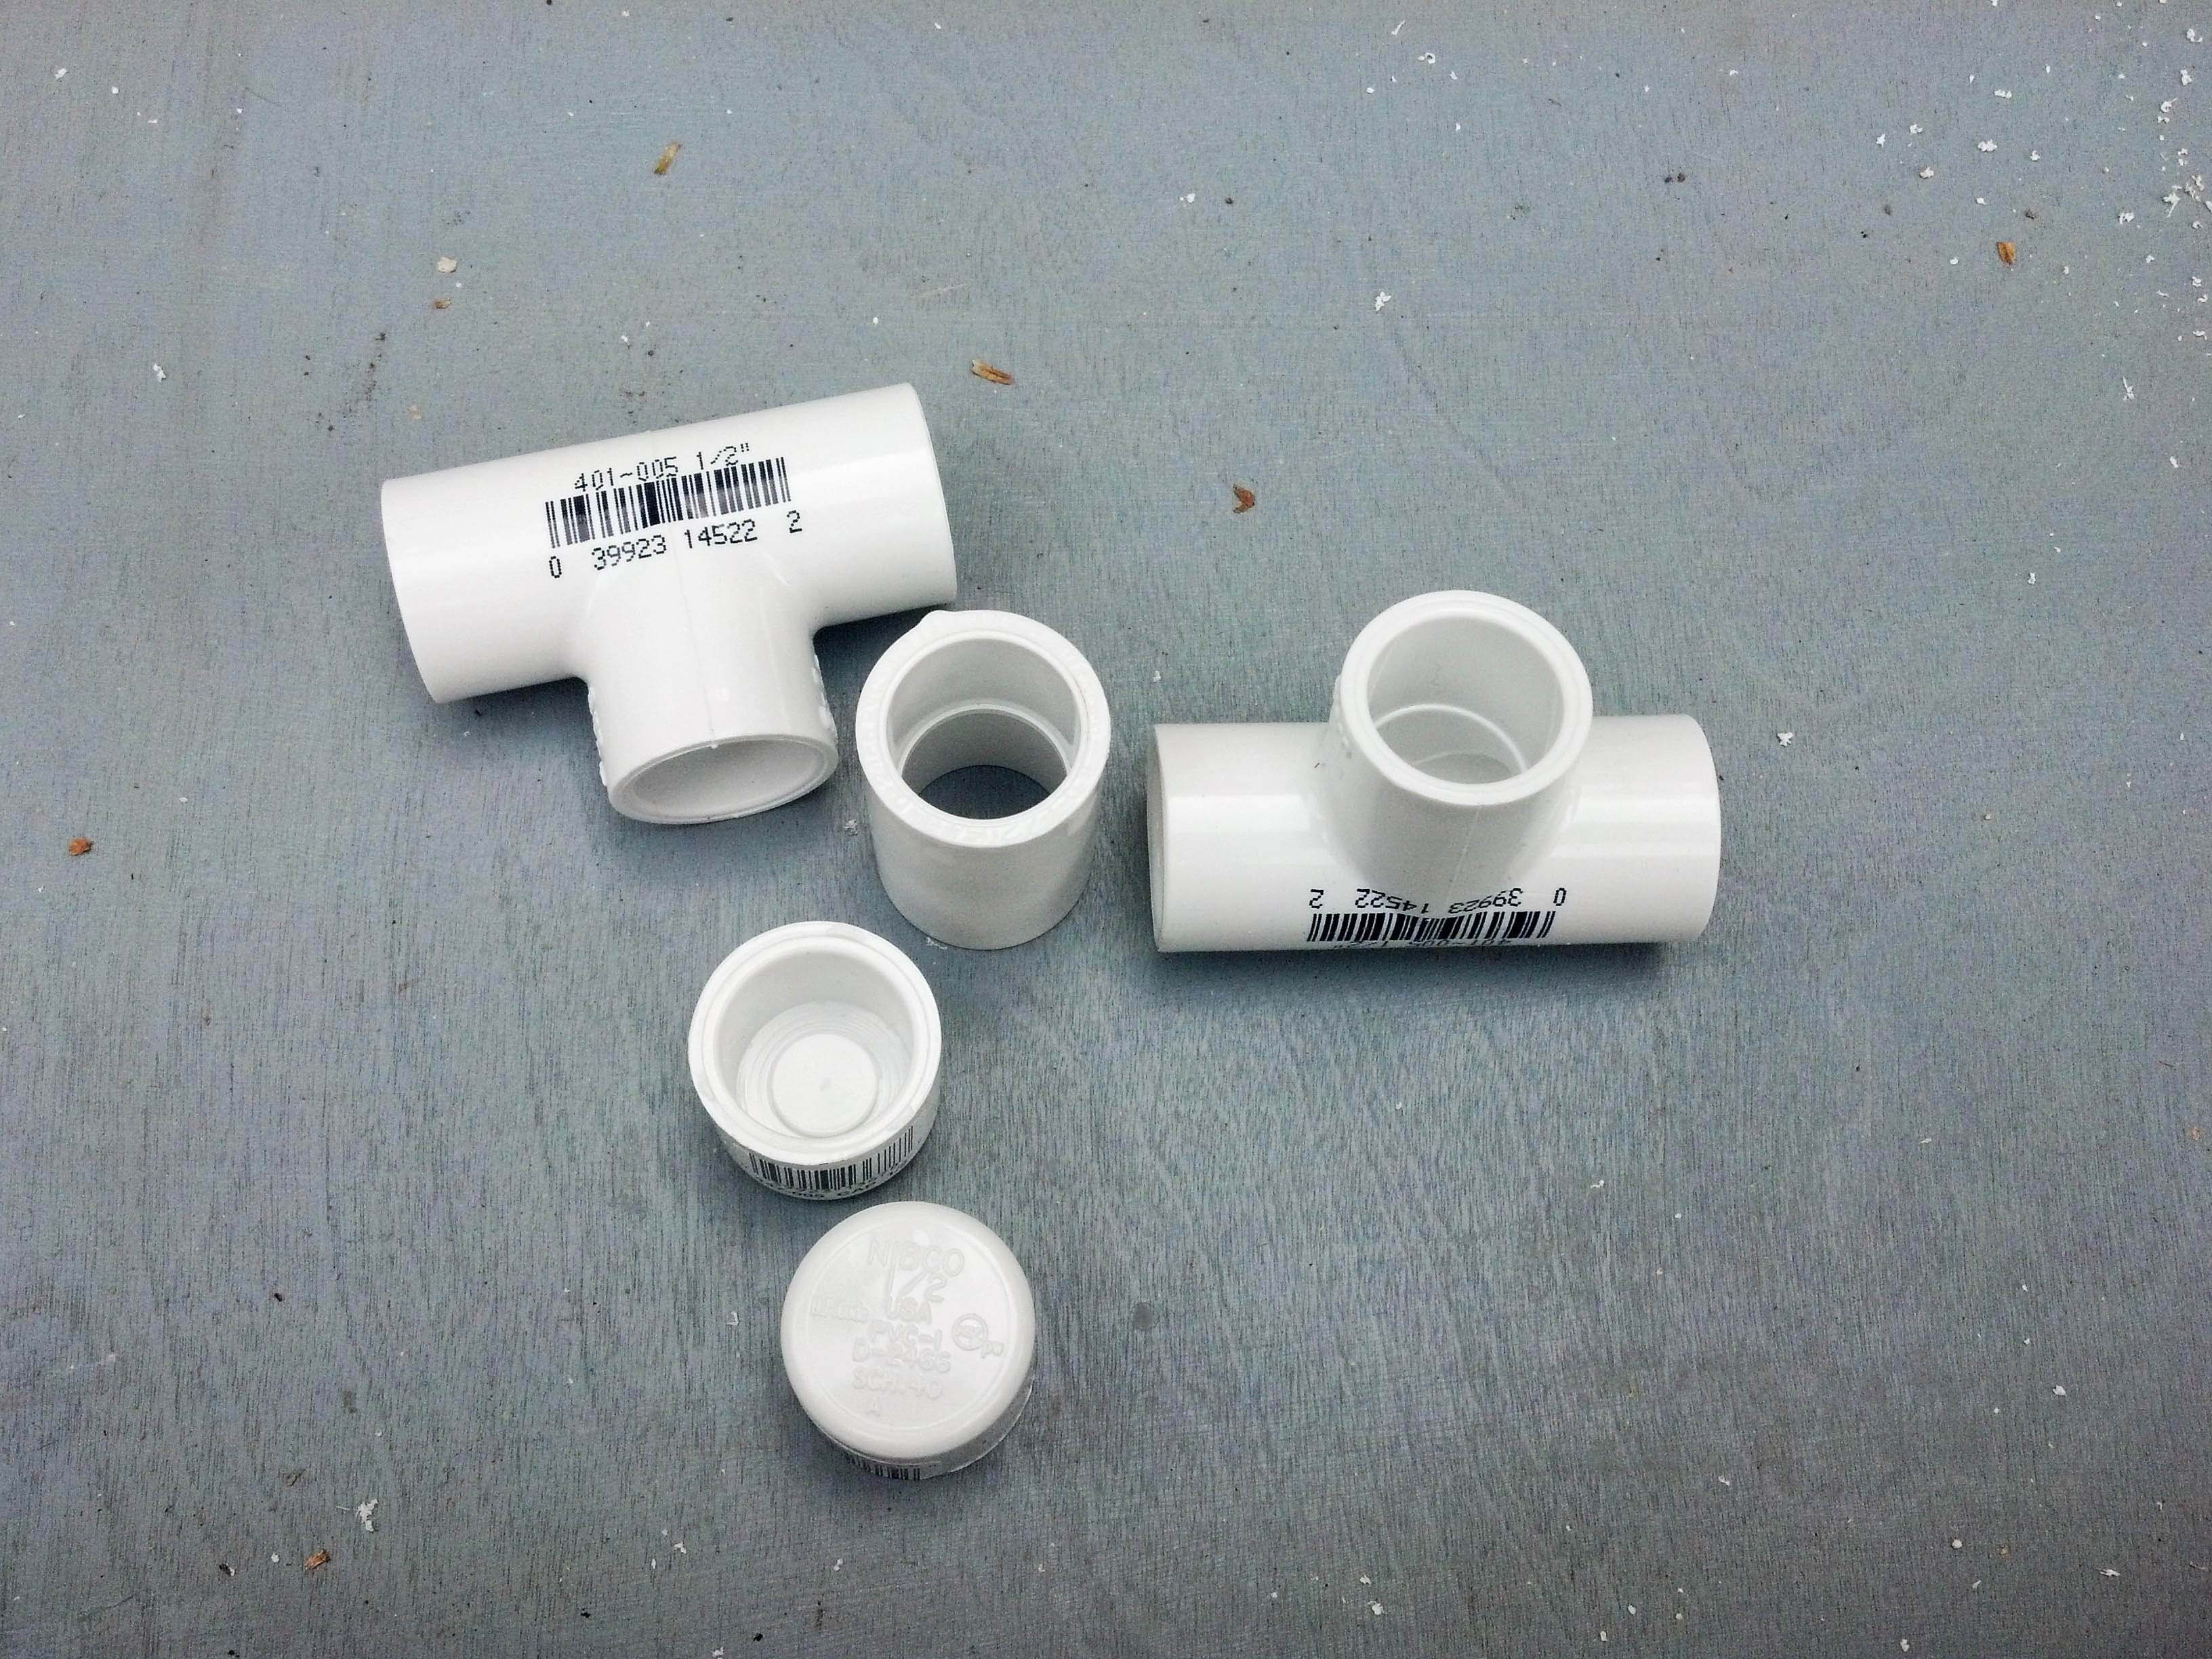
Next you will need these pieces of PVC and fittings.
Supplies:
6 pieces 1/2 inch PVC pipe
3 – 6 inch pieces
3 – 12 inch pieces
2 – 1/2 inch caps
2 – 1/2 inch T-joints
1 – 1/2 inch coupler
duct tape (not pictured)
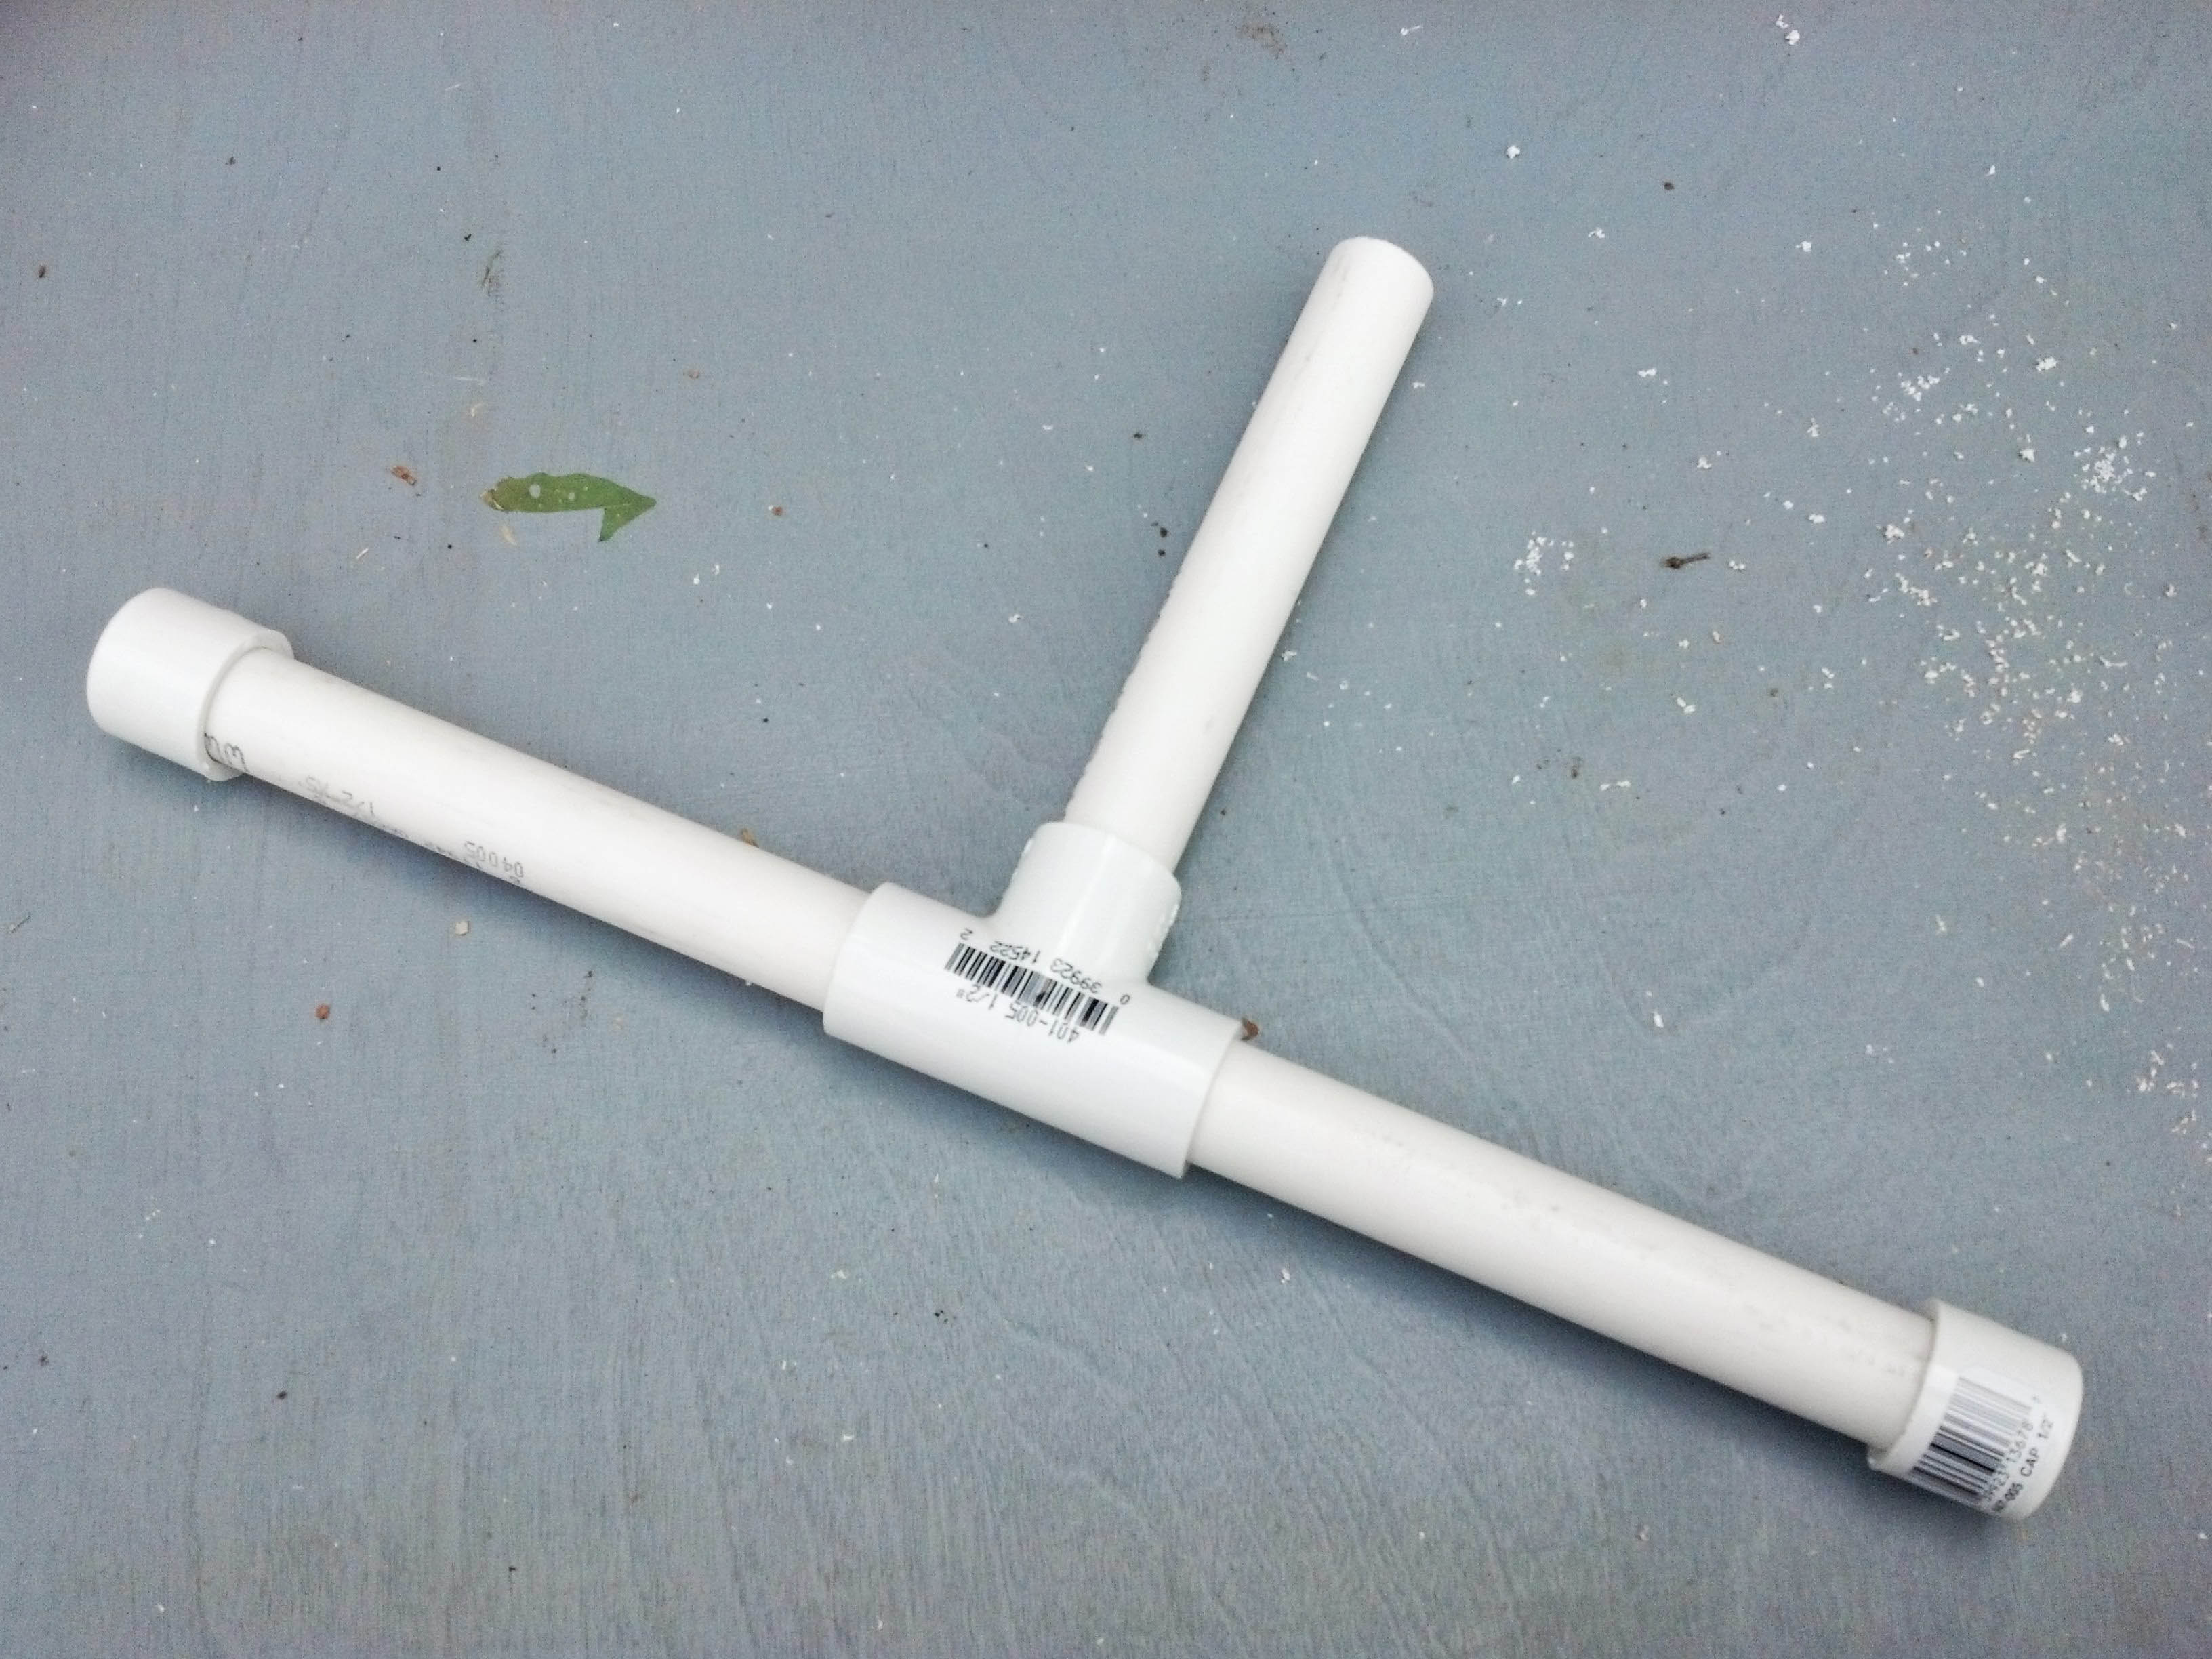
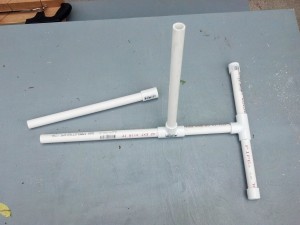
Now, we’ll start the assembly with three 6 inch pieces, a t-joint, and the caps. Assemble them to form a T shaped structure with the two ends of the T capped and the bottom of the T open.
These photos show assembly of the base in two easy steps.
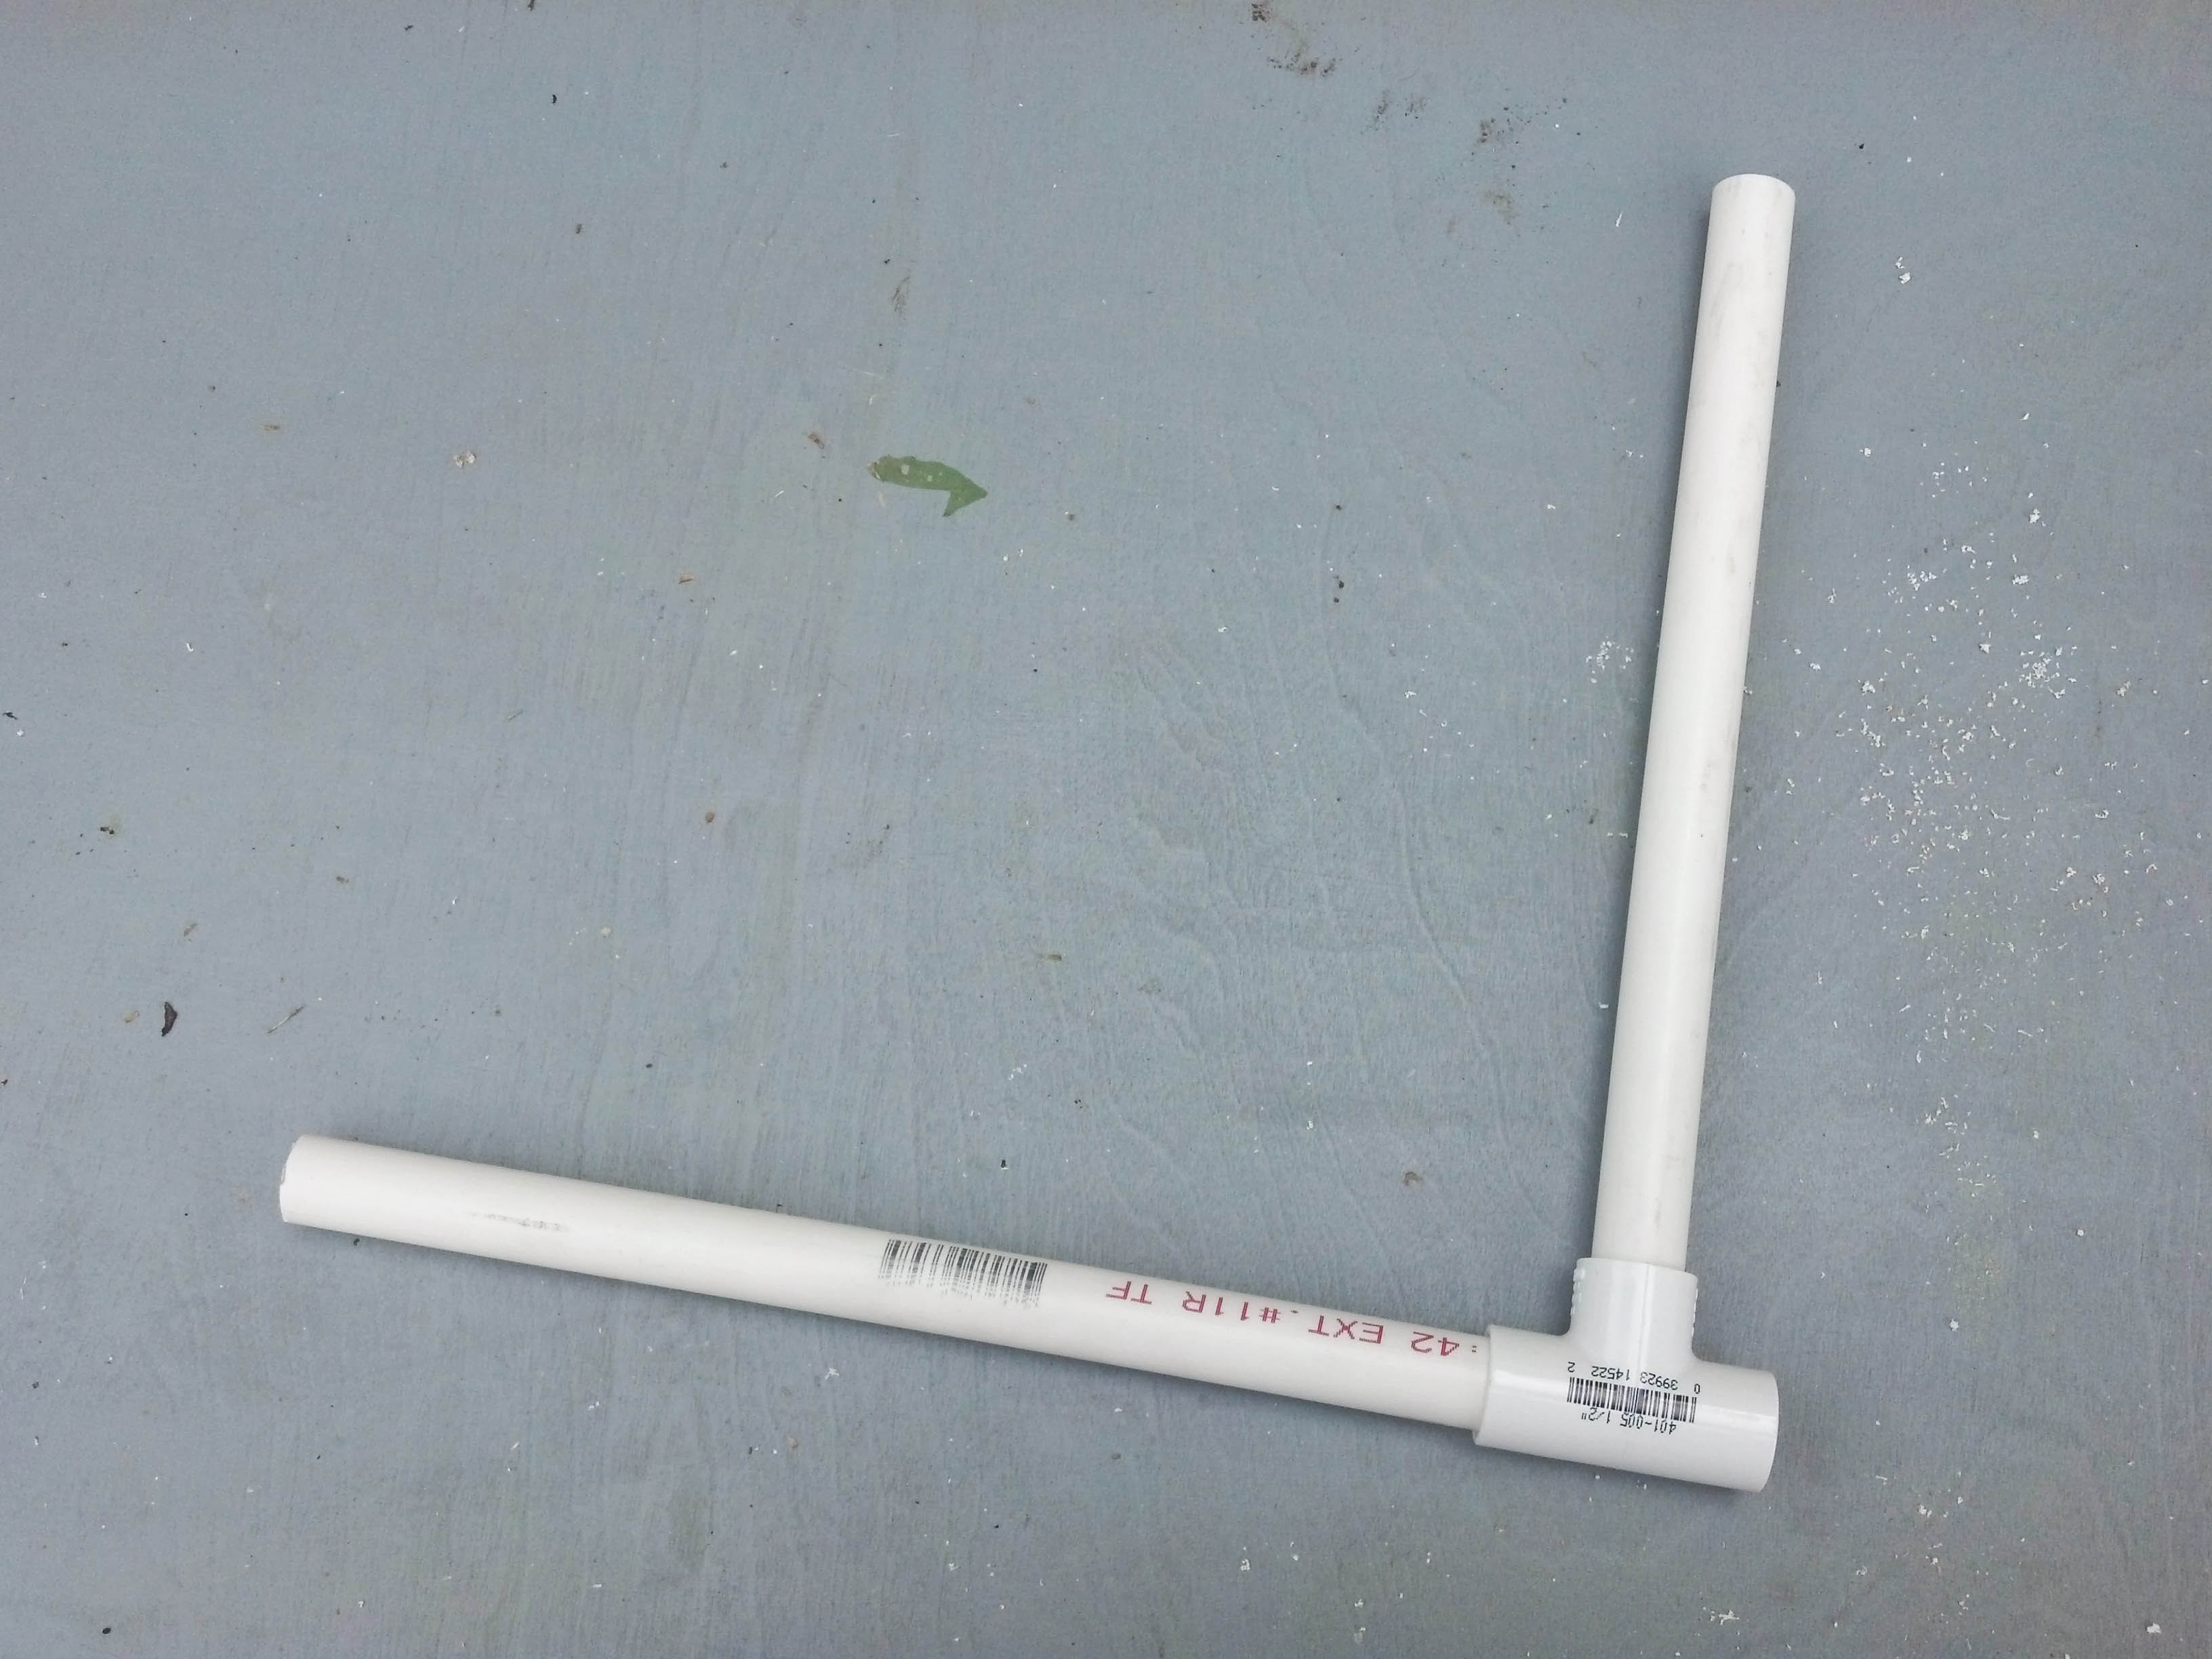
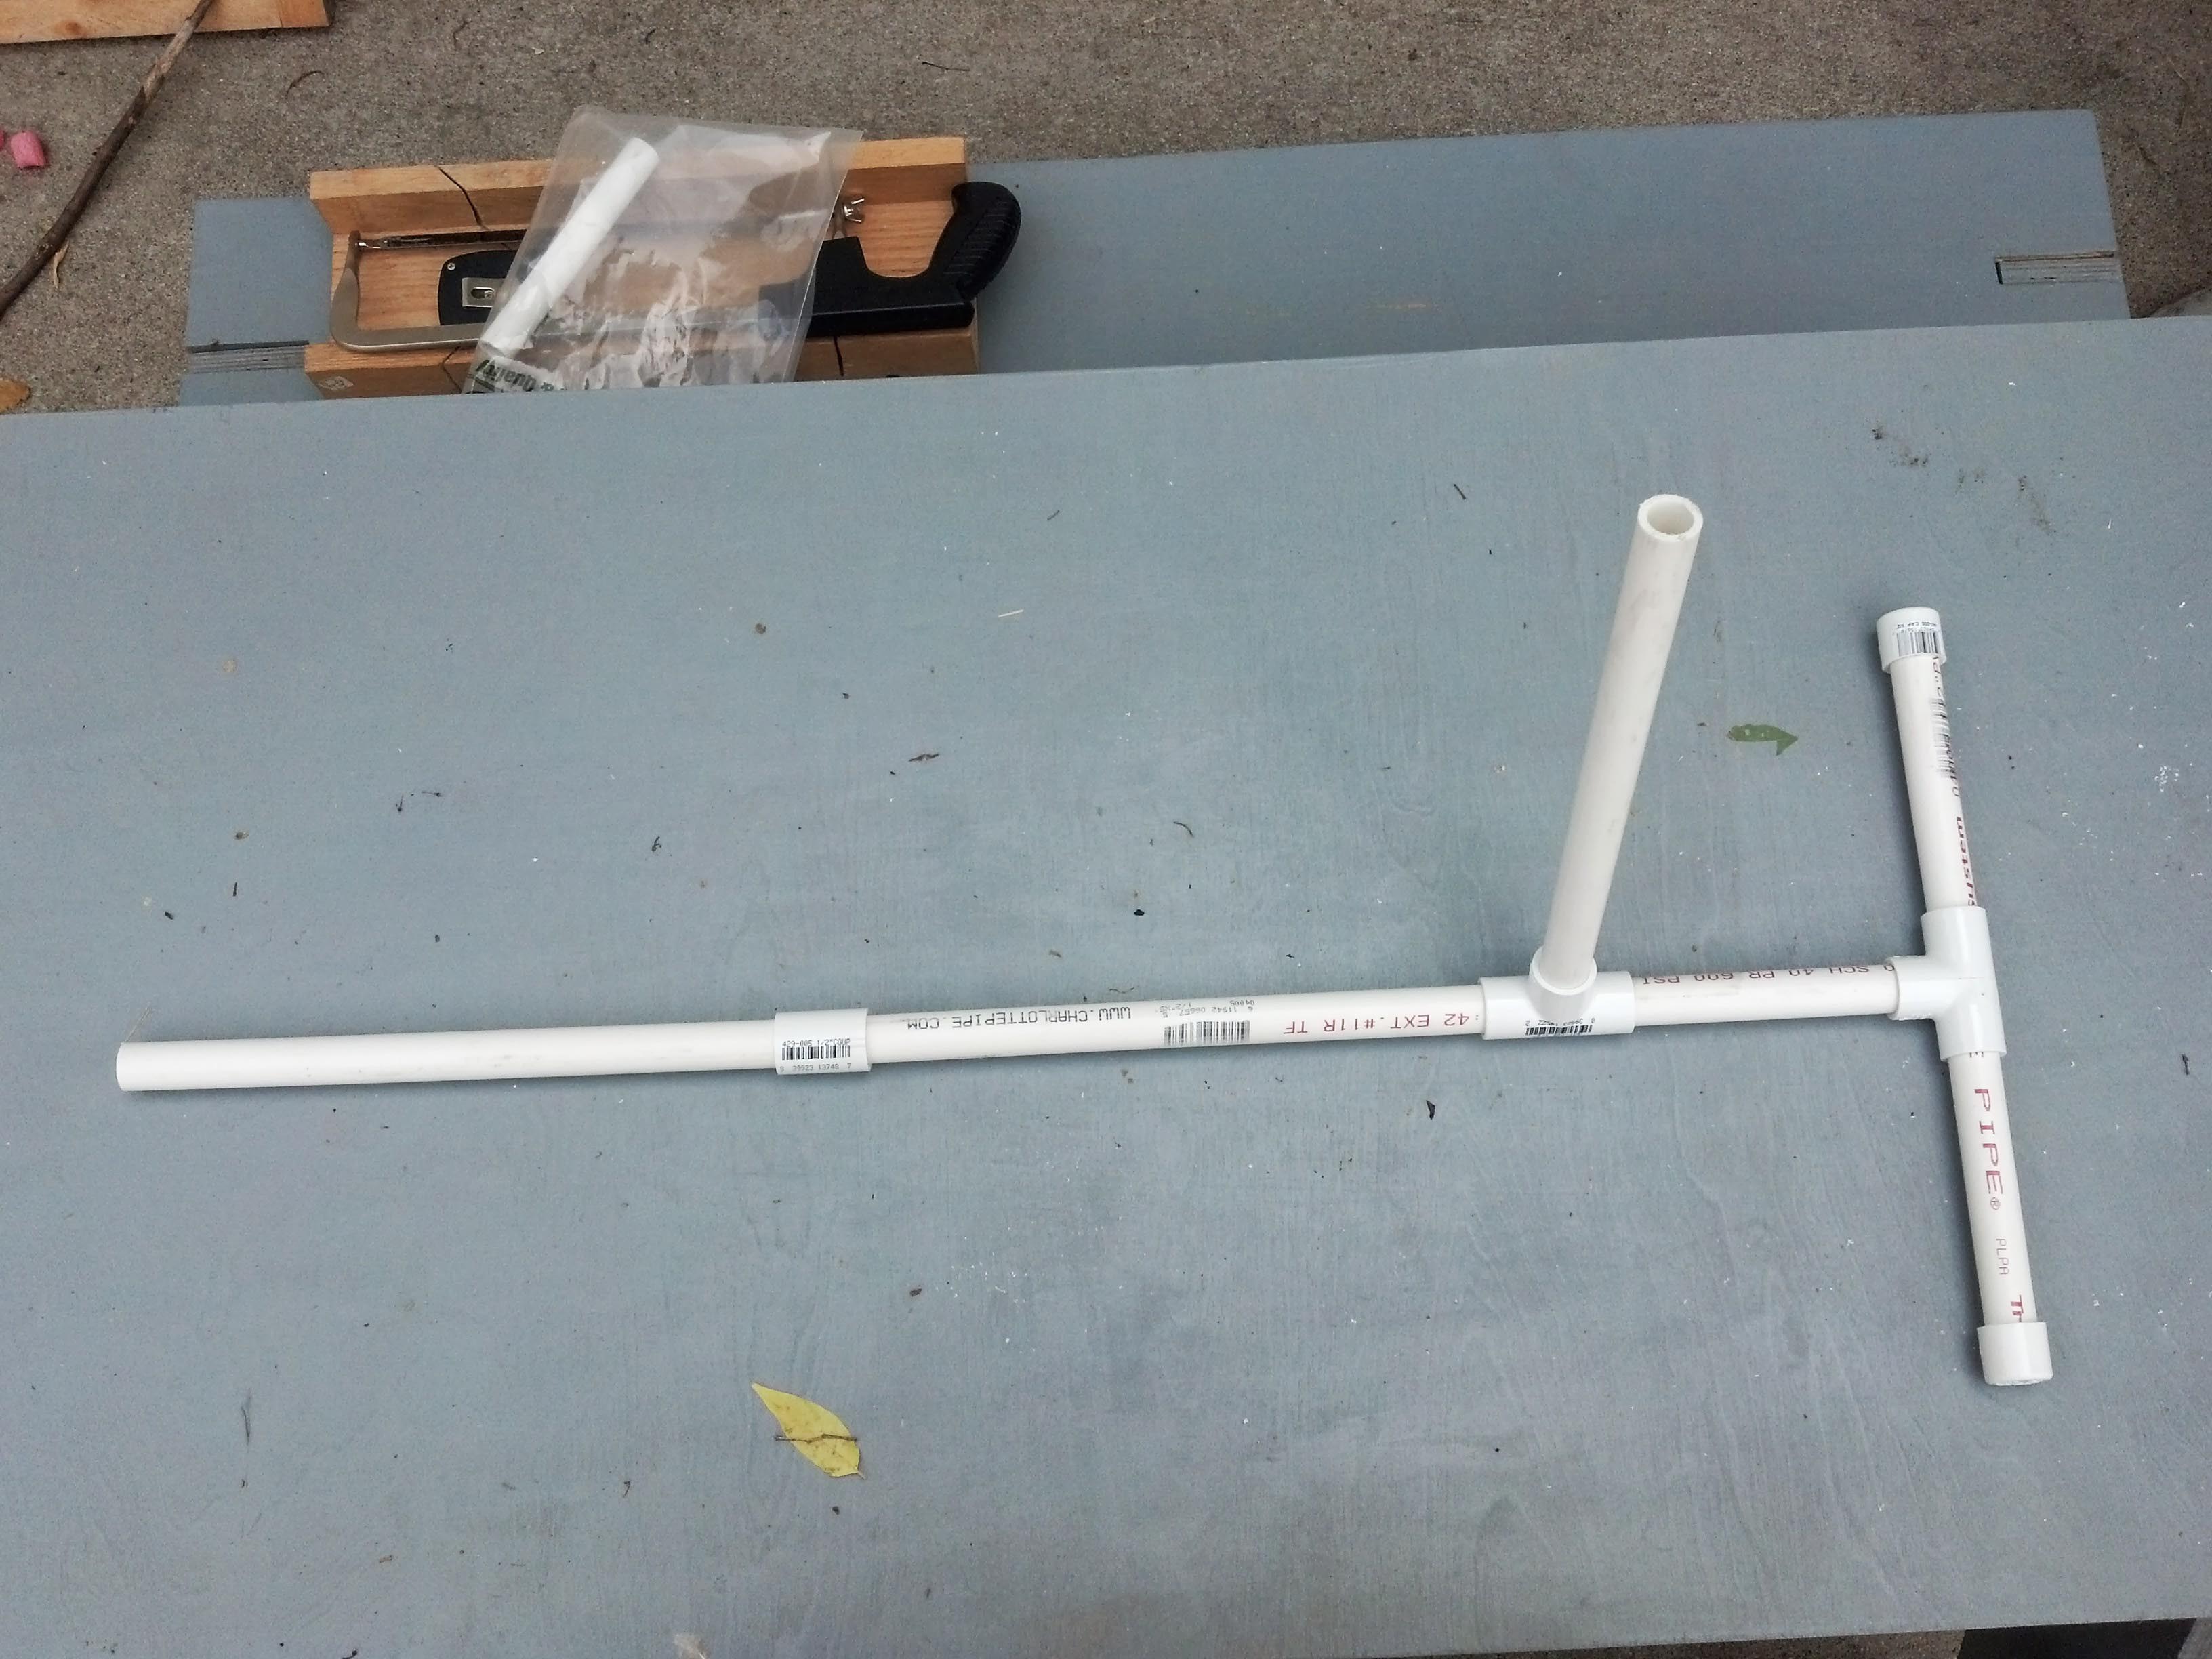
Next, we will build the launch section. You will use two 12 inch pieces and the other T-joint. Assemble this into a right angle using the center and one edge of the T-joint, leaving one end of the T-joint open. The open section of the T-joint will connect to the base.
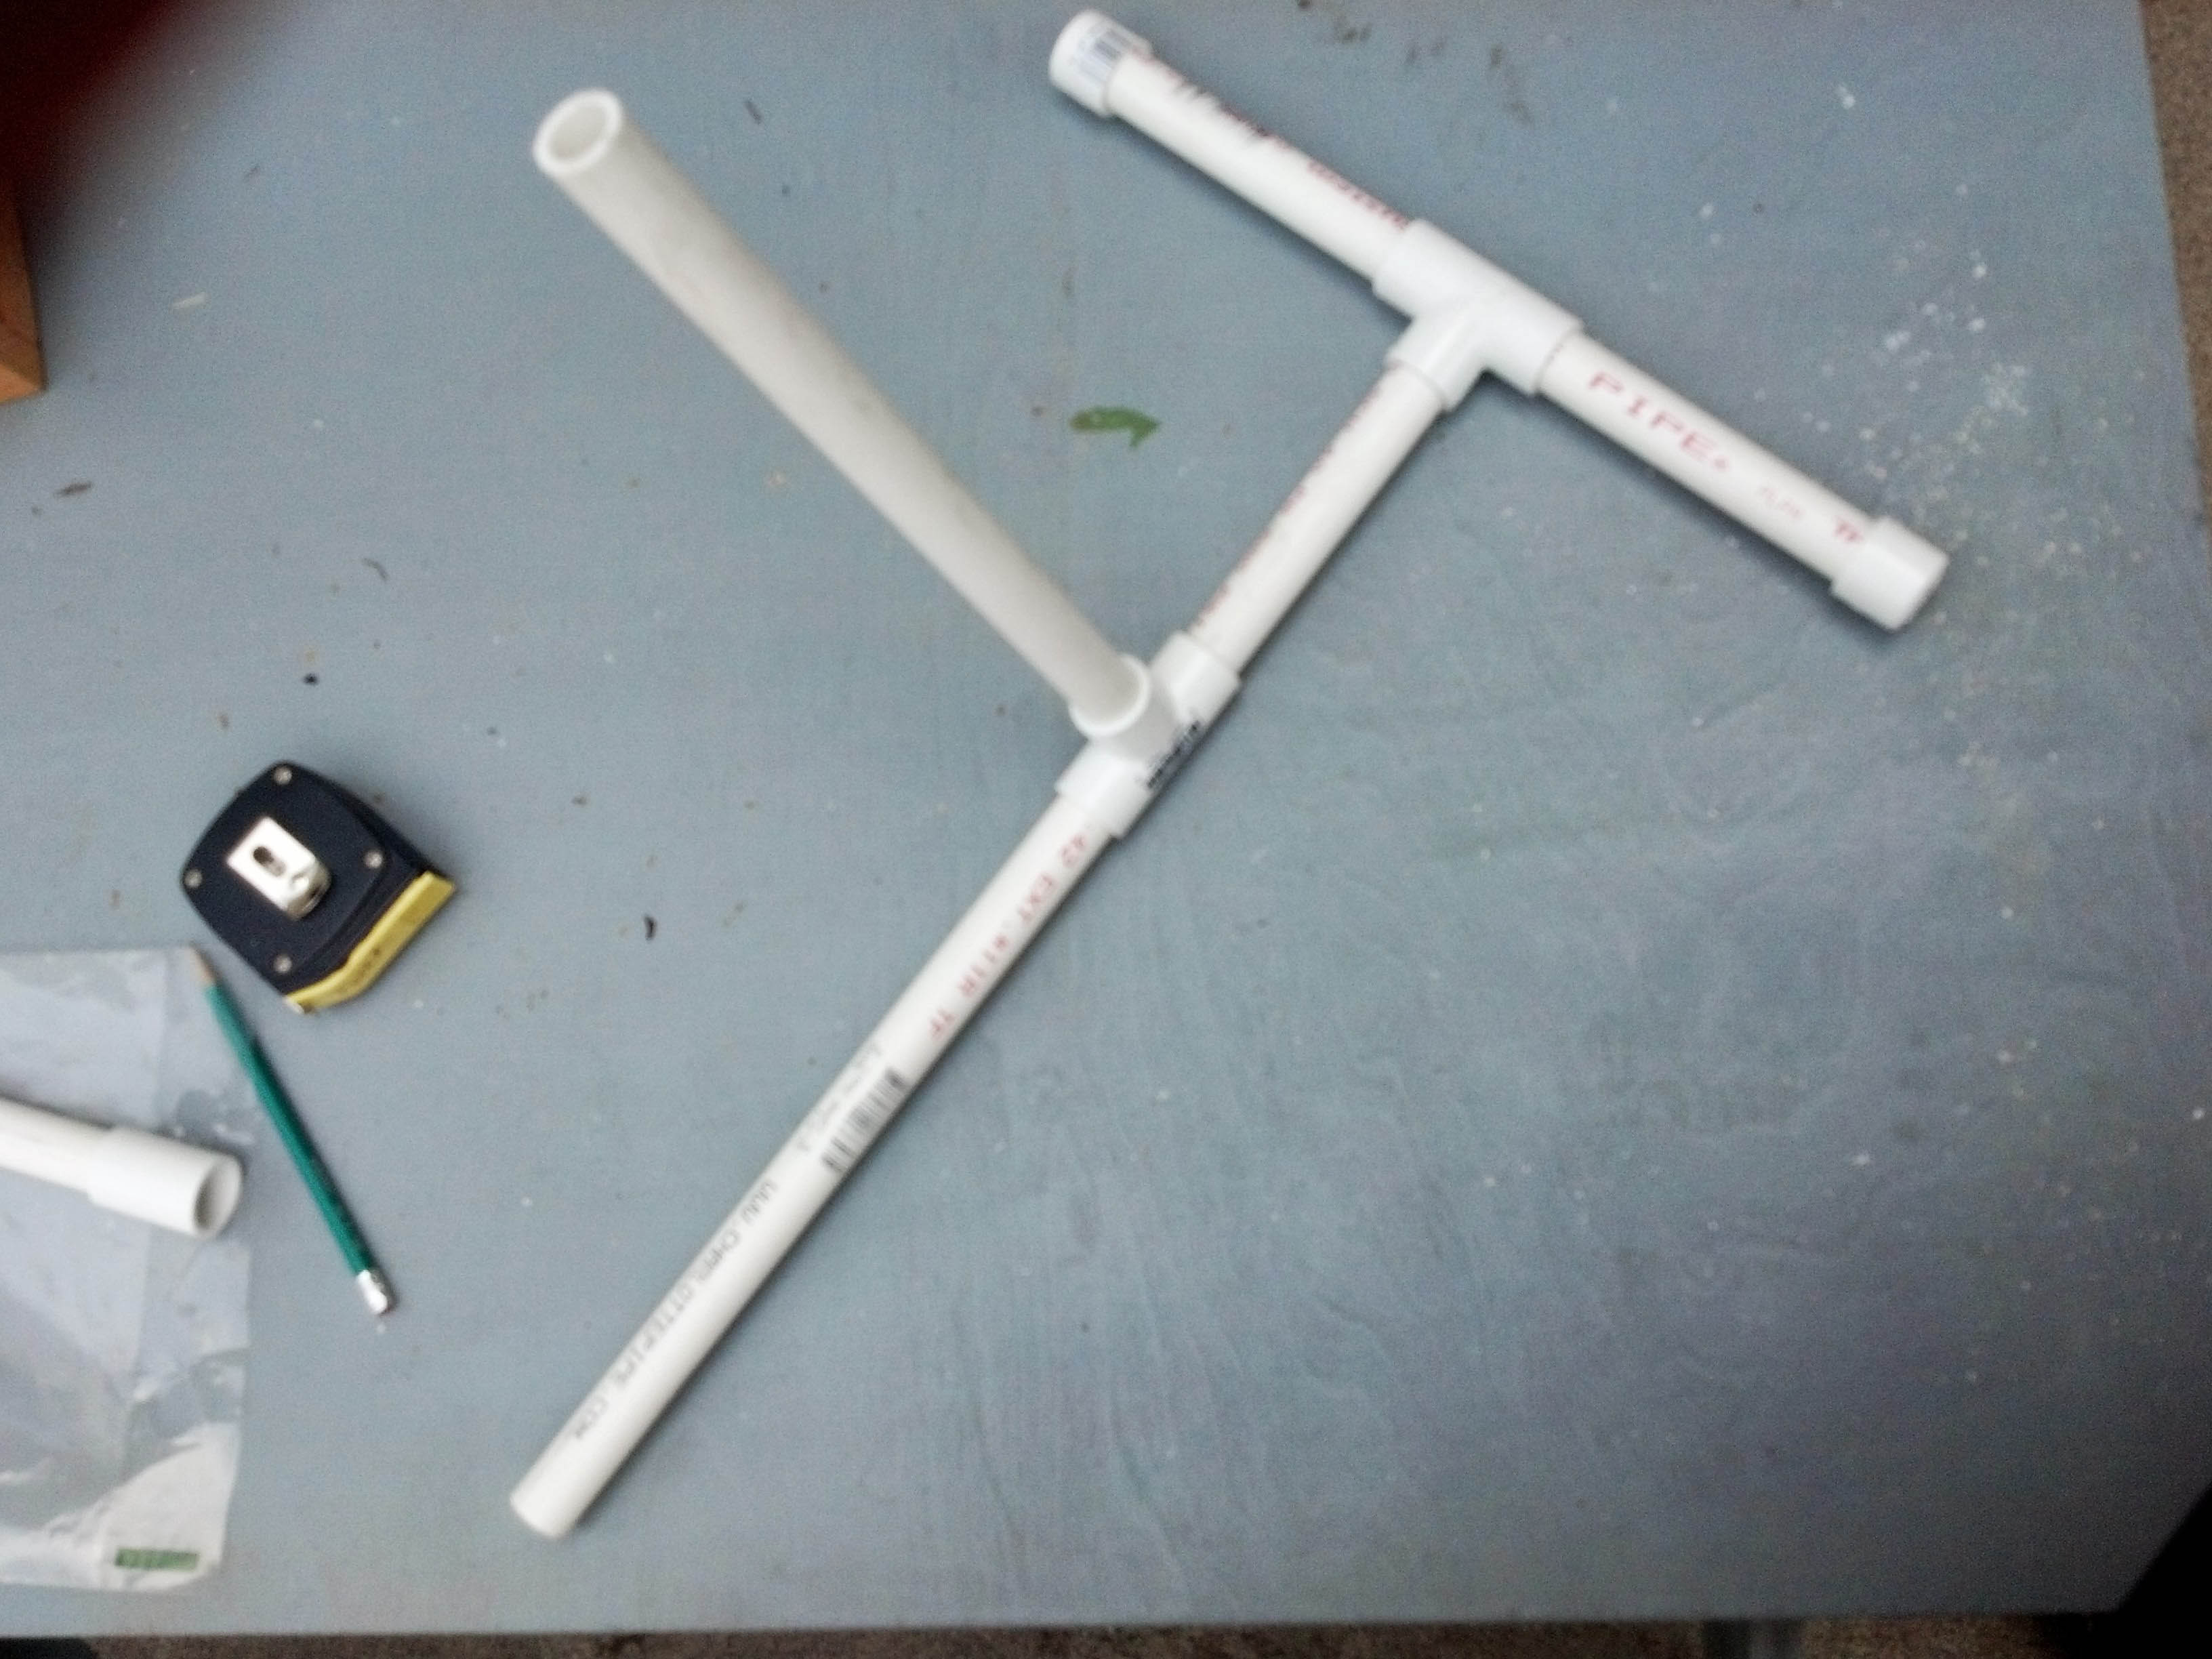
You should now have these two parts. Connect the launch section and the base section to form your launcher. Put them together and you should have your competed launcher.
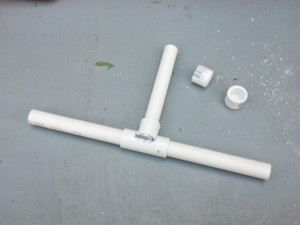
Almost done. The last section to build is the bottle connector. Place the coupler on the end of the last 12 inch piece. You will connect this piece to the launcher using the coupler. All that is left is to add a two liter bottle to the end of the connector and seal with a couple inches of duct tape and you are ready to make and launch rockets.
This is by no means the be all, end all of stomp rocket launchers. There are several good designs out there. As with anything, I encourage kids and adults to experiment. Try building a launcher that will launch two rockets at a time. Or maybe try a launcher with two pop bottles. See if you can get any extra height or distance out of them. Take pictures and share your results. I’d love to see, and maybe even share, what you’ve done.
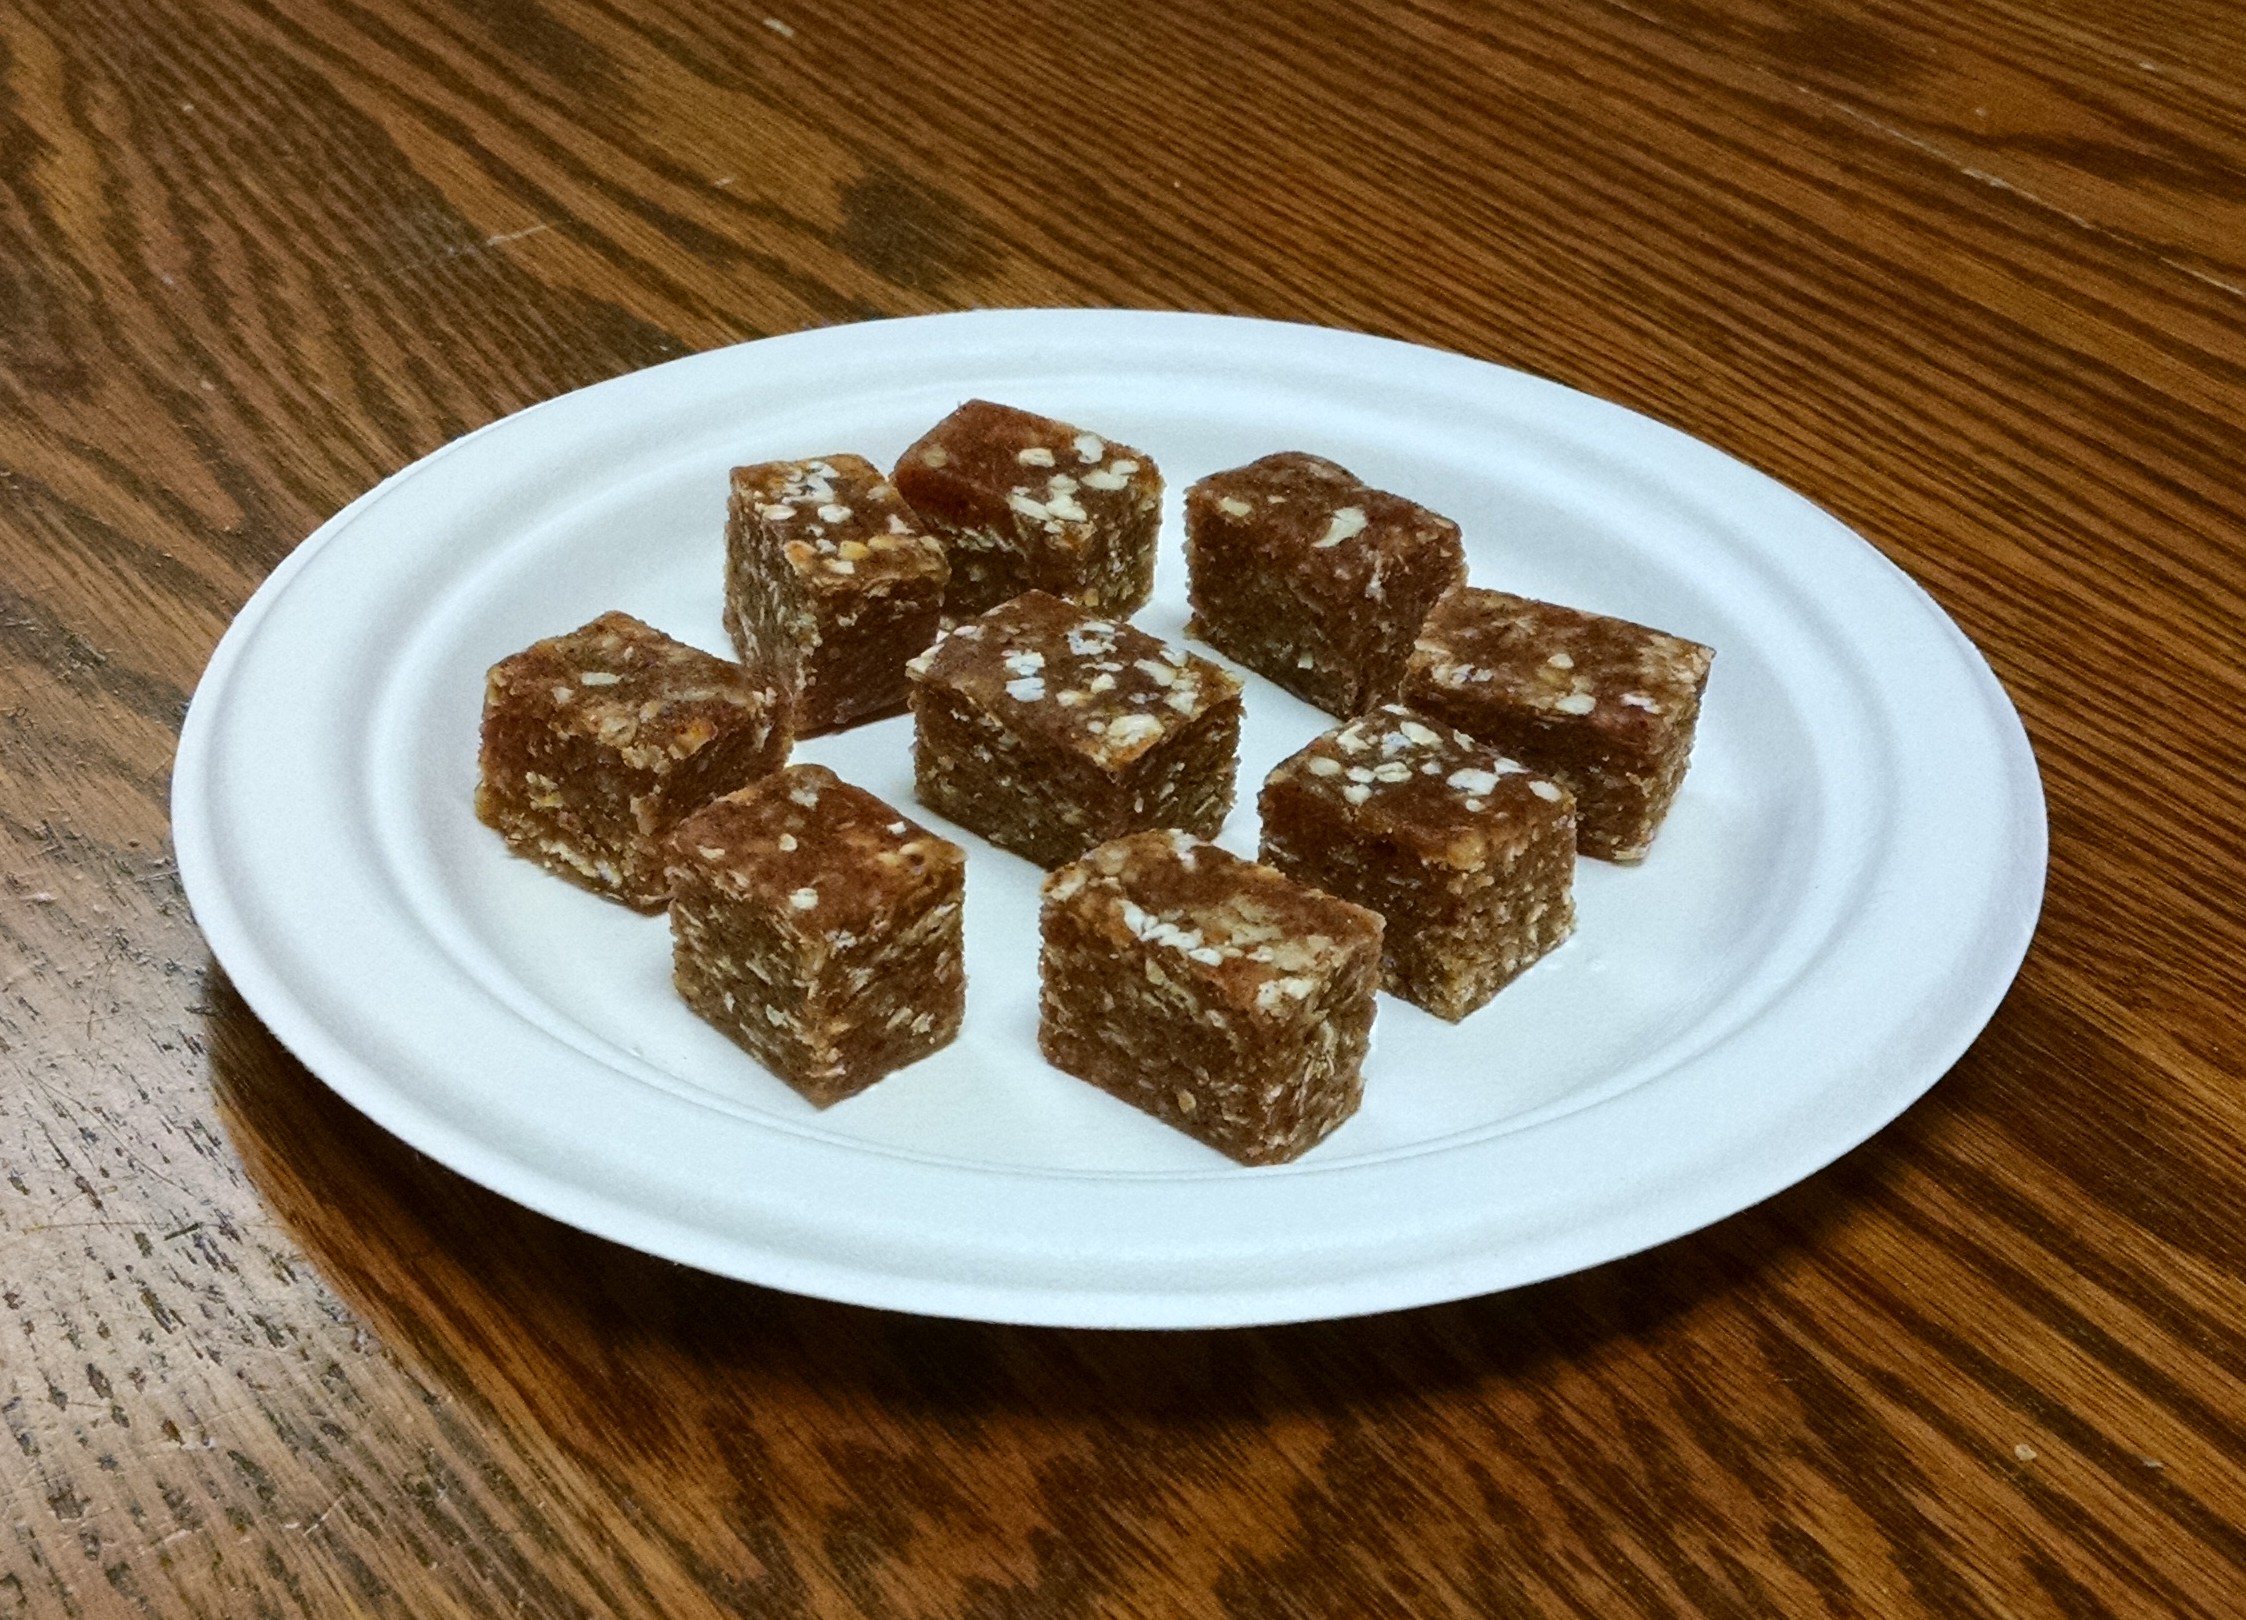
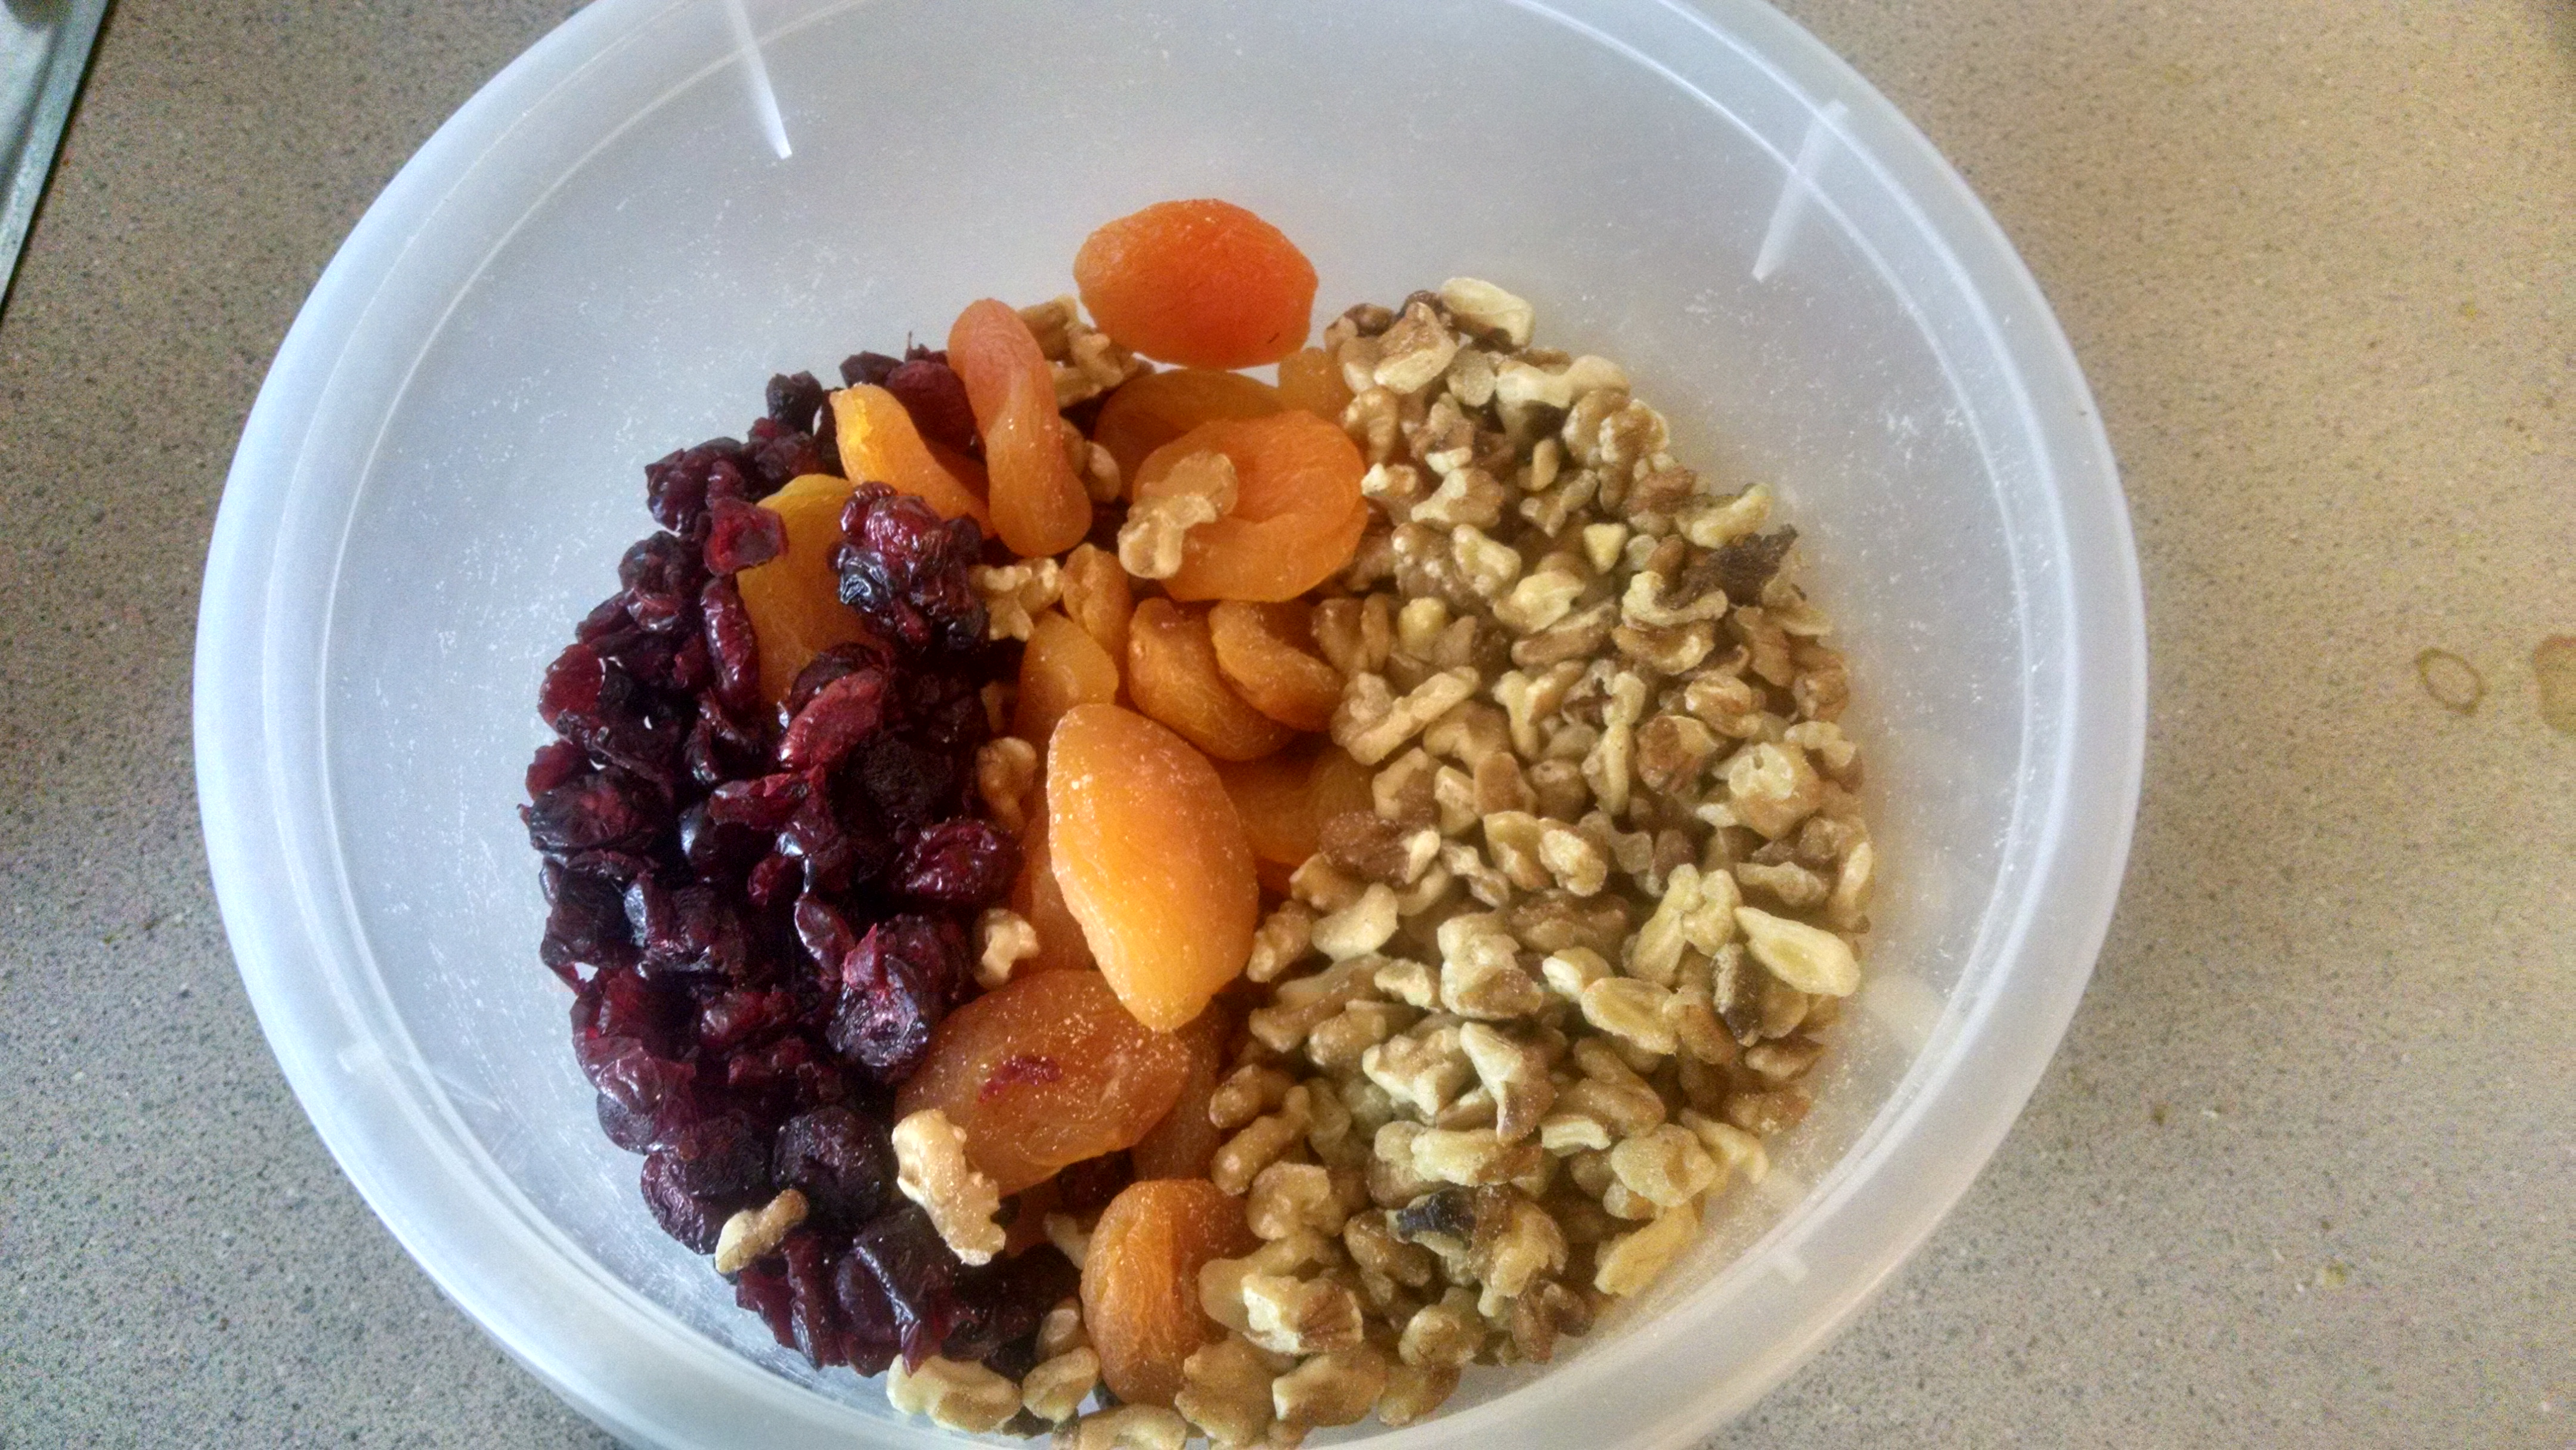
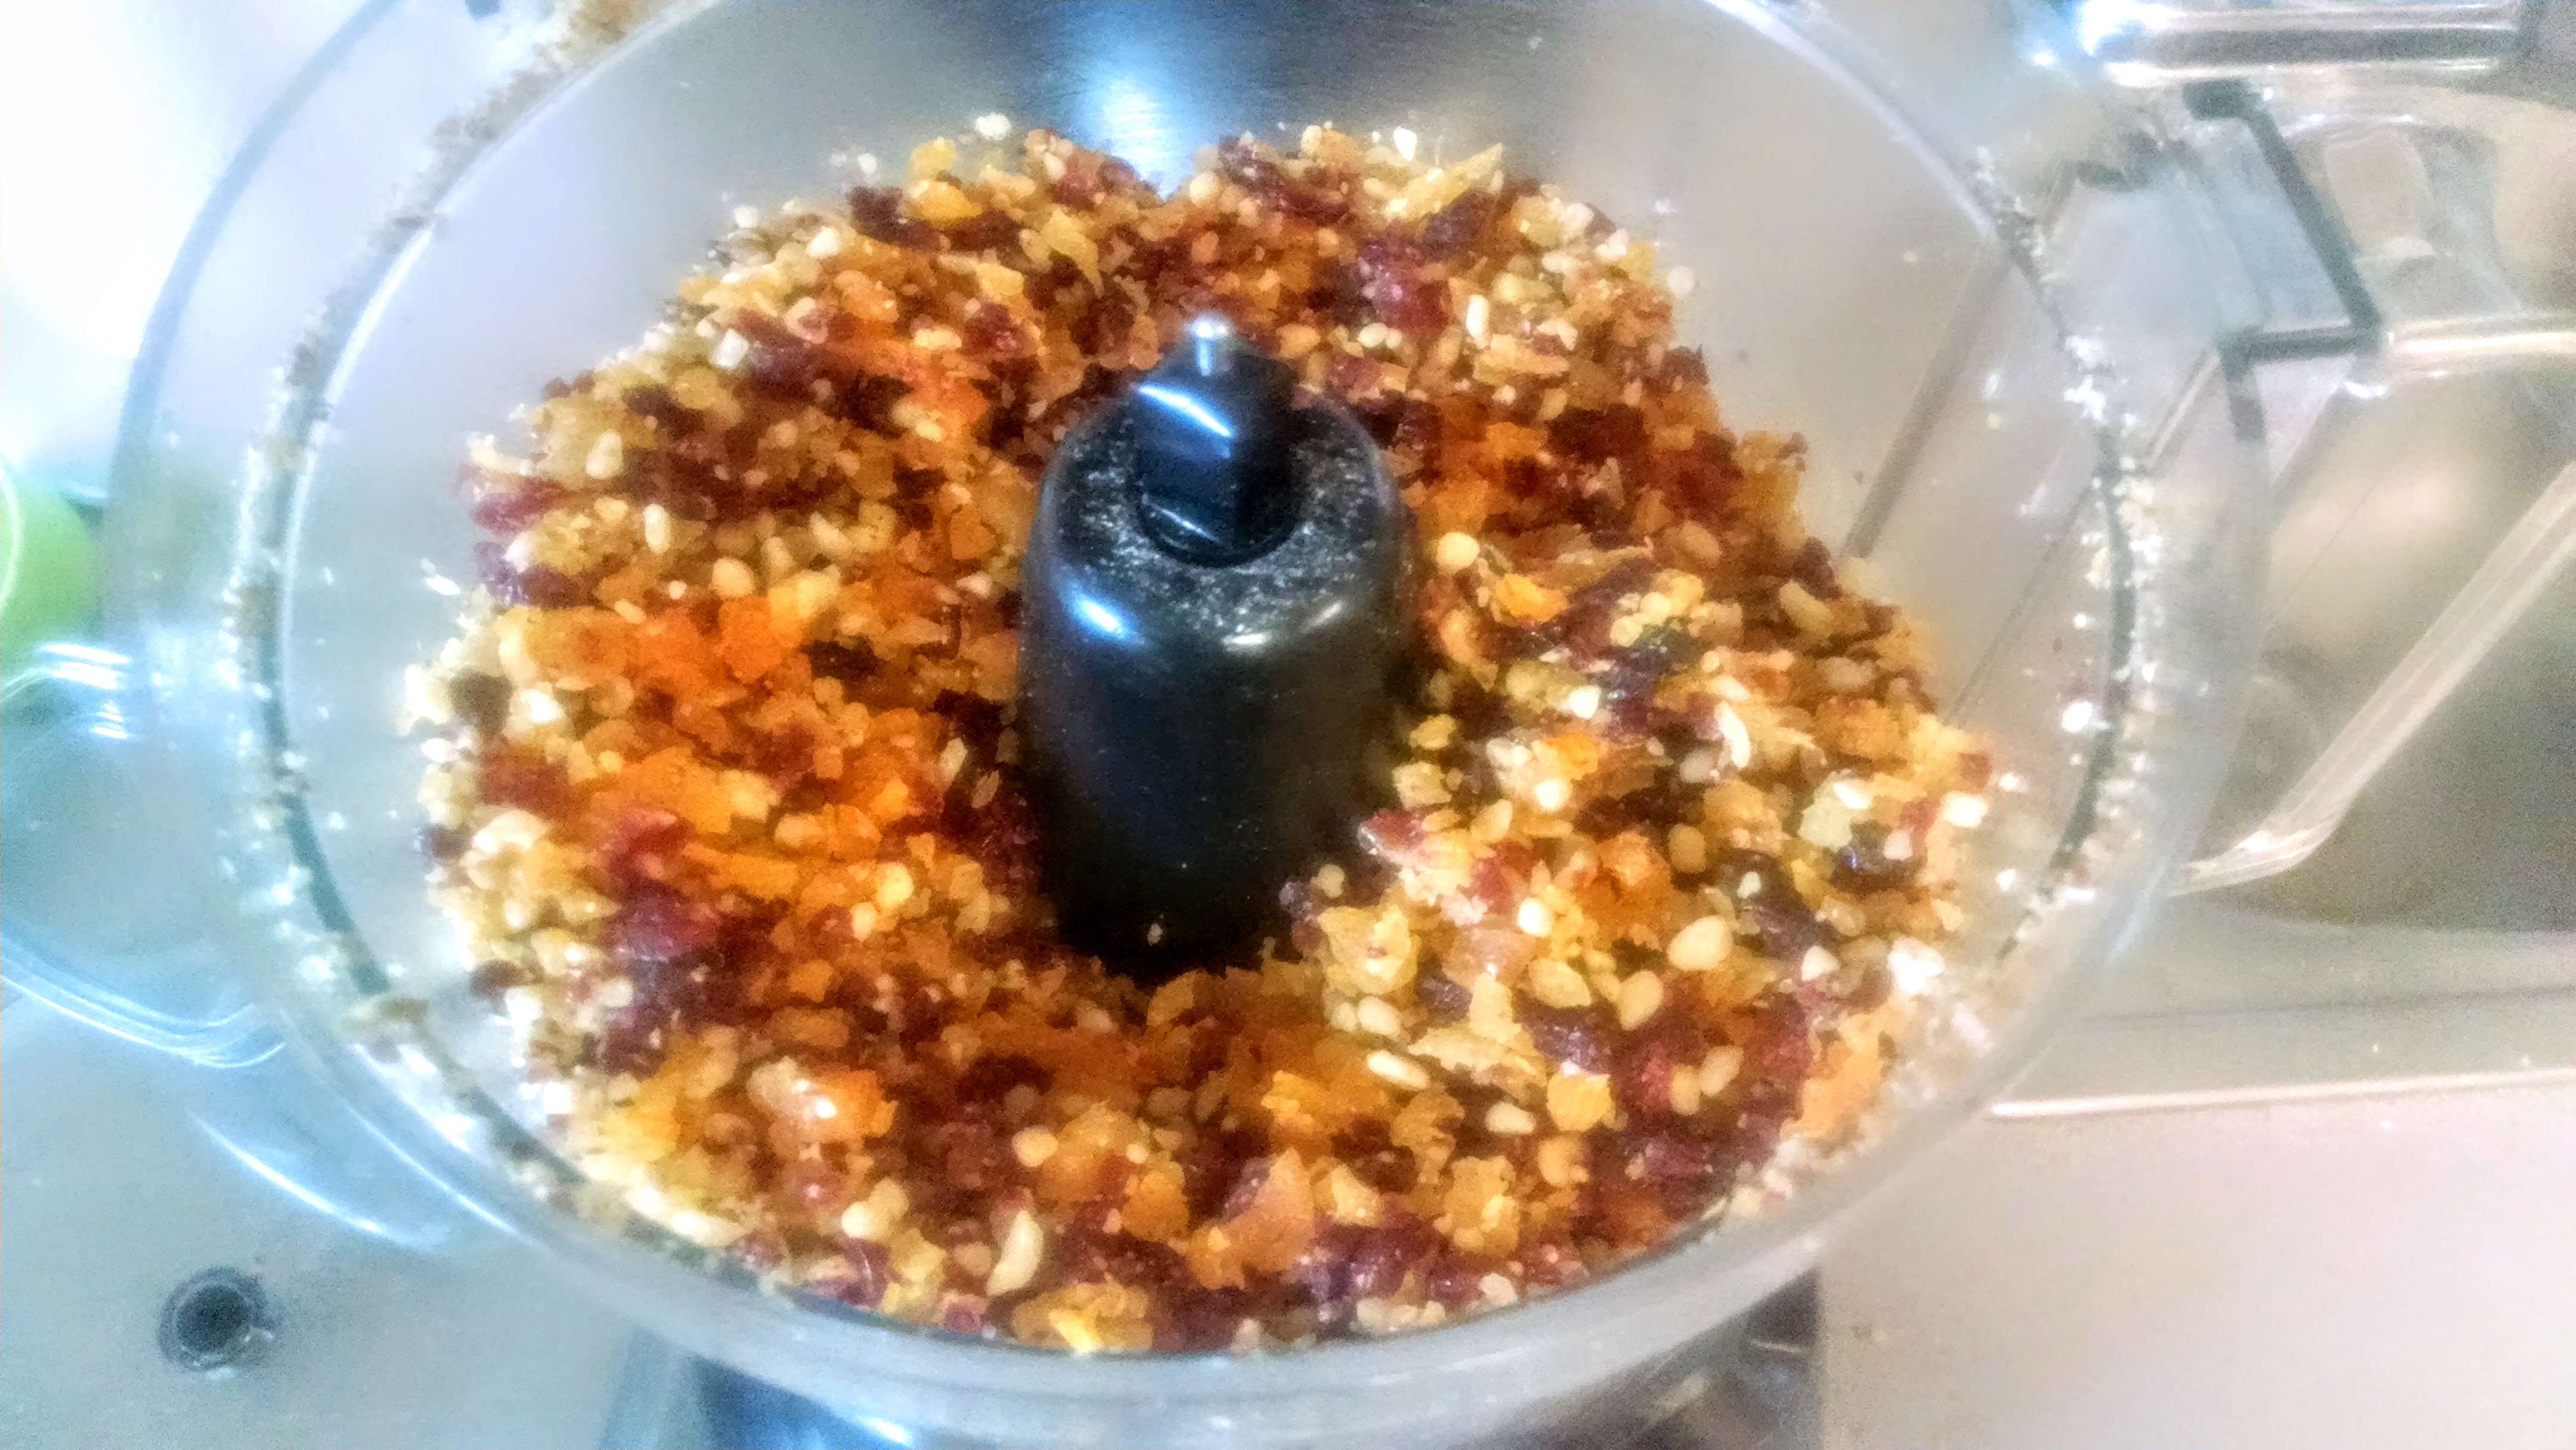
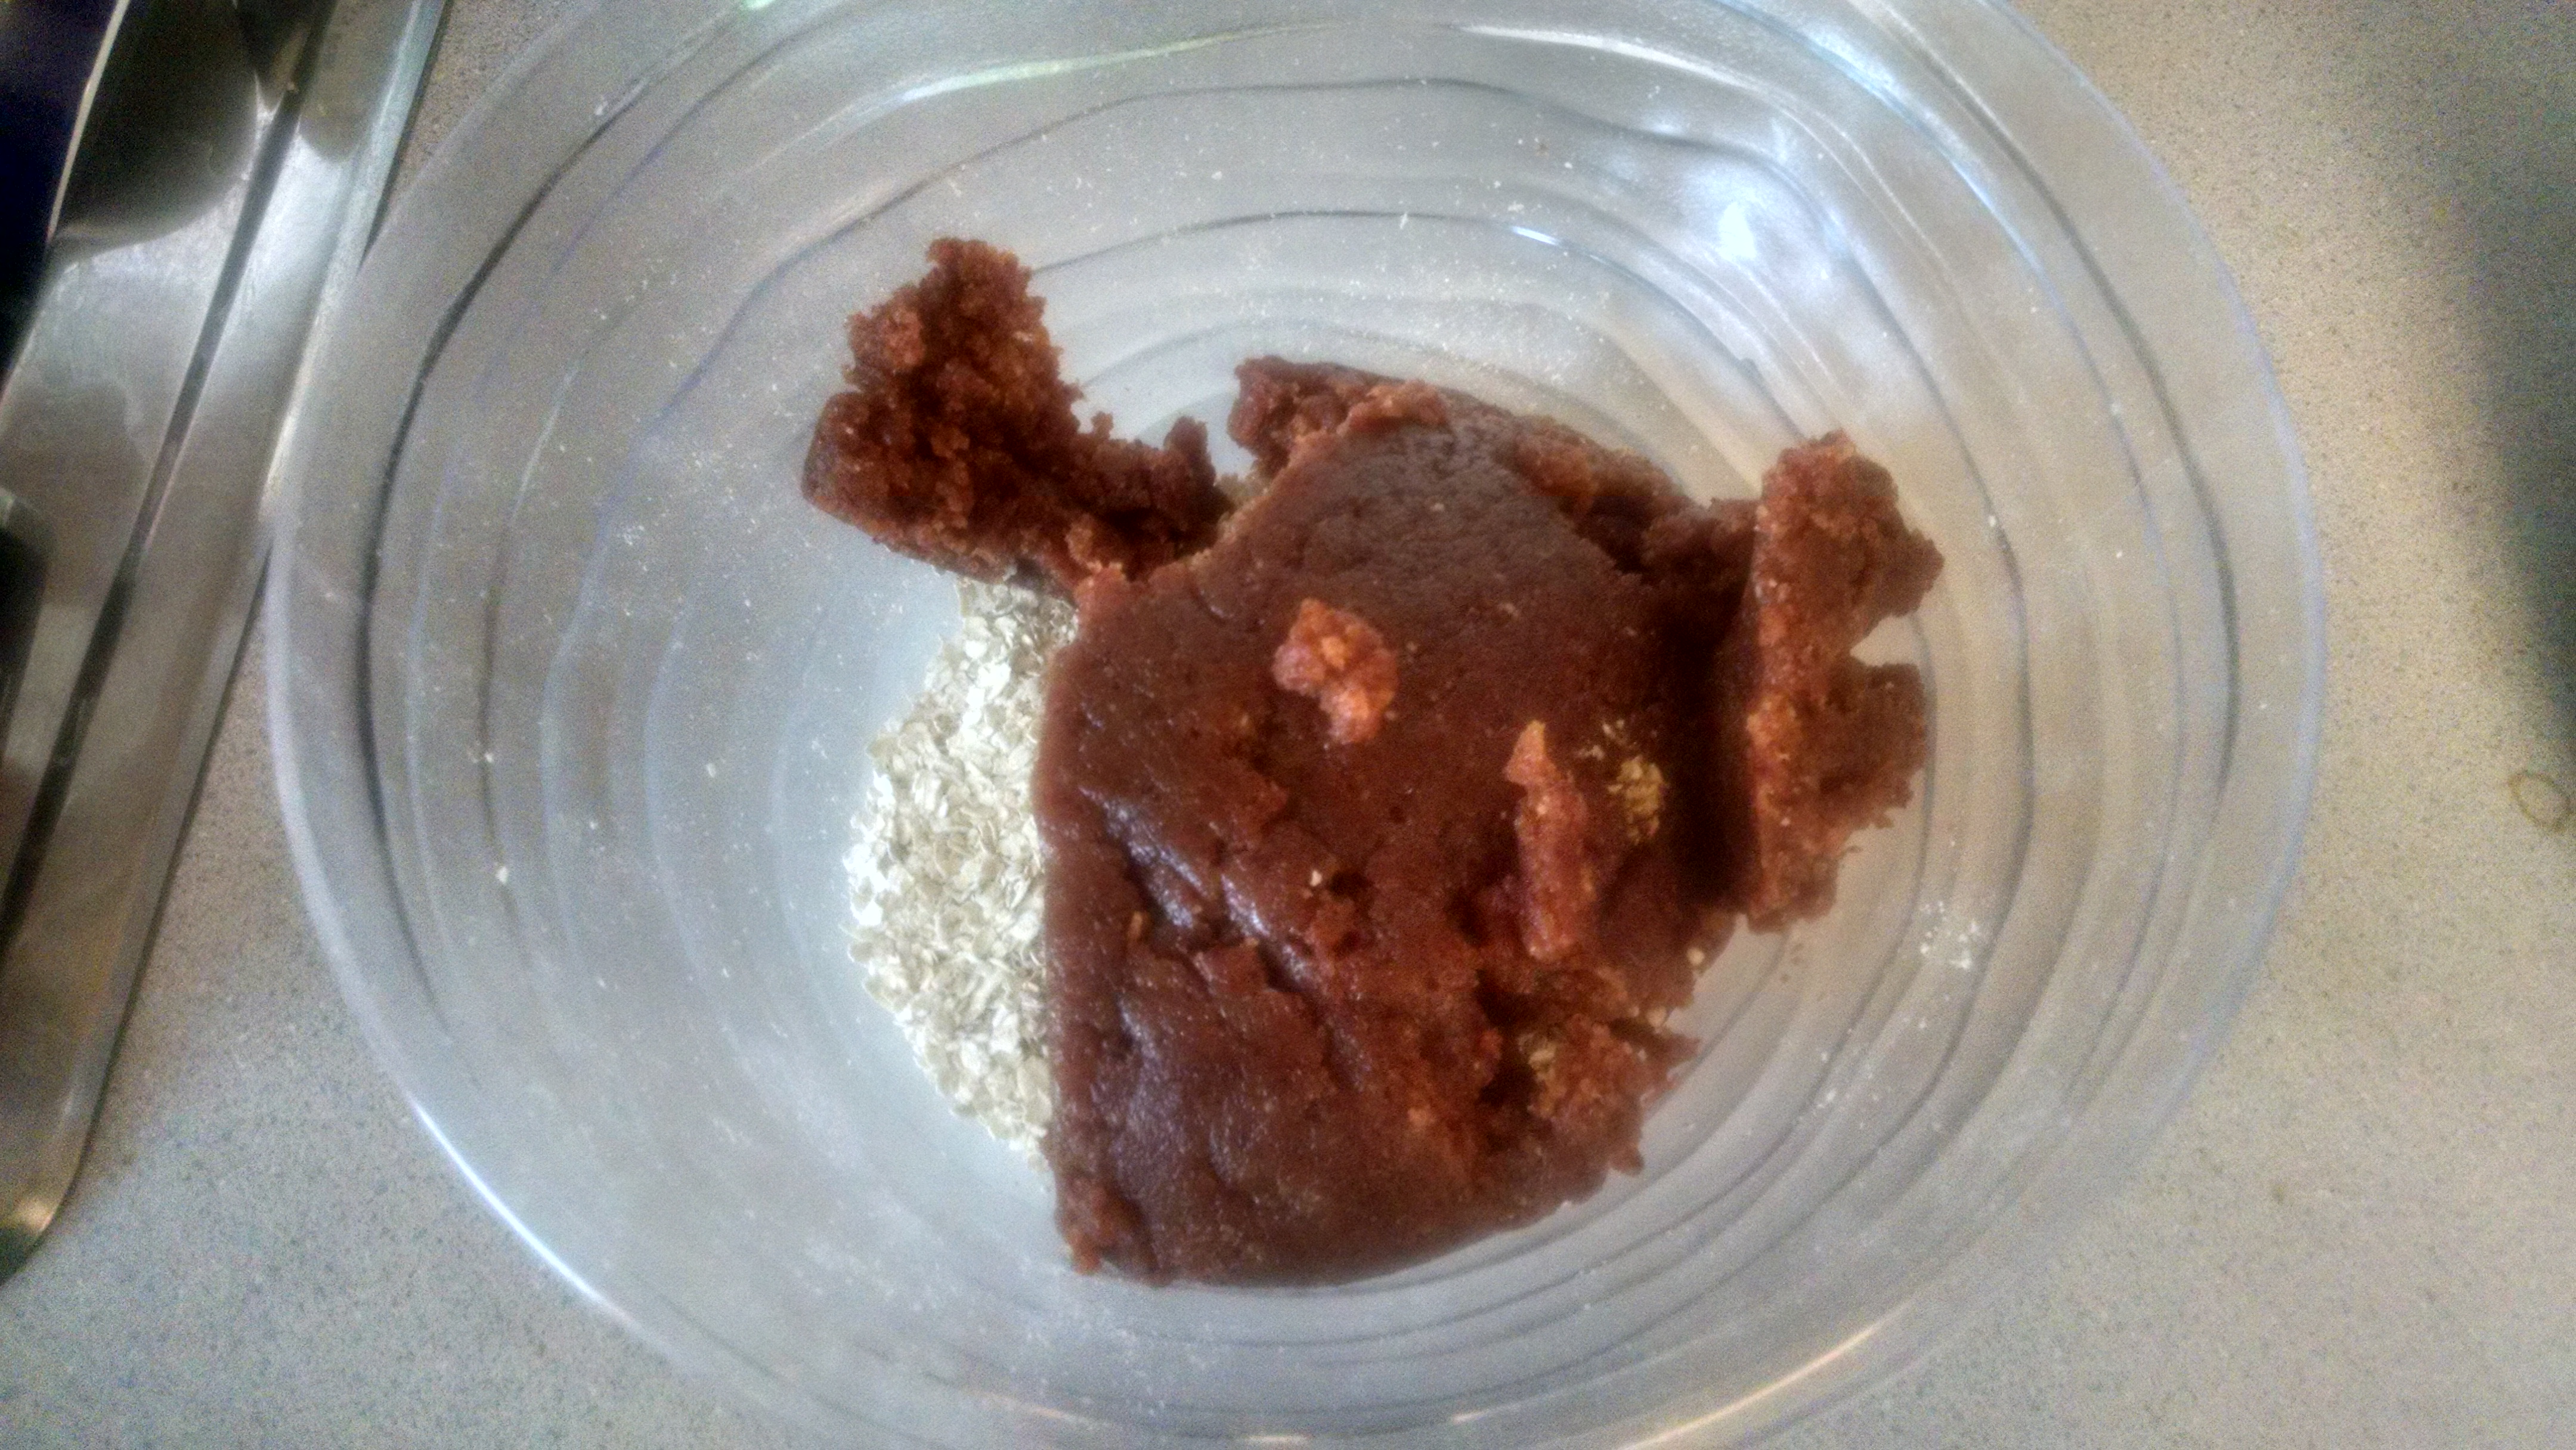
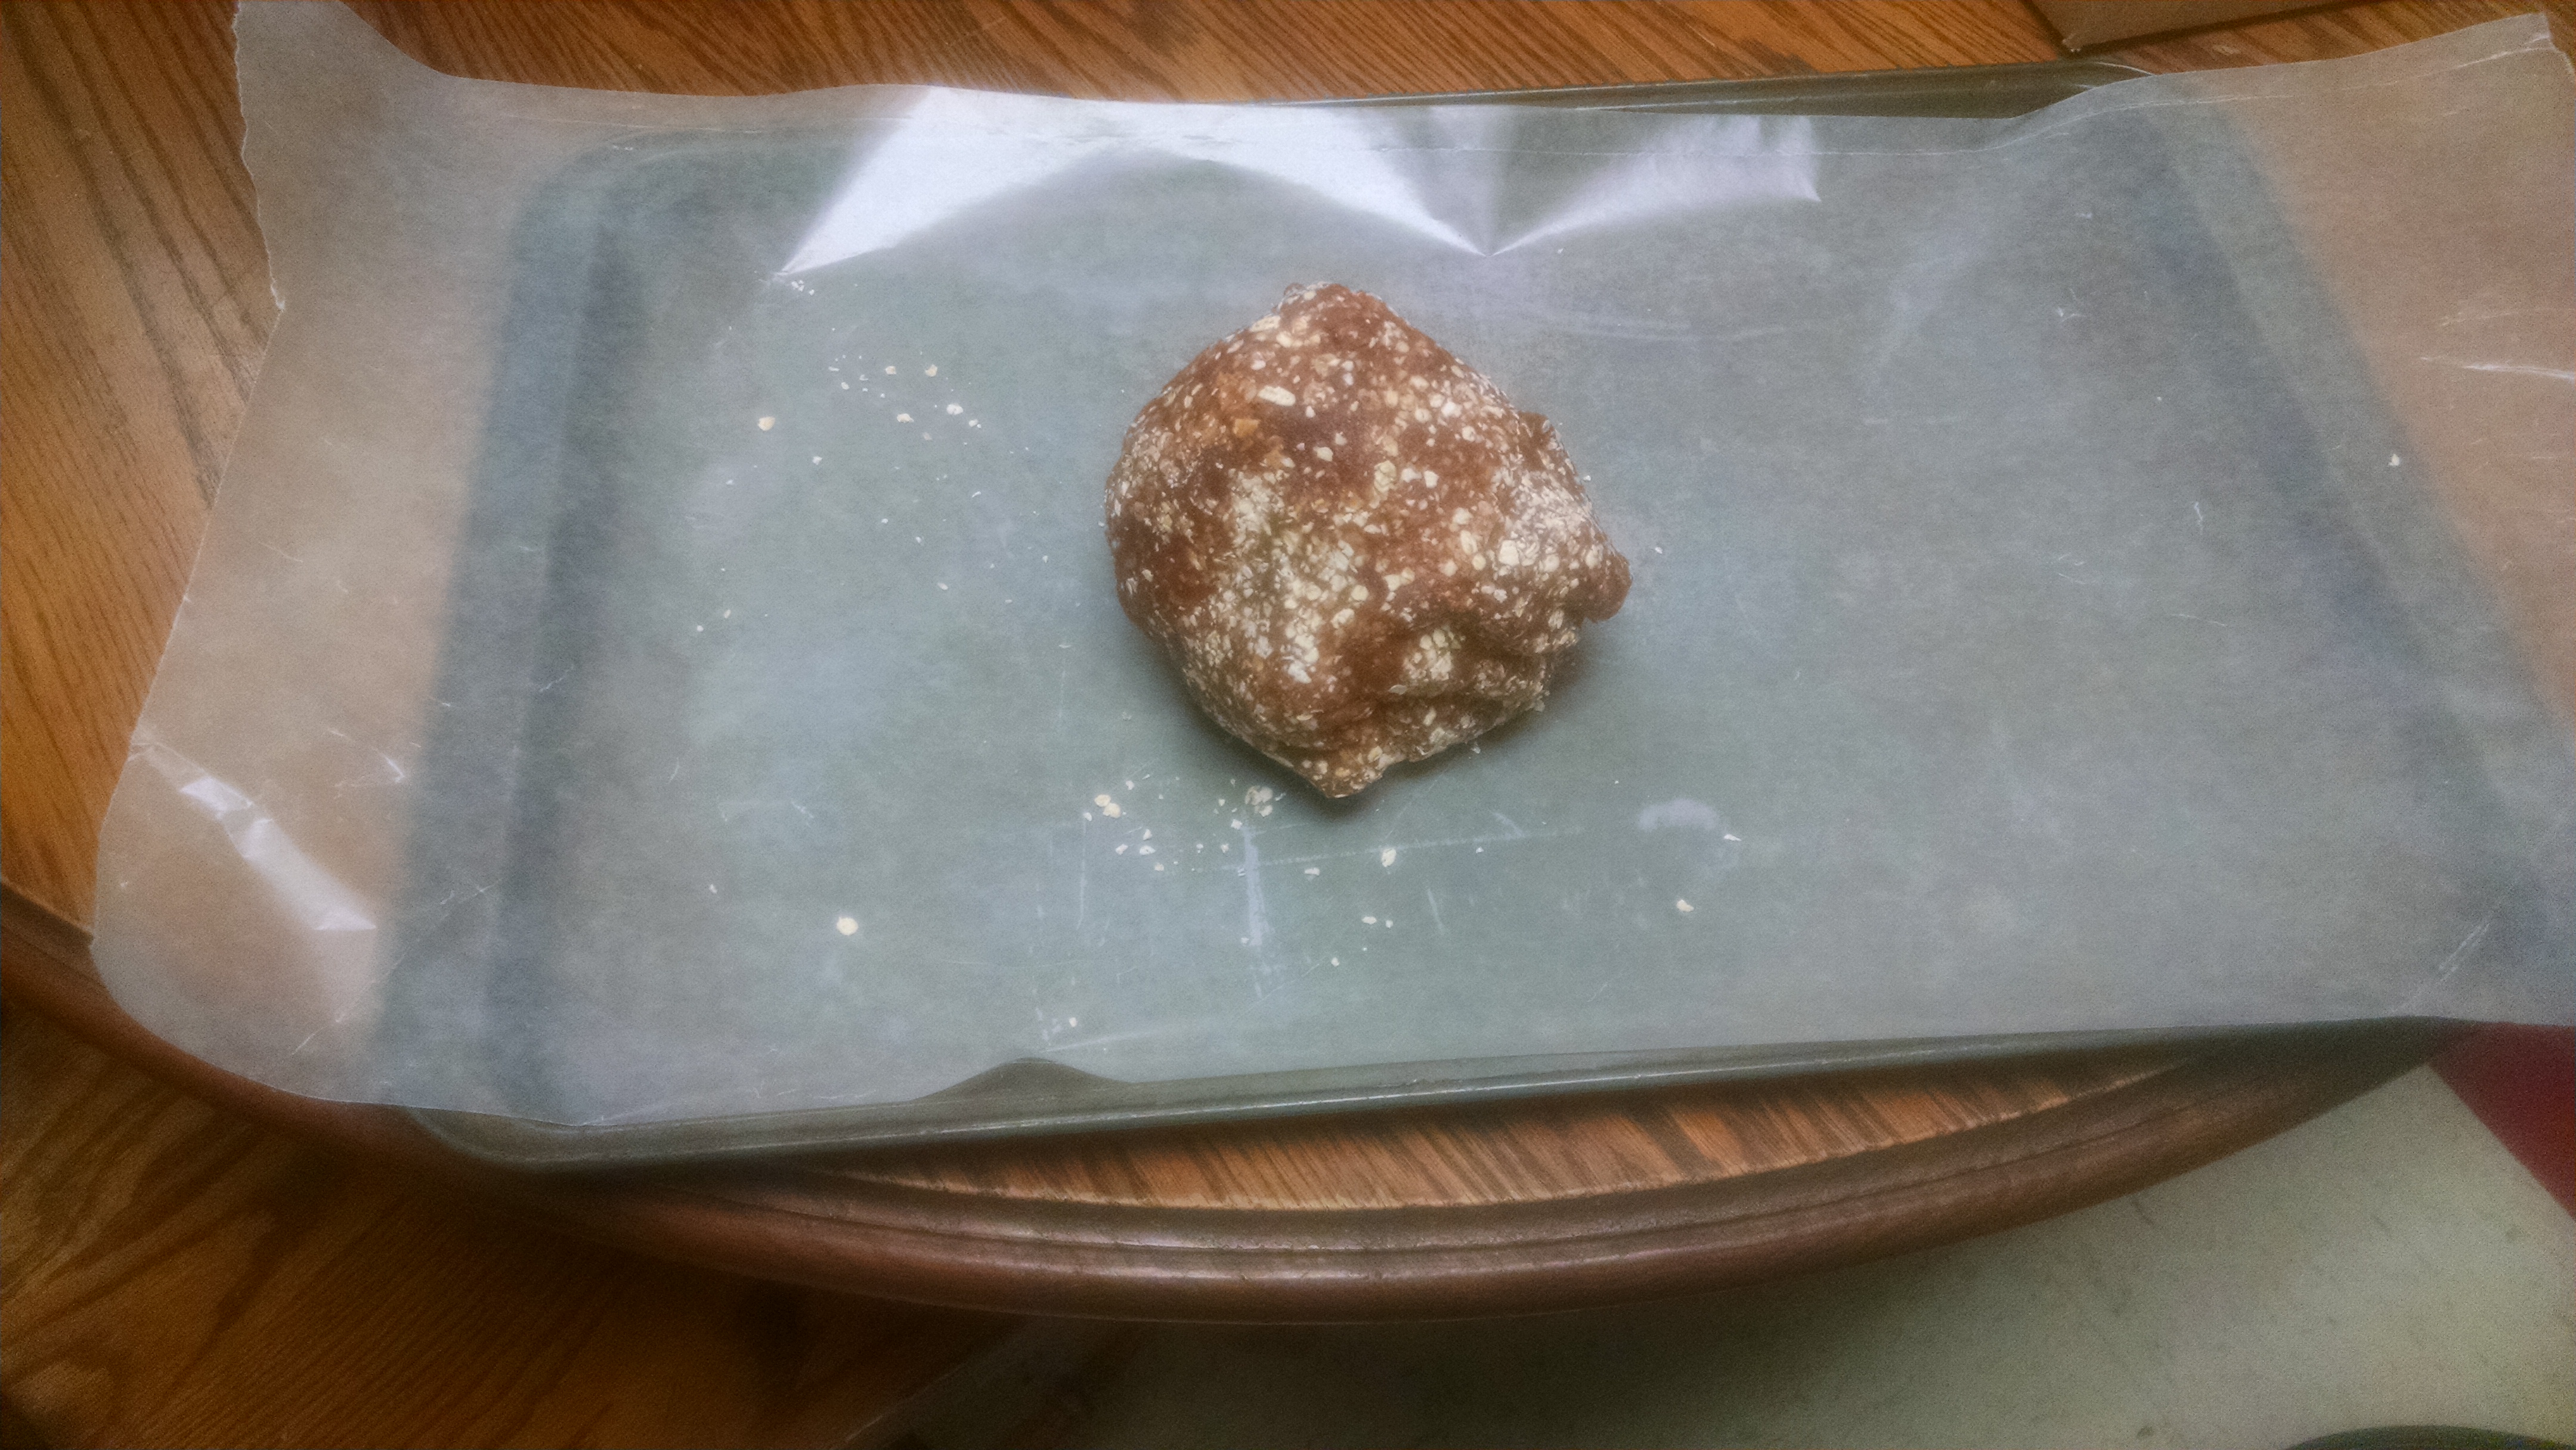
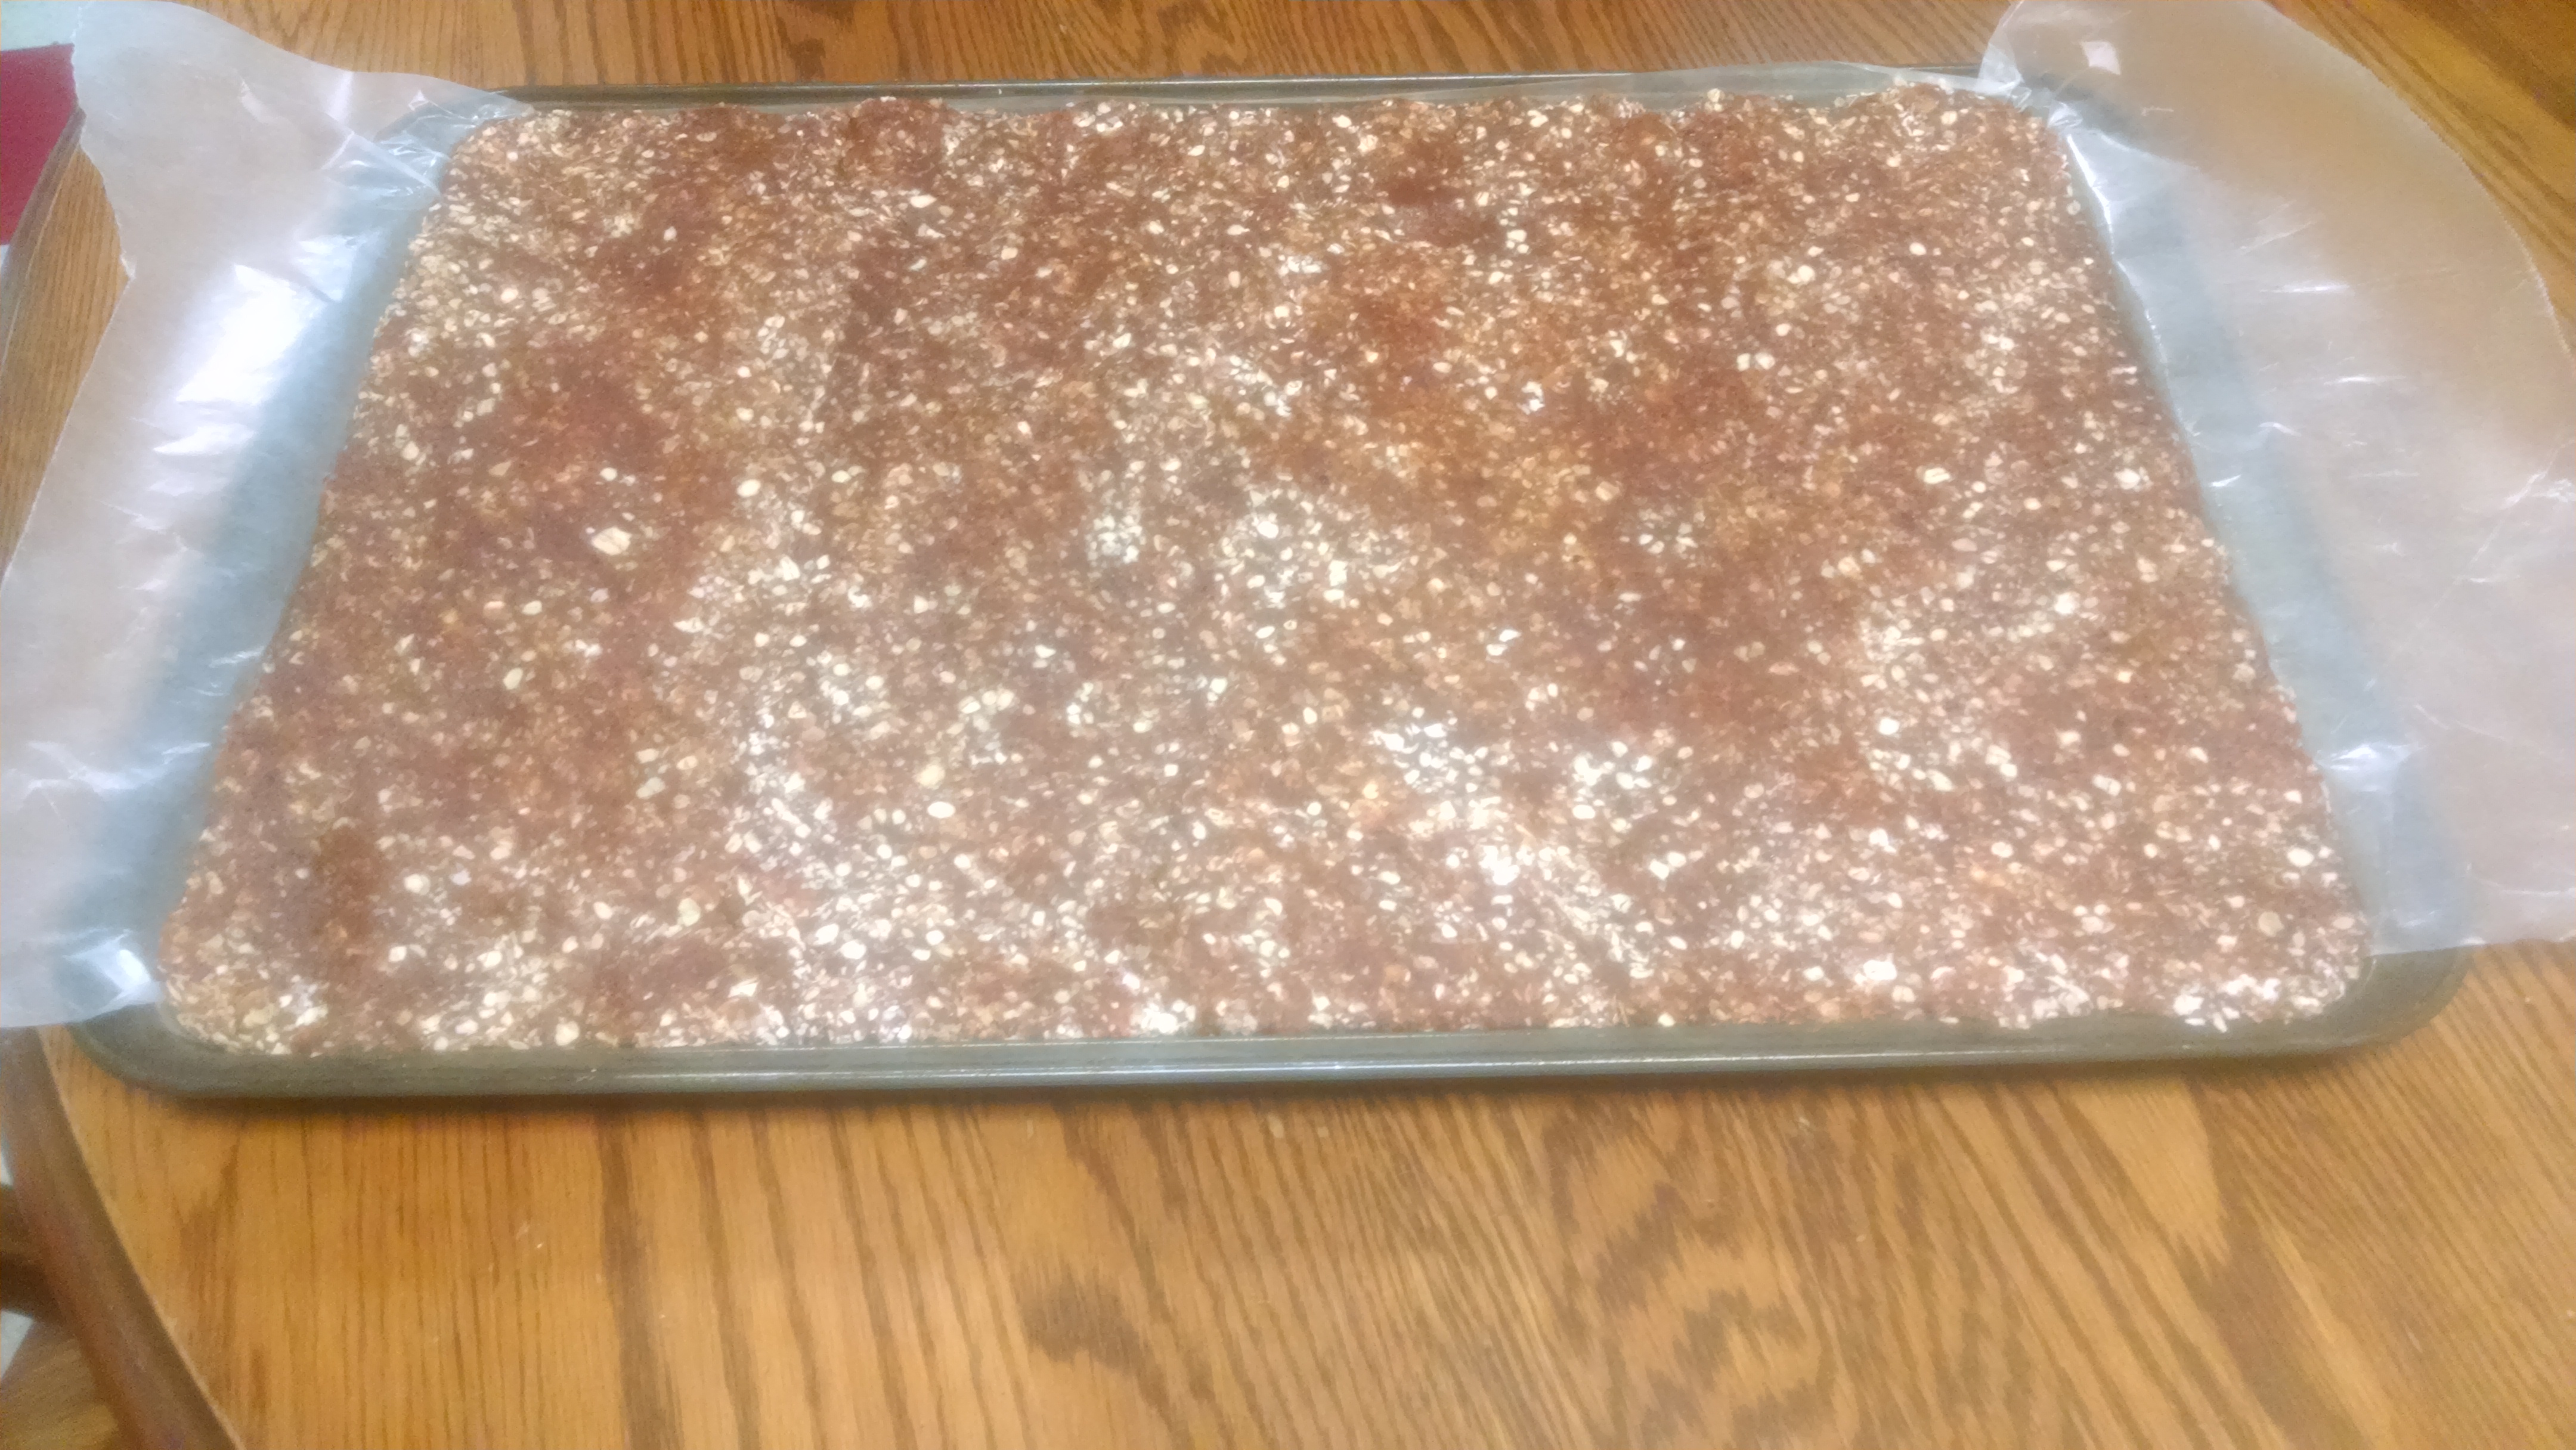
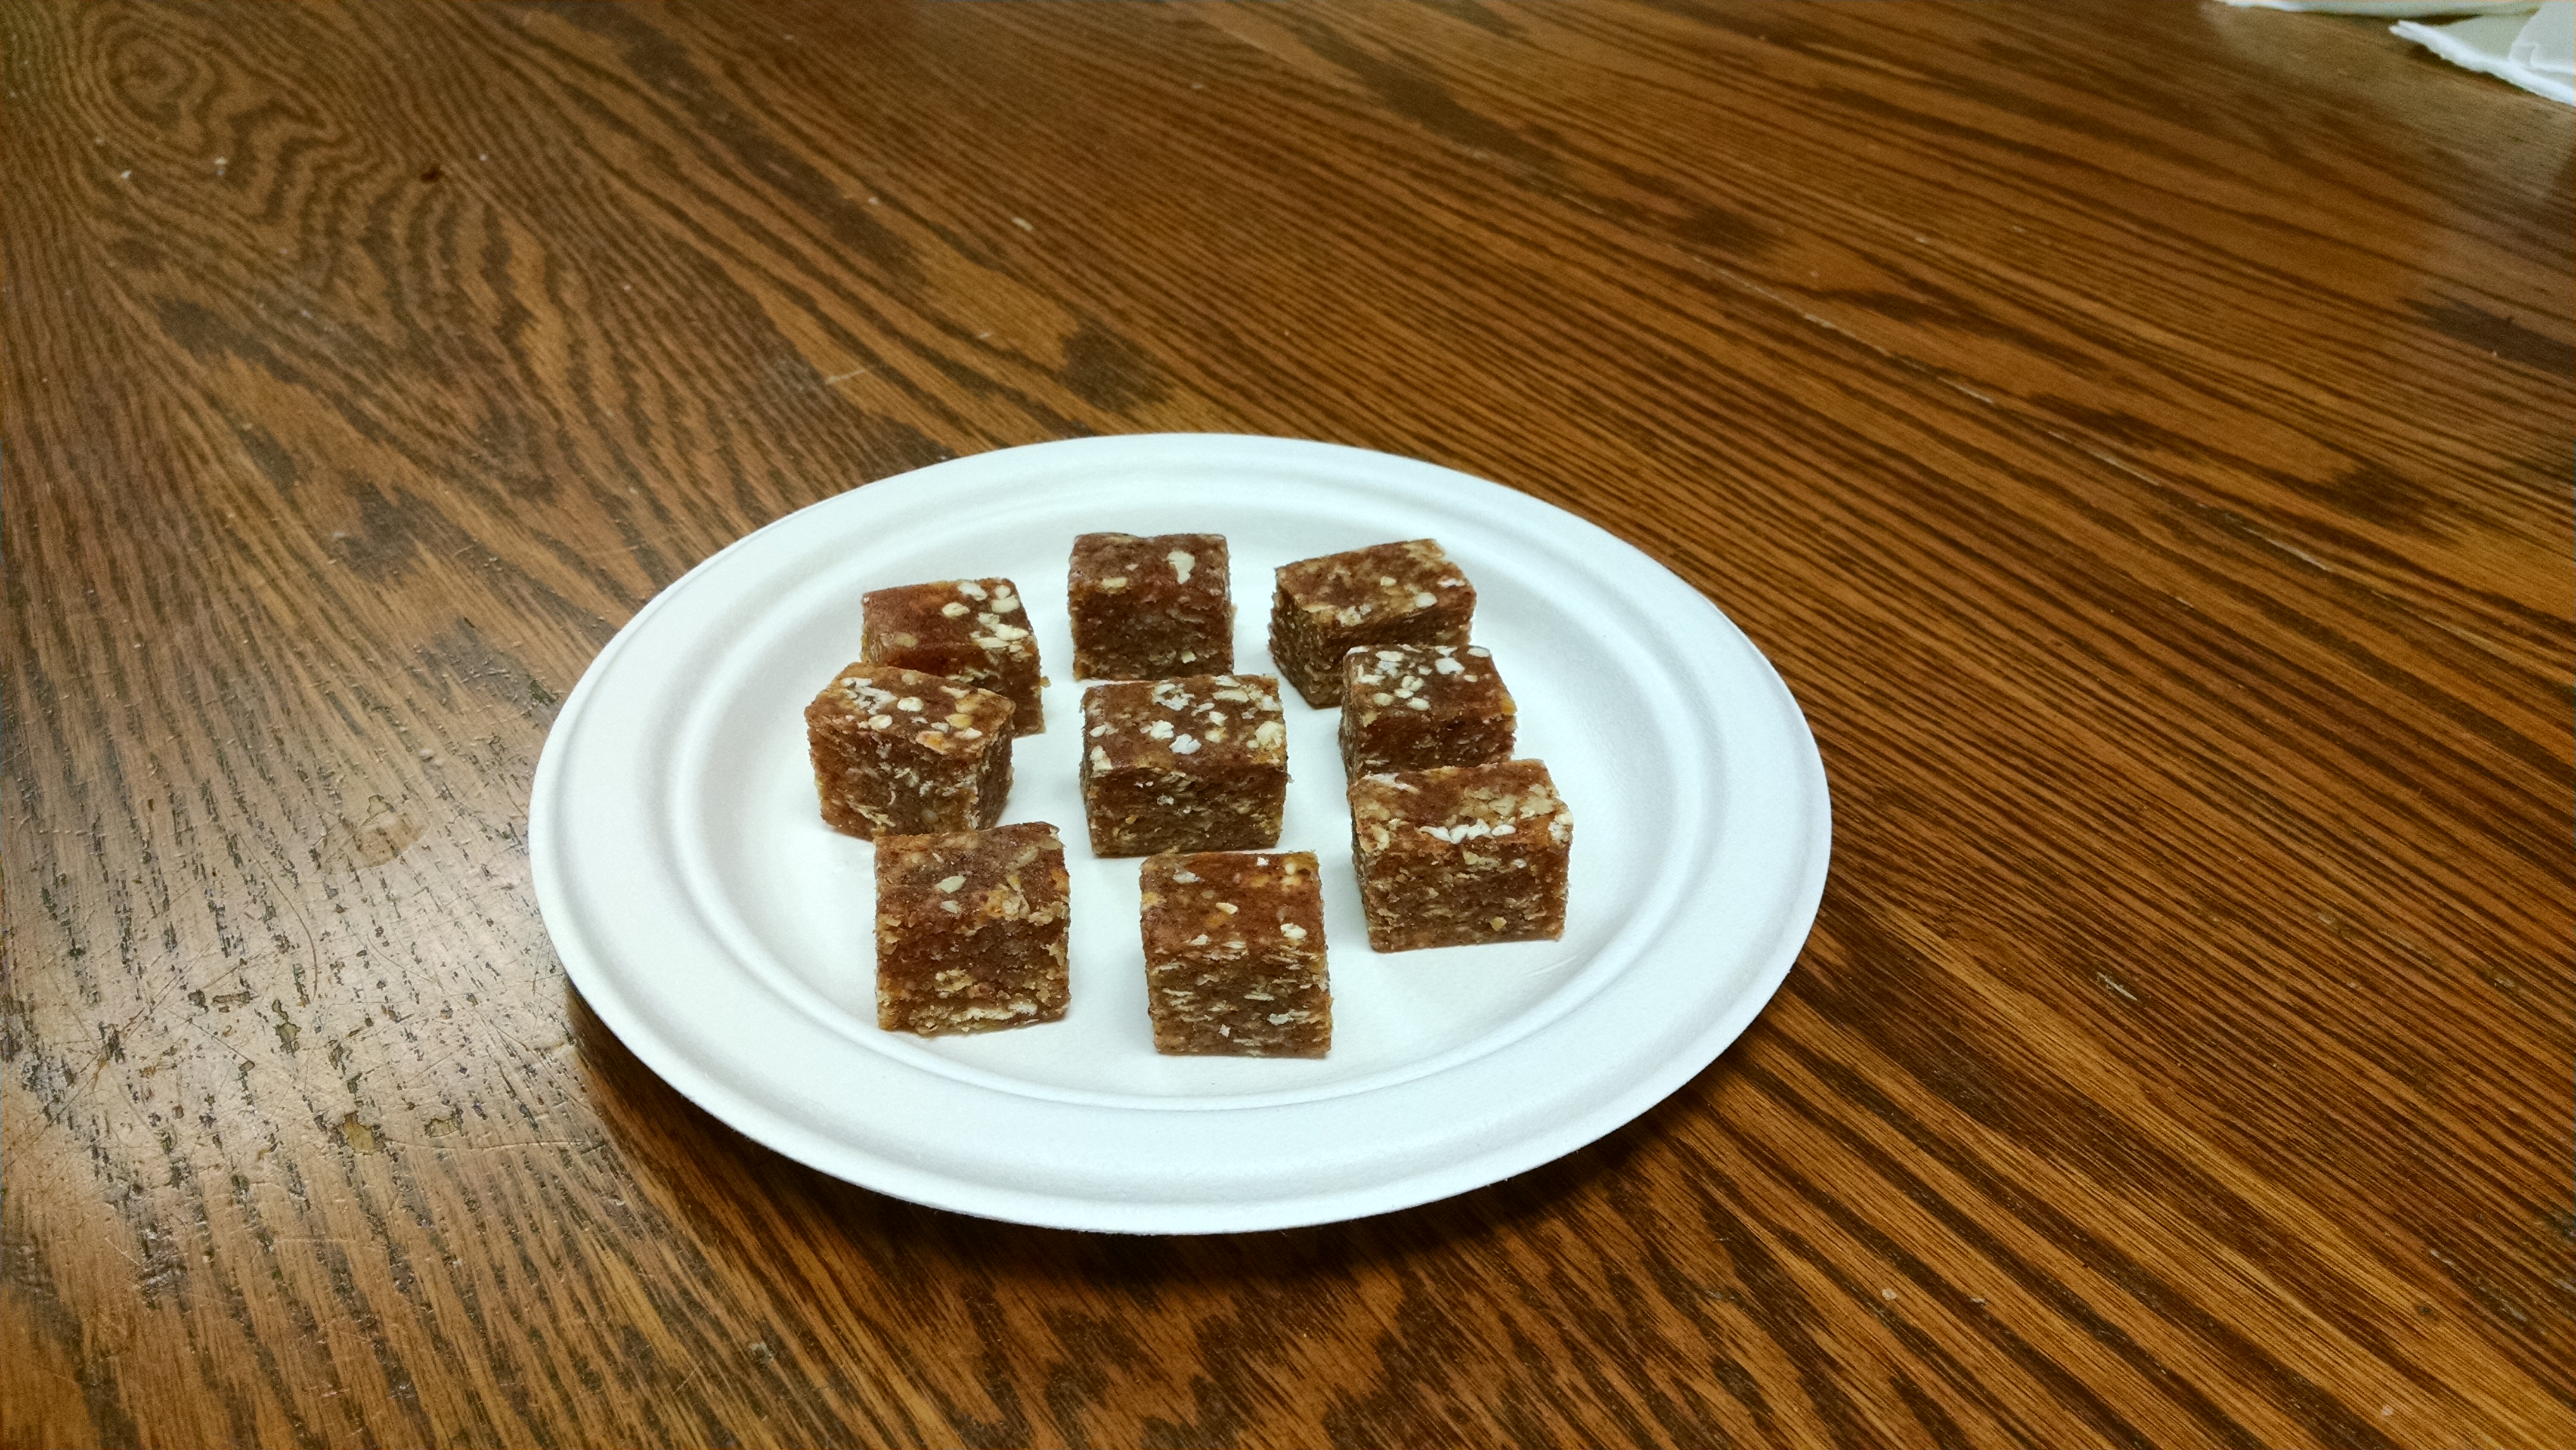
This has become one of my favorite recipes for making quick, tasty and nutritious snacks. The basic recipe is equal parts of two dried fruits, one nut and quick oats. I mix the fruit and nuts in an inexpensive food processor then hand mix the oats in a bowl. I finish by forming bars in a pan between layers of wax paper. Cut and serve or store.
Cranberries, Apricots, Walnuts
Starting to Mix
Mix TFN with Oats
All Mixed
Panned and ready to cool
Cut and Serve
(This is a post in progress. I had a request to get photos up, so here it is dirty. I’ll clean it up and add more specific directions later.)
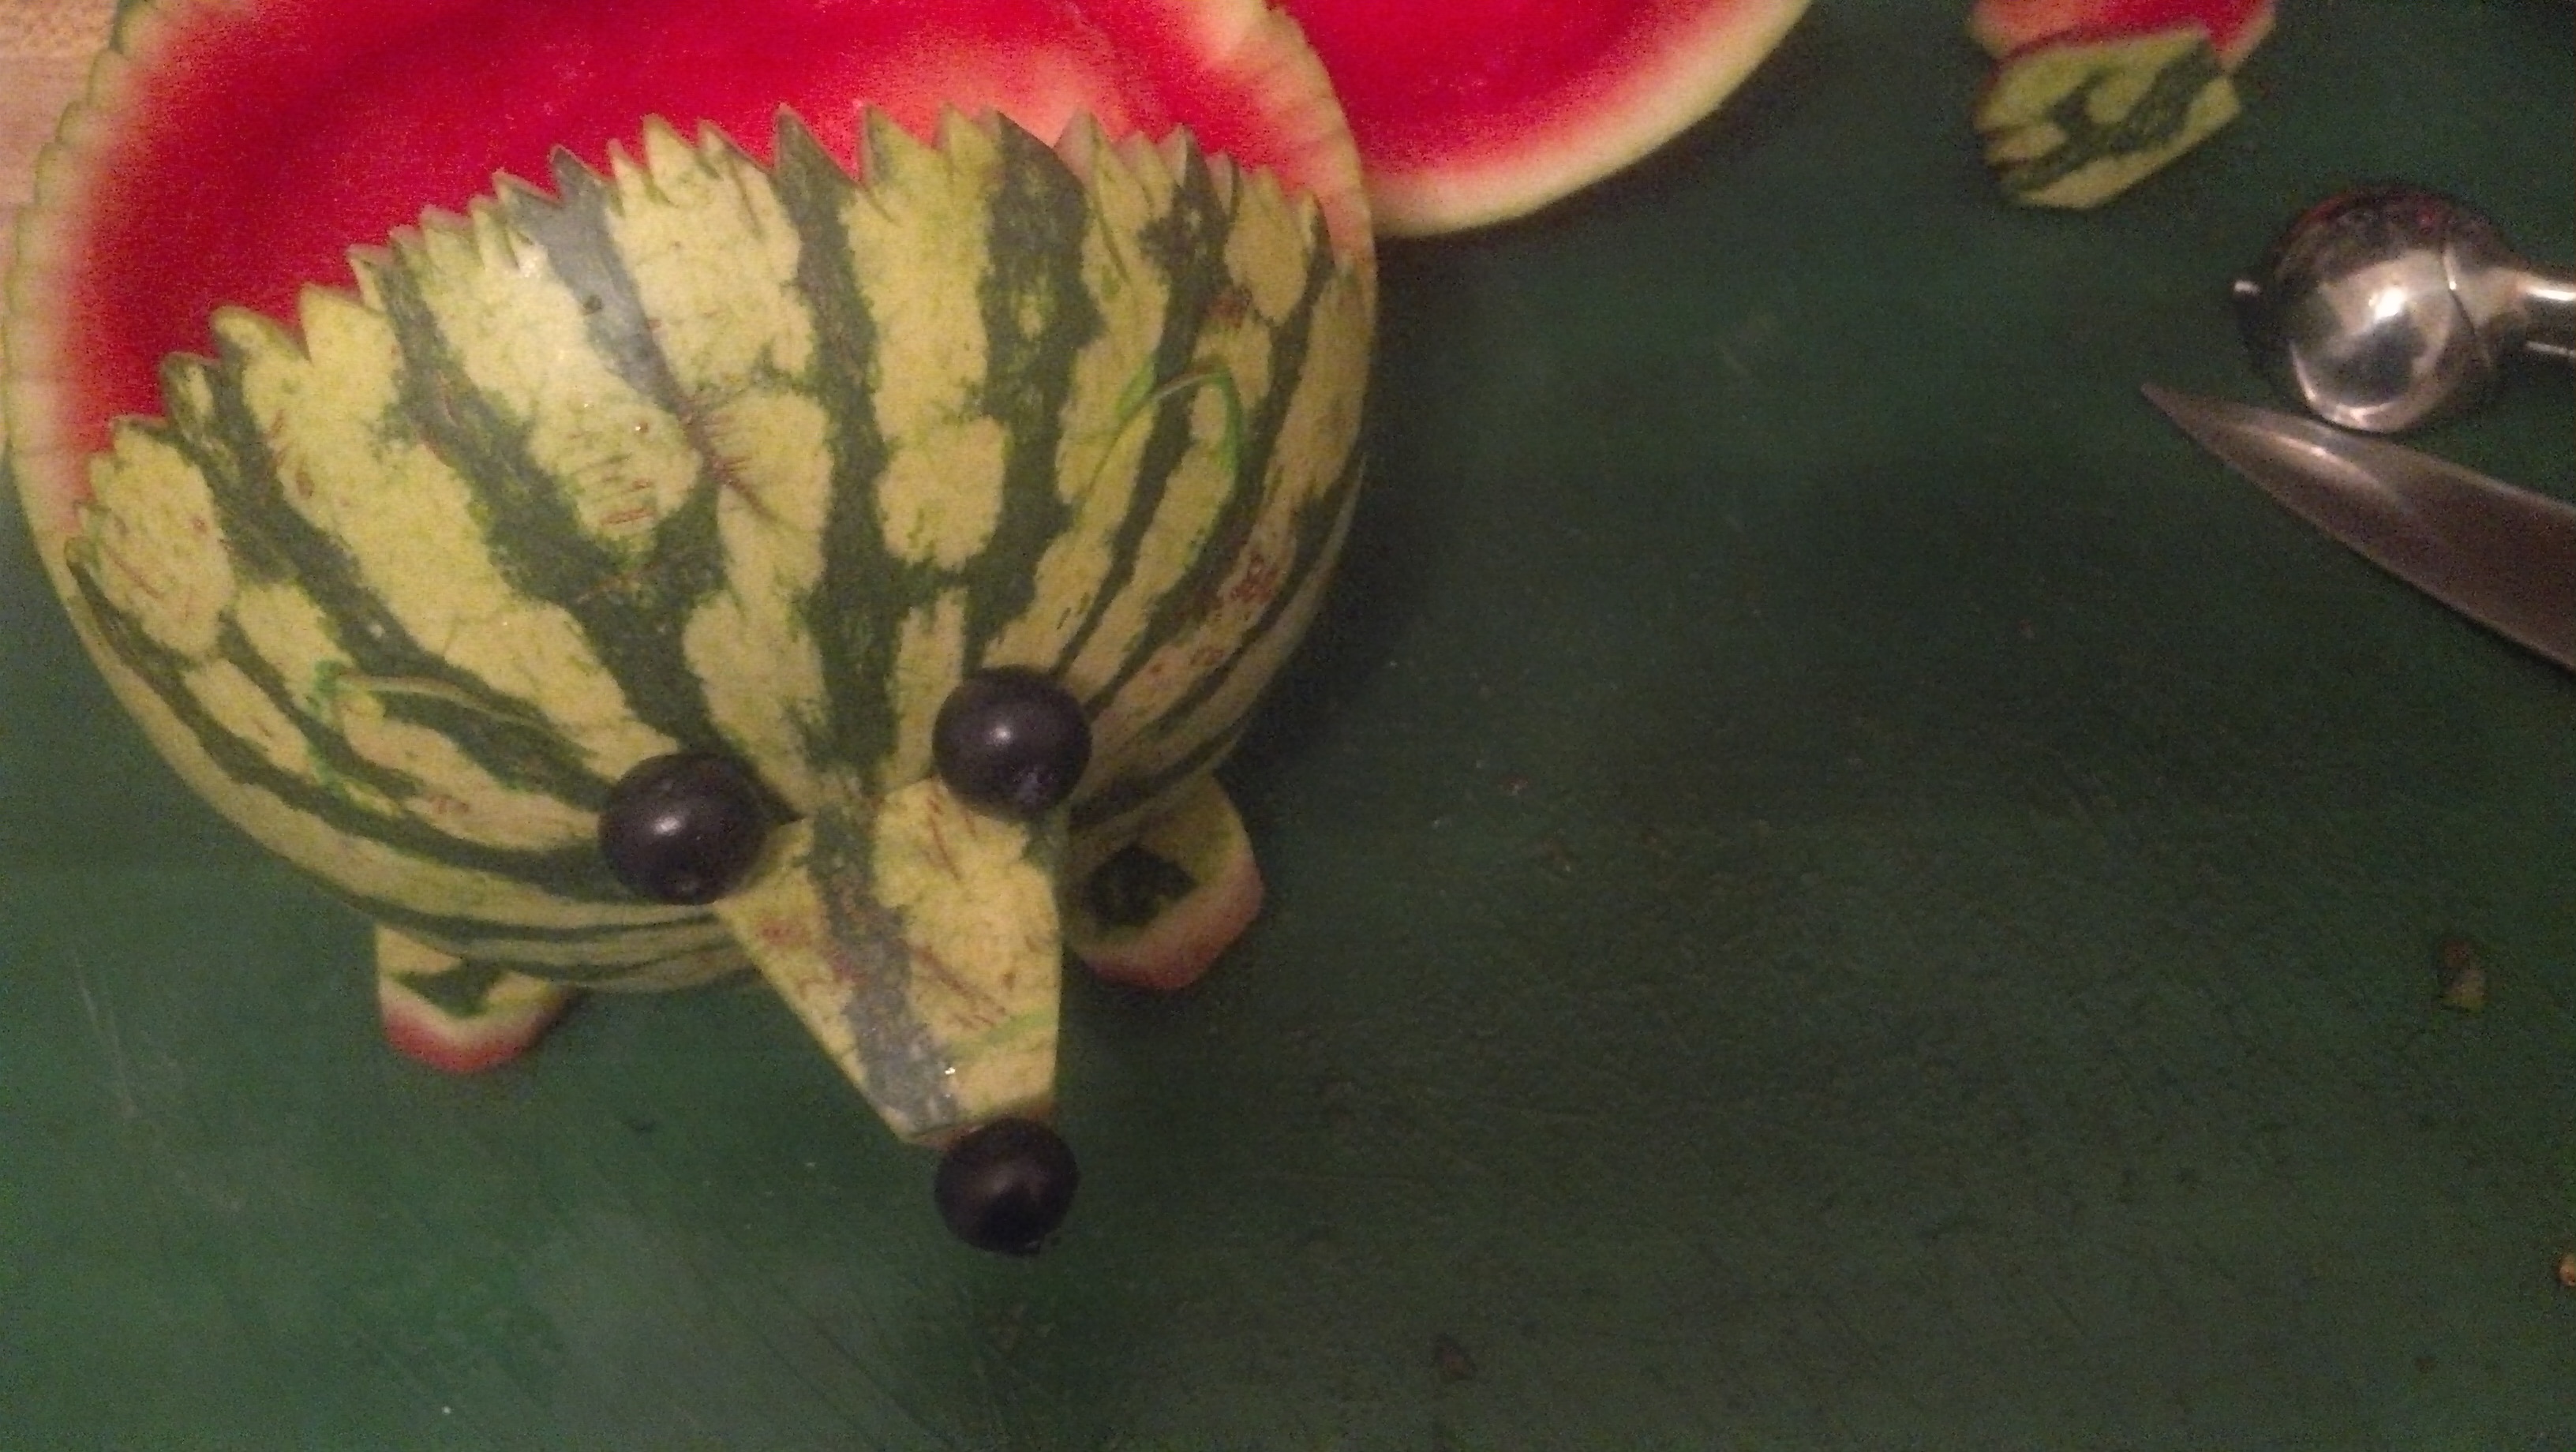
Summer is certainly here, from the heat and crazy thunderstorms with tornadoes, to restless kids that leave a tornado wake behind them. I know we are all scrambling and looking for ways to keep the kids busy in constructive ways. This week, at a local camp, I’ll be teaching a class on How to Eat a Hedgehog. For all my activist friends, don’t worry, I won’t be teaching kids how to roast their pets. Instead, we’ll celebrate those cute little animals they just can’t get enough of.
We’ll start with a watermelon hedgehog. Since I’ll be teaching this in a couple of days, I thought it wise to try what I’m going to teach. So, I found the instructions online, pulled them up on the iPad and headed for the kitchen with a small melon under my arm.
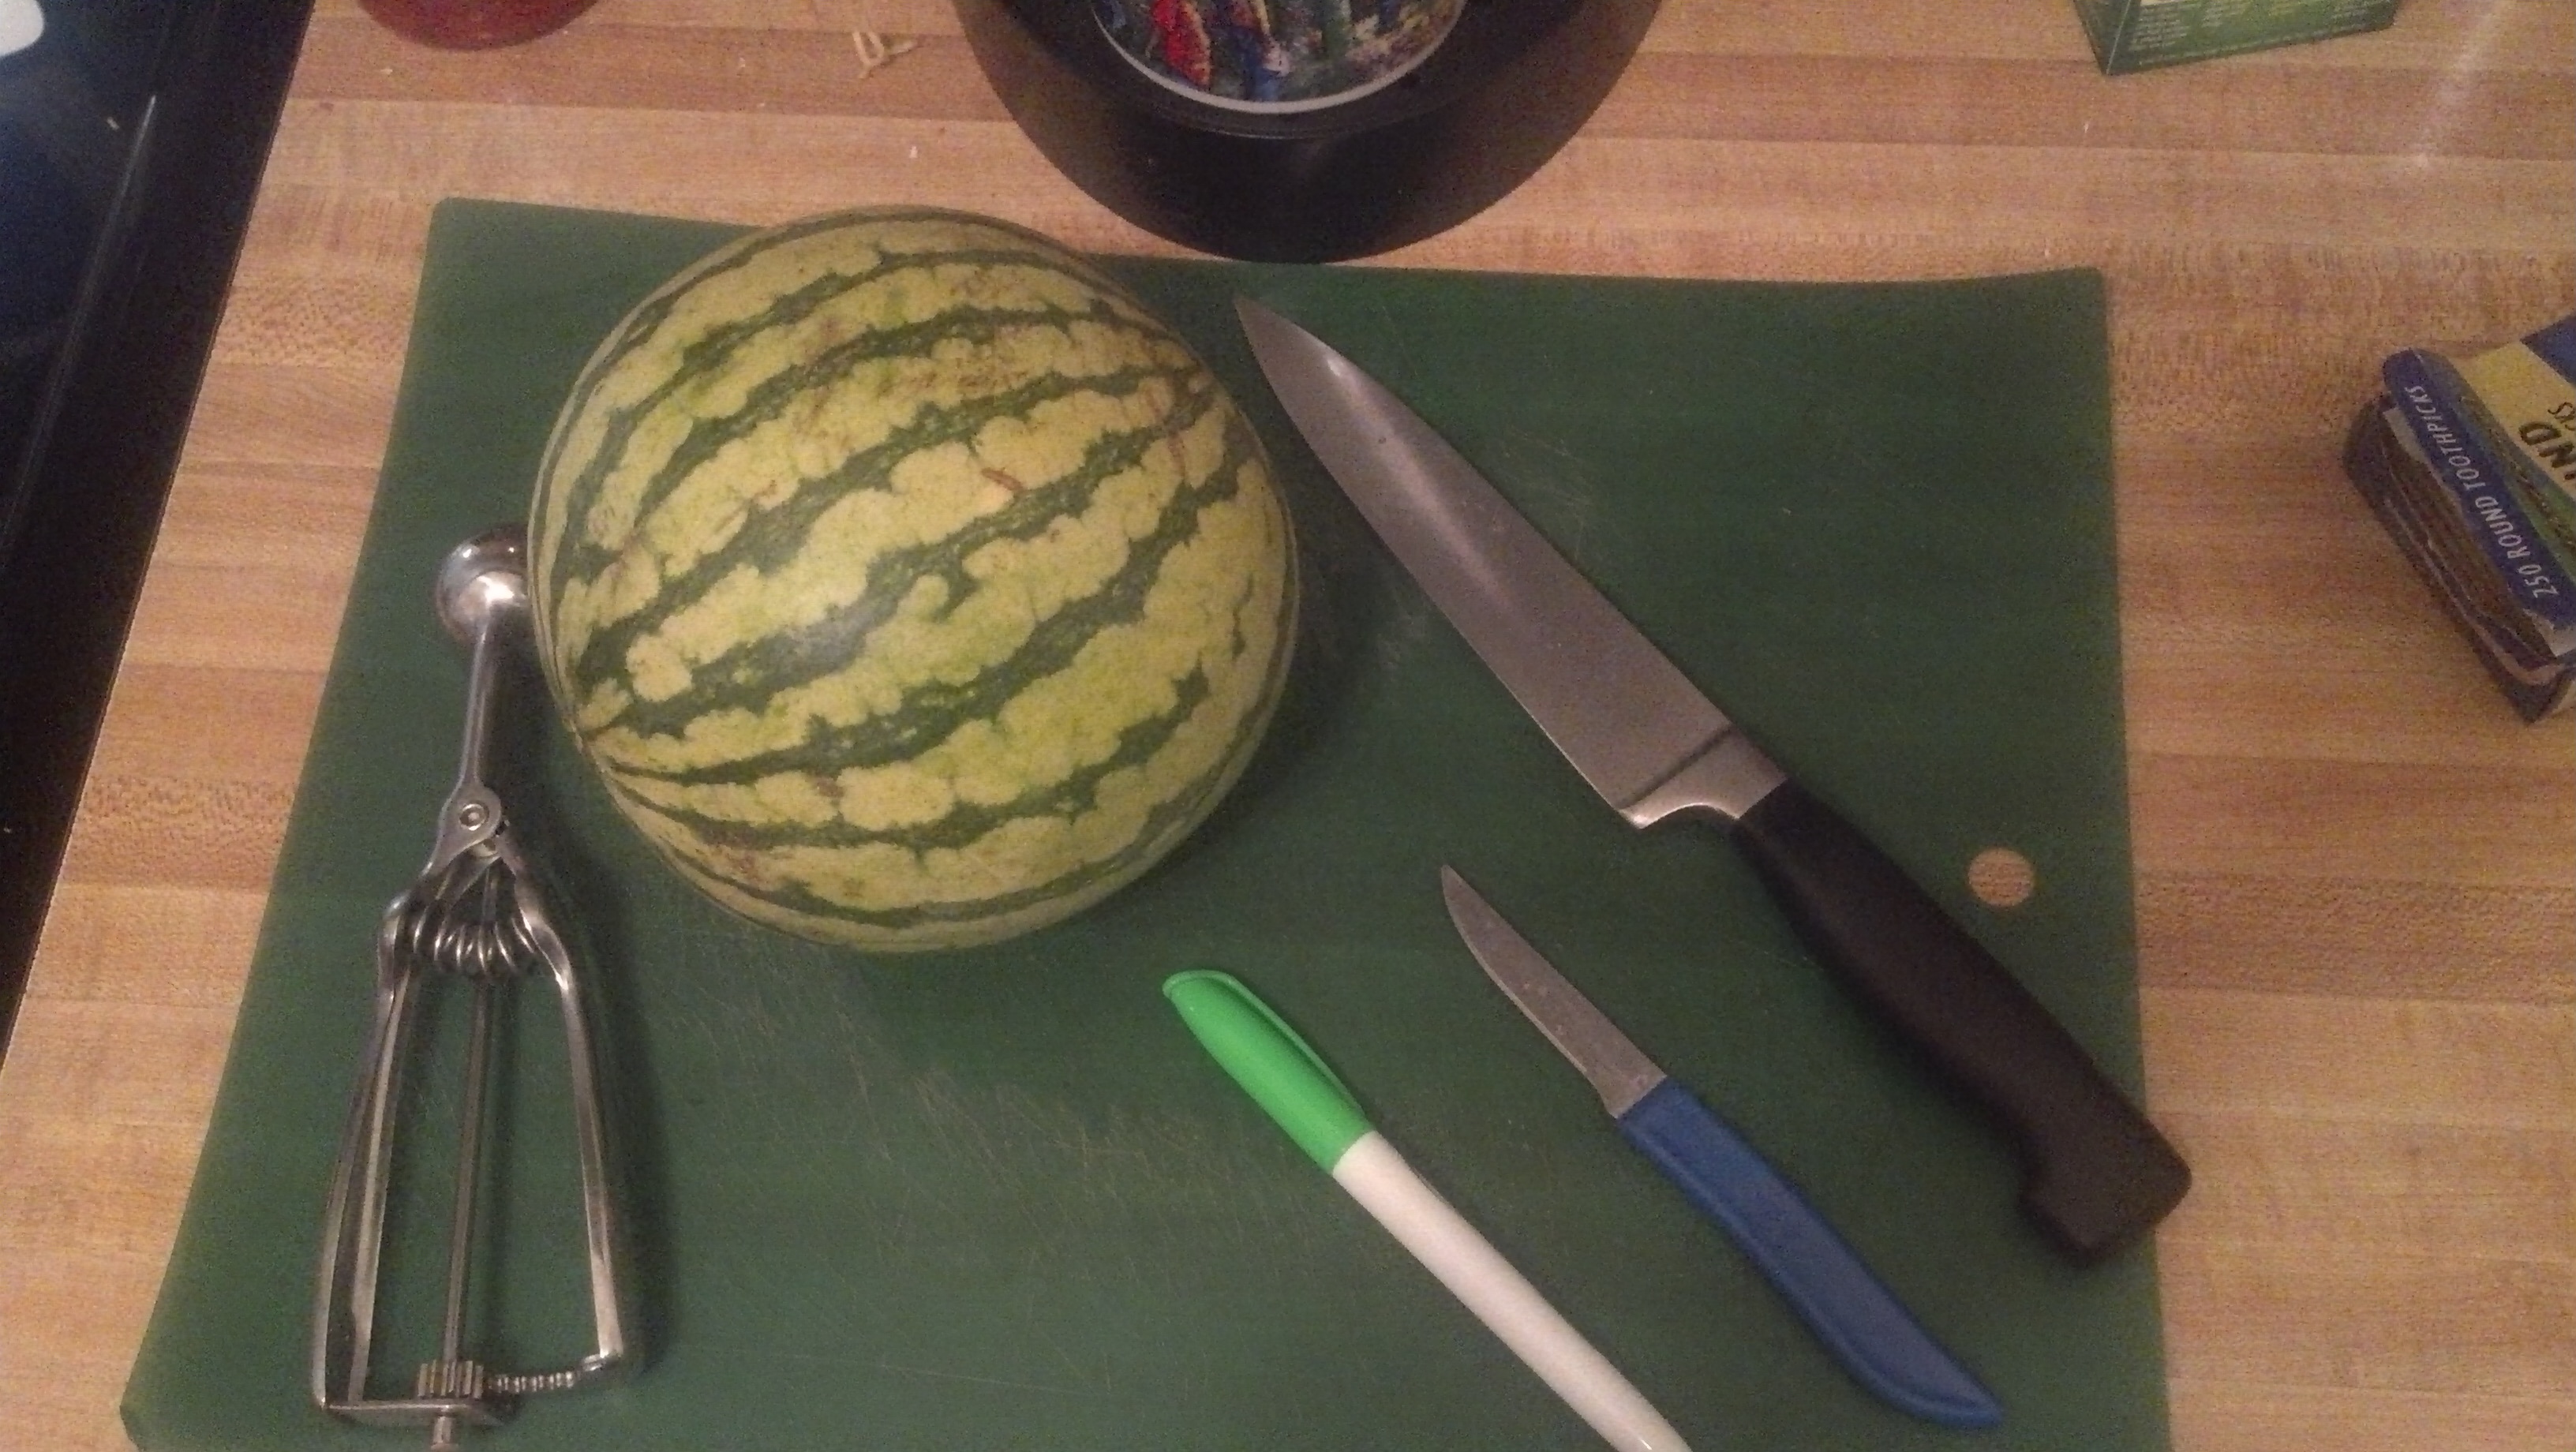
What you’ll need:
One Watermelon
Cutting Board/Mat
Green Dry Erase Marker
Large Knife
Pairing Knife
Melon Baller or Cookie Dough Baller
Bowl for holding melon flesh
toothpicks
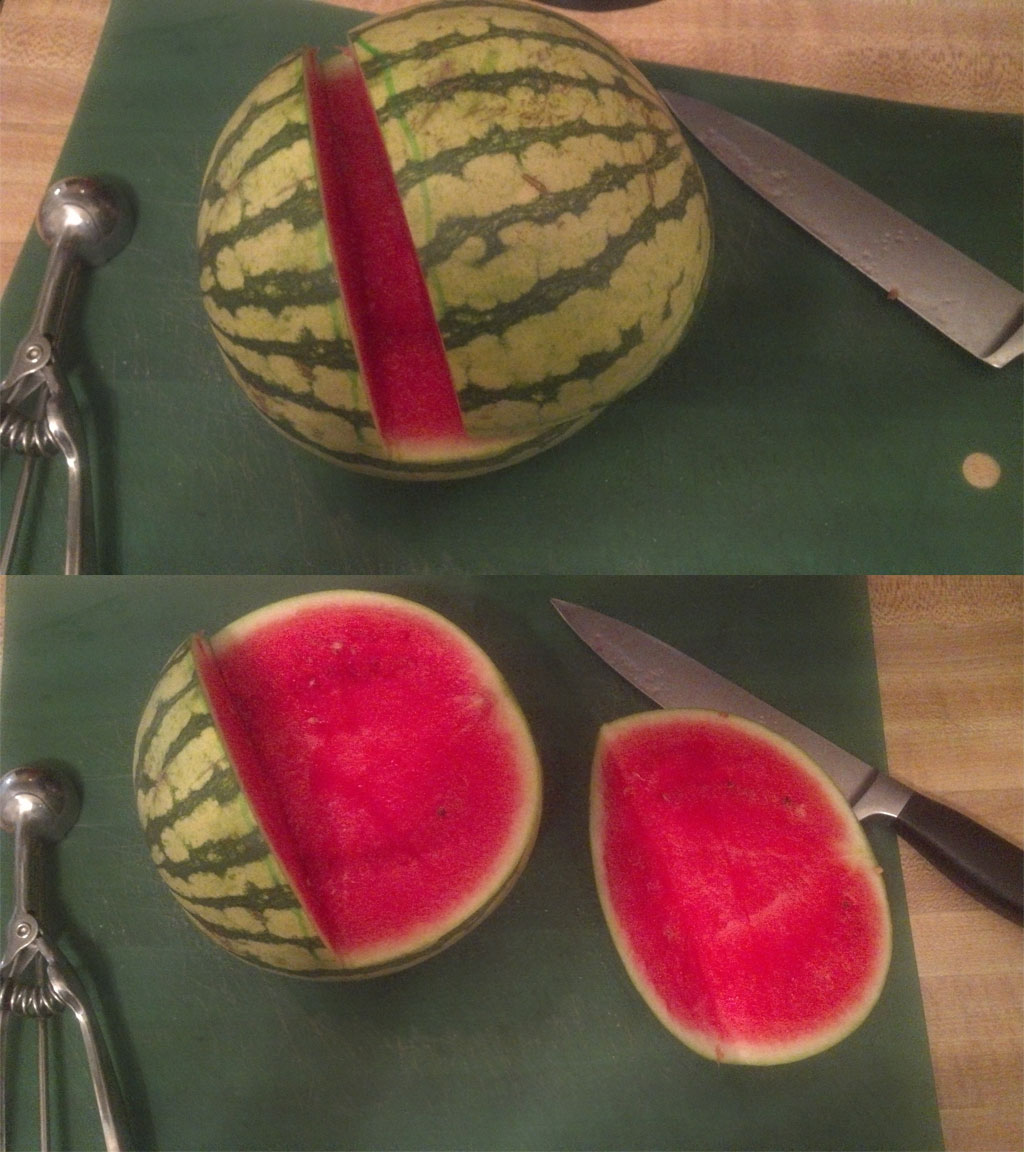
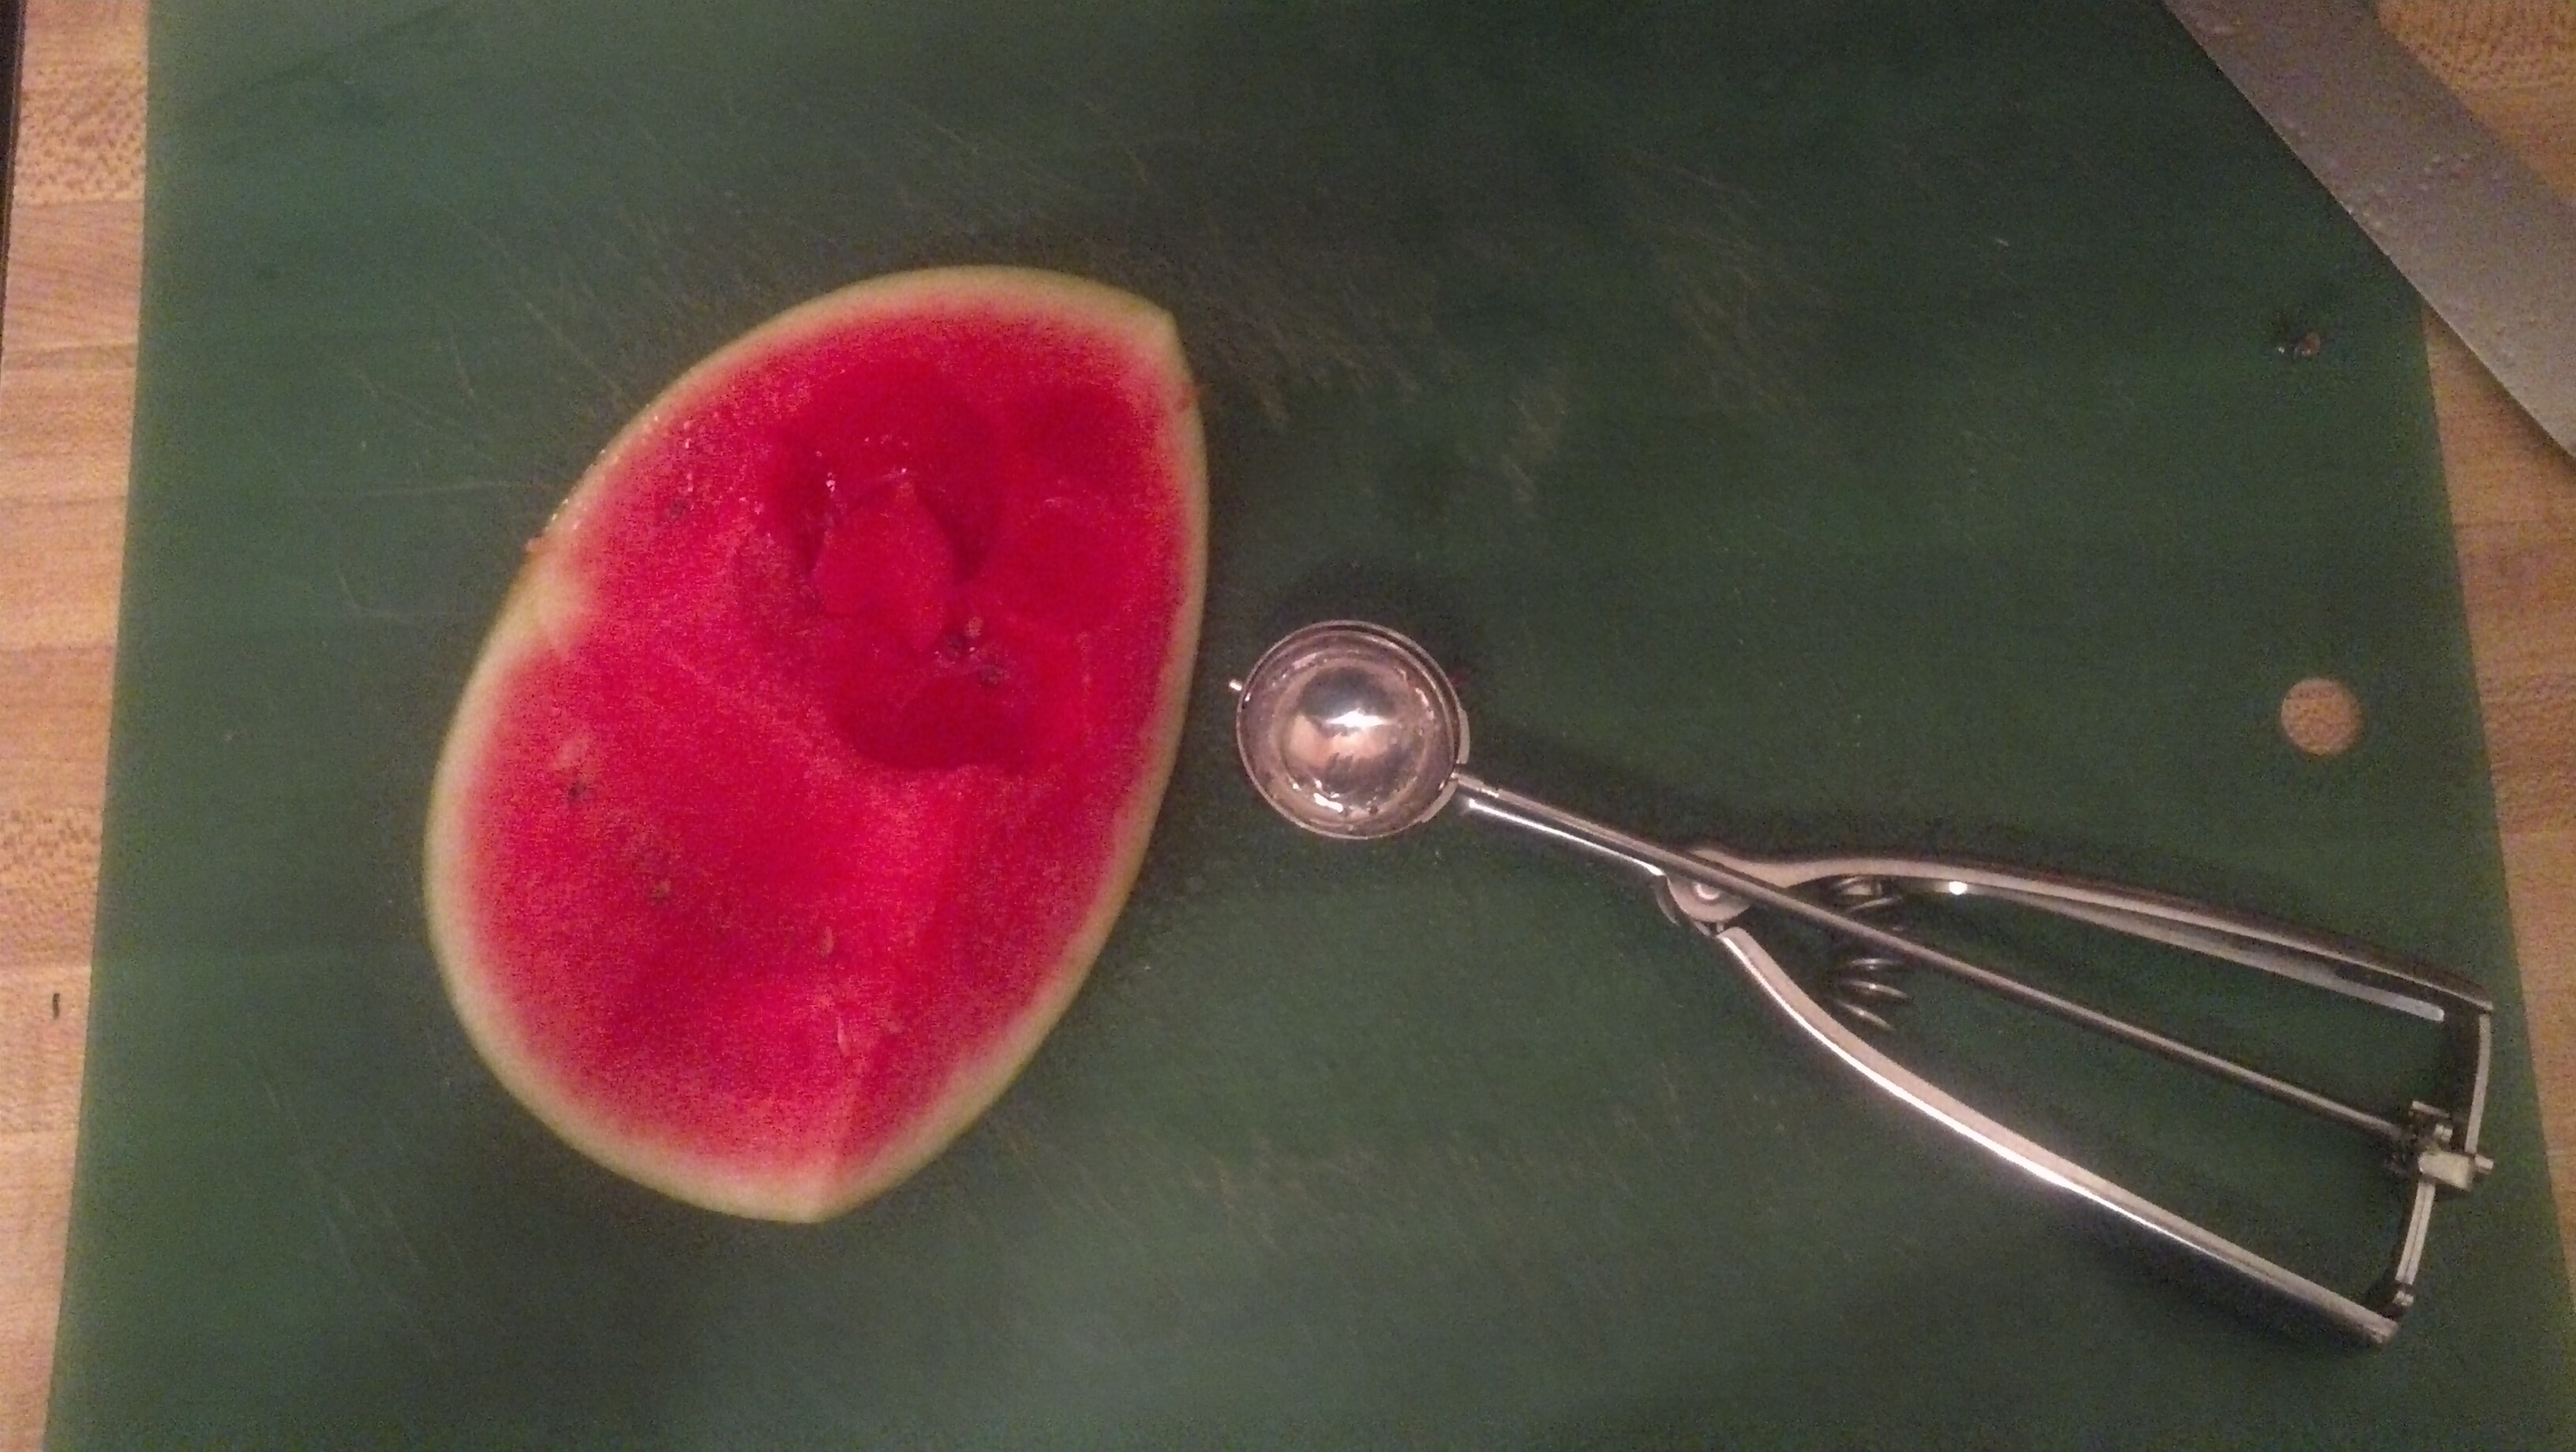
Start by finding the flat side of the melon. This is usually easily identified as the spot is yellow, or not as bright green as the rest of the melon. This is the side of the melon that was sitting on the ground. Cut just enough off of this side, to help the melon sit without rolling. WARNING: If you cut to deep, the watermelon will drain through your cut leaving a pool of hedgehog, err… I mean watermelon juice on the counter. I was using a small melon, so the rind, white part, was pretty thin and I had to be very careful.
Identify the front of your hedgehog. For me, I used the stem as the placement for the nose. You may want to choose the other end depending on the shape of your melon. Next, you will want to mark your cut for the body with a green dry erase marker. I started a cut between 1/3 and 1/4 of the way back from the front of the melon. Mark from the top straight down the sides to just above half way. Then, when you are happy with your lines, cut the back off of your melon.
Now, go after your melon with the baller. I used a bowl to hold the melon as I cut it. The bowl also collected the juice from the cut melon and kept my counter relatively clean. Obviously not all the balls will be perfectly shaped, but that’ll be just fine. *One thing to note here, is that since I was using a small melon, the rind was quite thin. You have to be careful not to cut too deep into the rind, especially where you made your cut in the bottom or, you’ll end up with hedgehog juice all over, and nobody wants that.
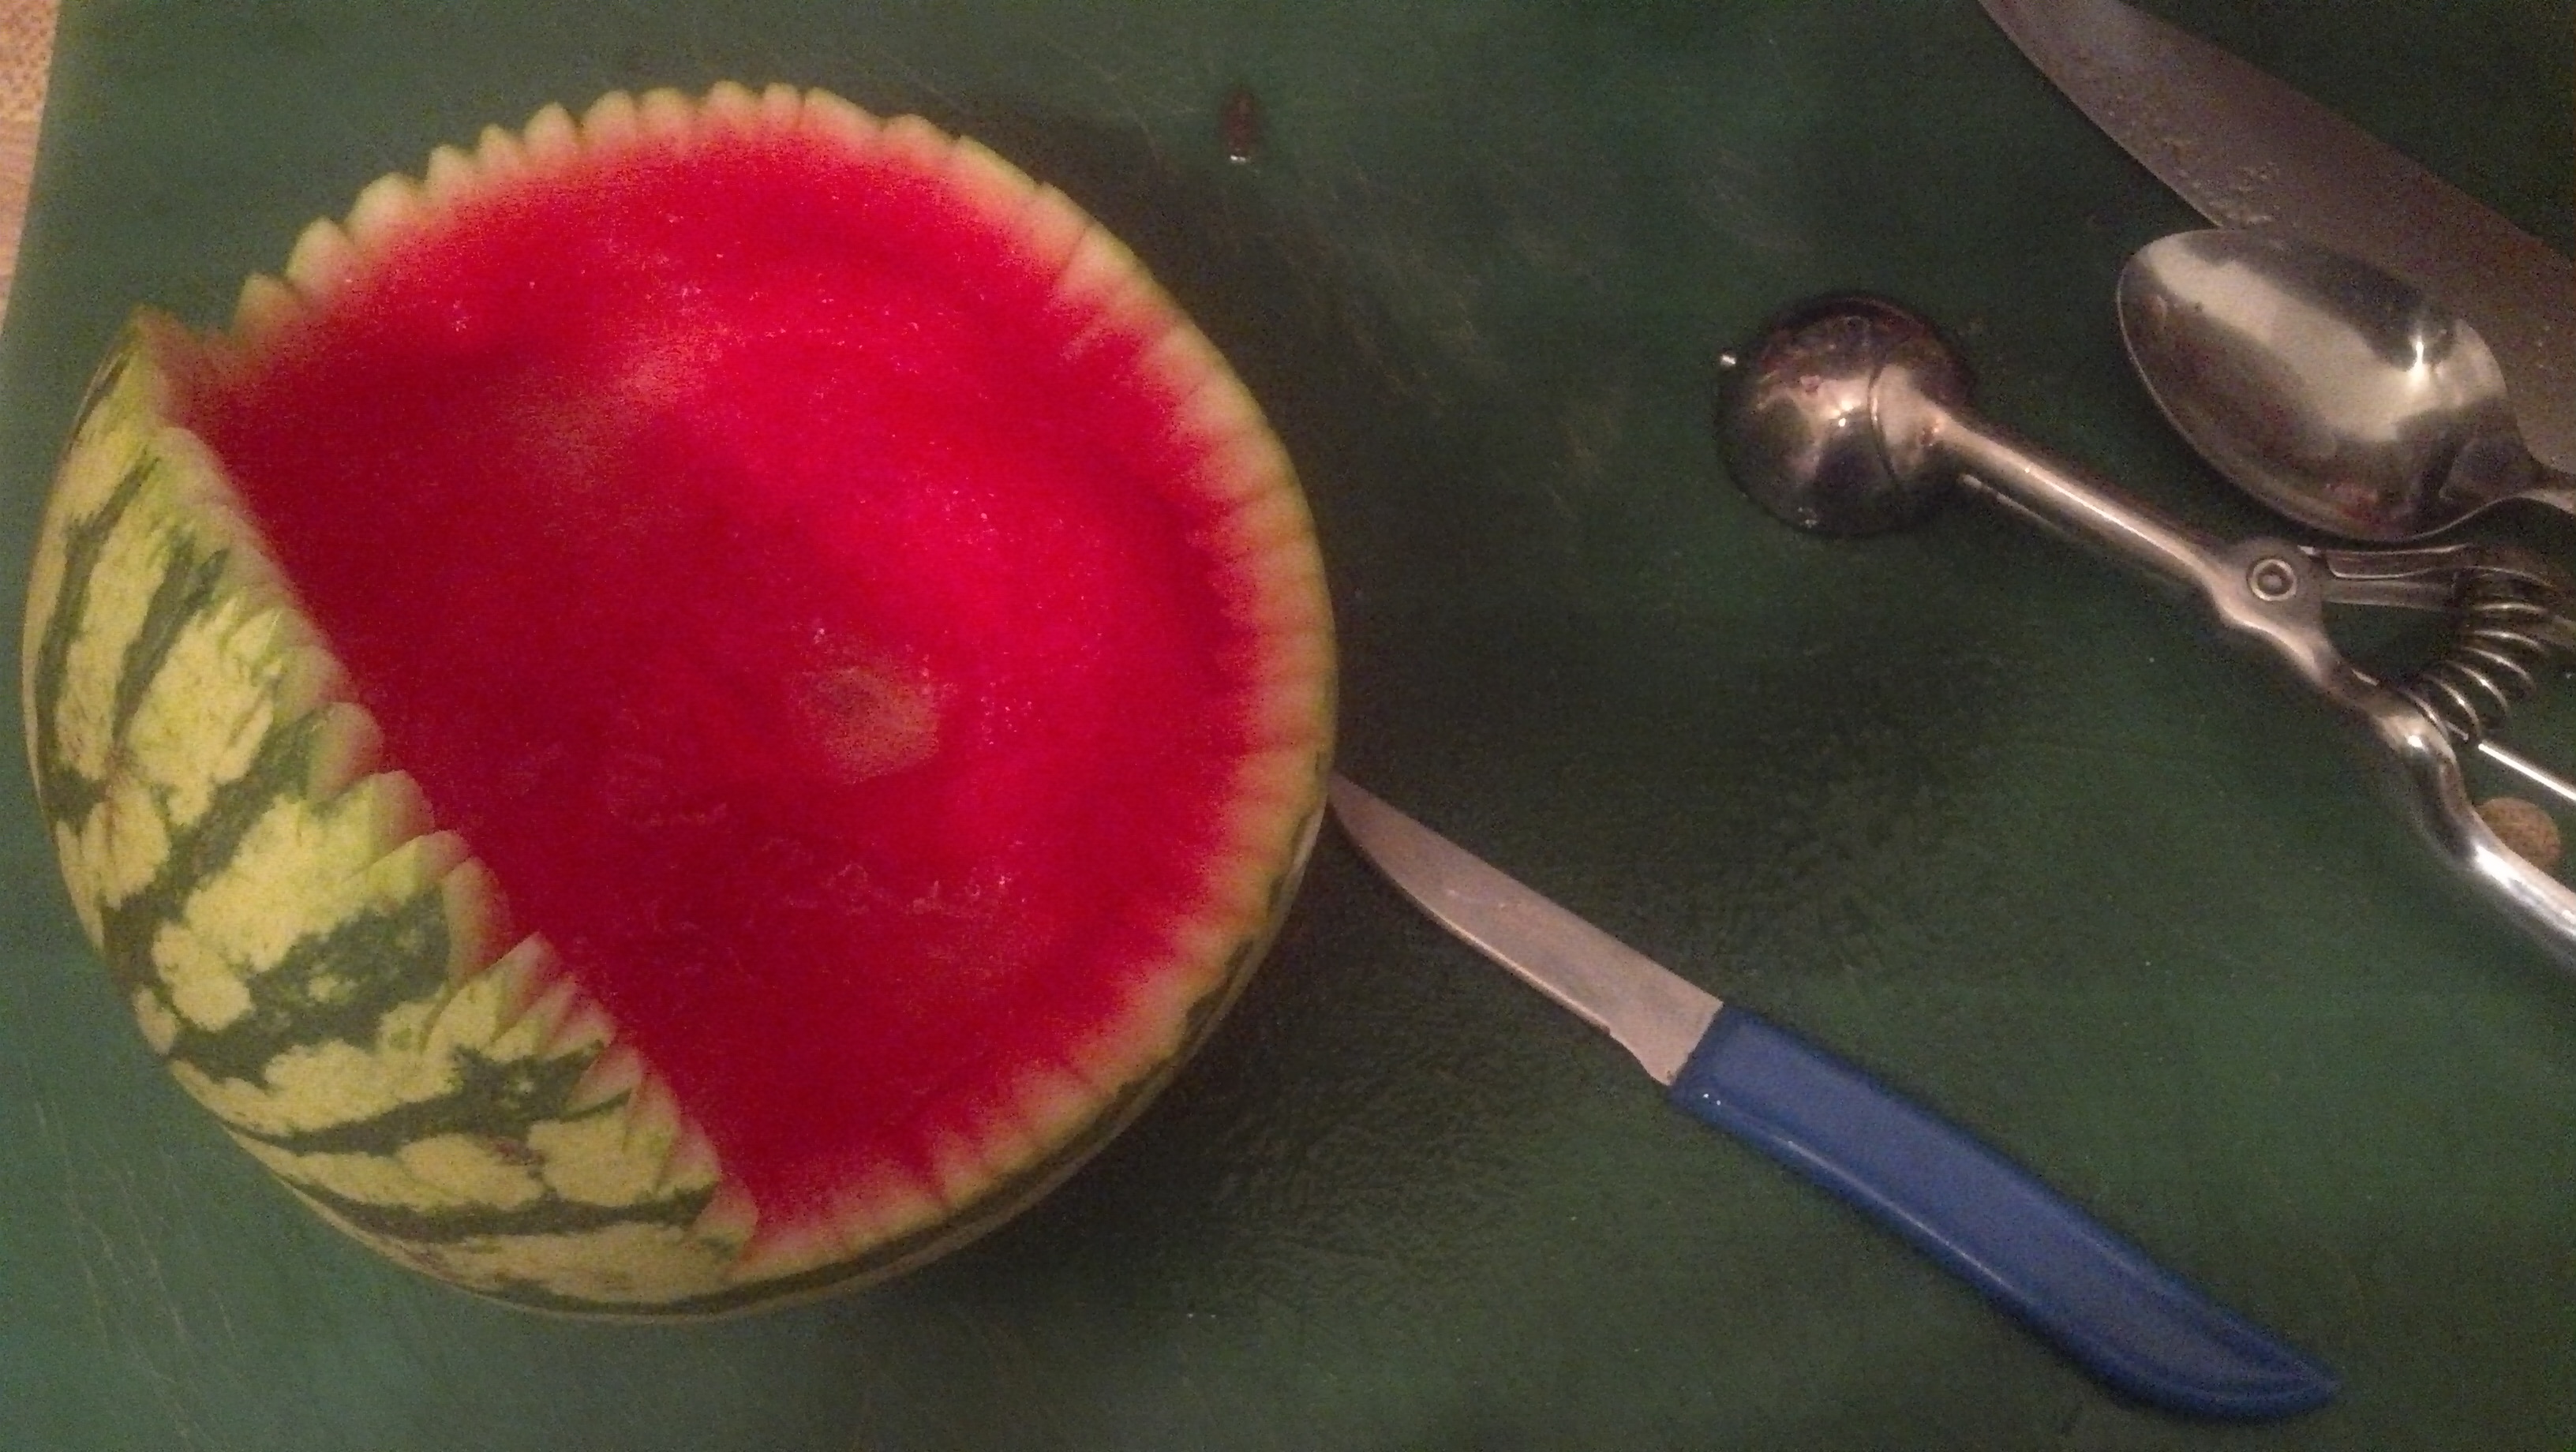
It’s time to start adding the details. Using your paring knife, make small cuts around the edges. Vary the size angles and shapes. This will help add to the look and effect. You can’t really go wrong here, as long as you don’t make your cuts too big. Have fun and add some variety. Sharp points mixed with curves and the like will do a good job resembling the fur on the hedgehog.
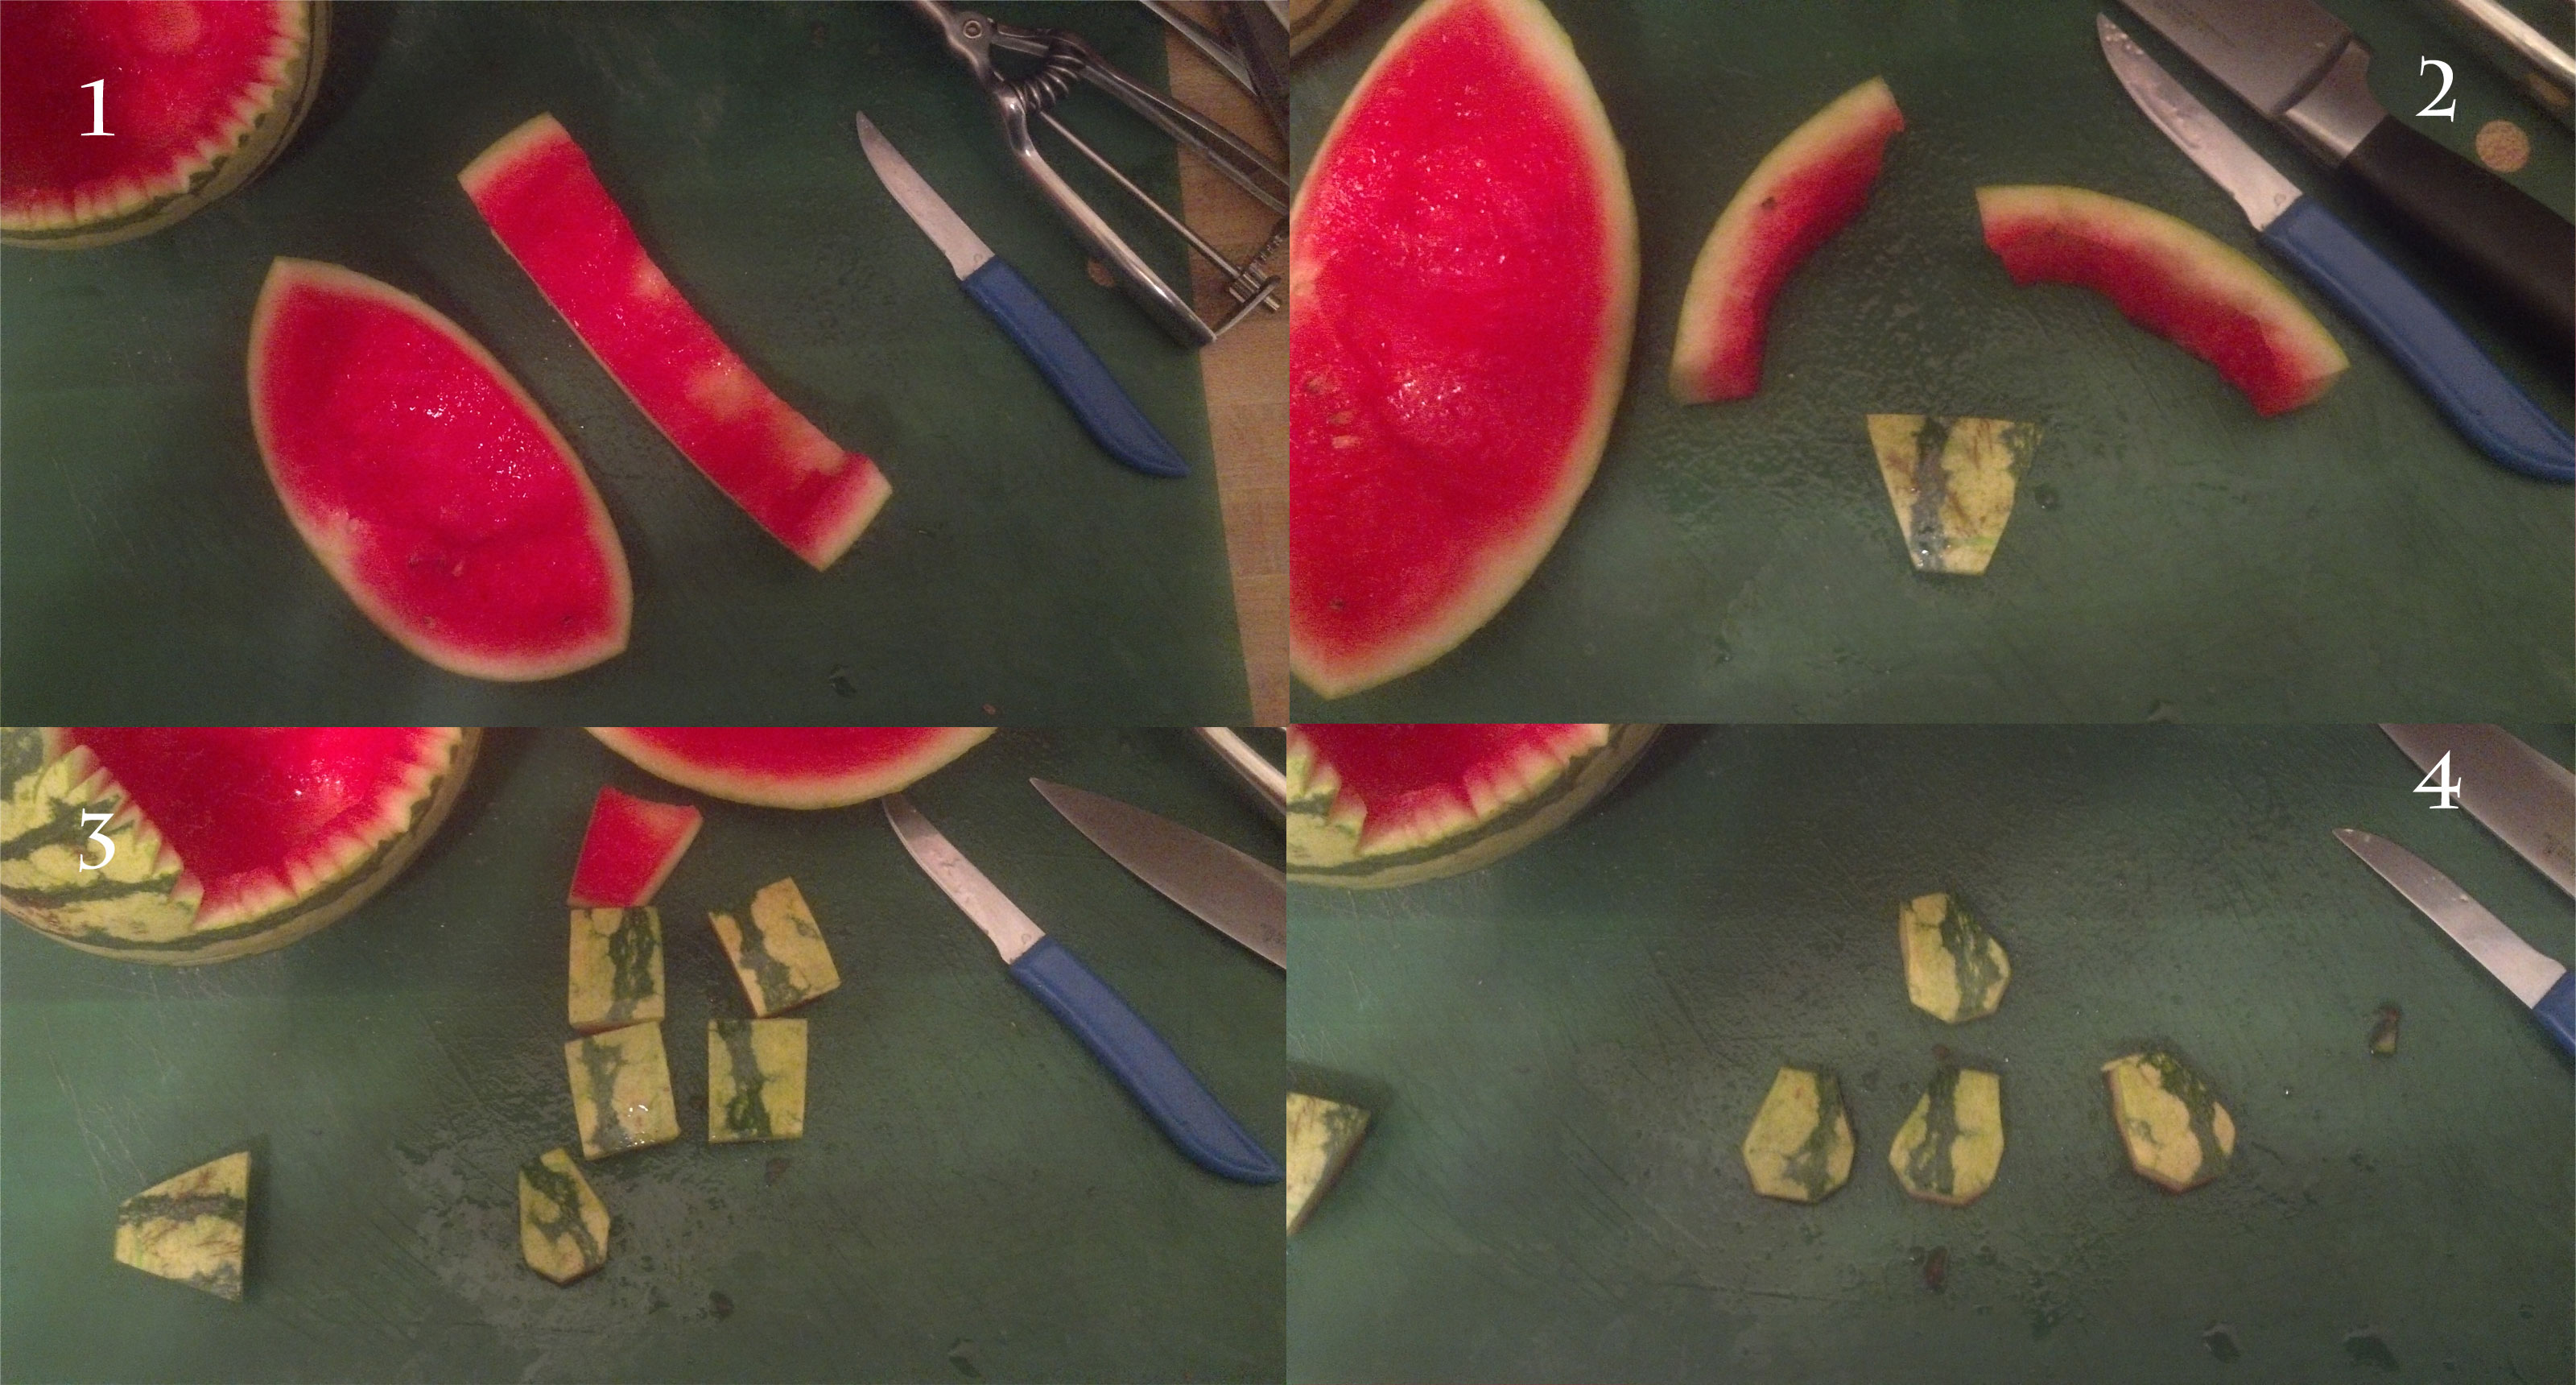
The moment you’ve been waiting for, or dreading is here. It’s time to start cutting the body parts. Don’t worry, this is easier than it looks. Start by cutting a strip off the piece you cut from the back. You will want to cut this as wide as the nose will be long. You can see how I cut mine in the corner labeled #1. Then, from the middle of this piece, cut the diagonals of the nose so one side is about 1/2 inch wide and the other side is an inch or more. By cutting the nose in this manner, the stripes from your melon should run the length of the nose. (see #2) This will look more realistic. Now, time for the feet. Cut the remaining piece of the strip into four equally sized pieces for the feet. You will want to now ‘cut the corners off’ of the feet shaping them. You want each foot to be wider in the front than in the back, so cut a long narrow section of each side of the back, then trim short equilateral corners off the front of each foot. You can see how I did this in images #3 and #4.
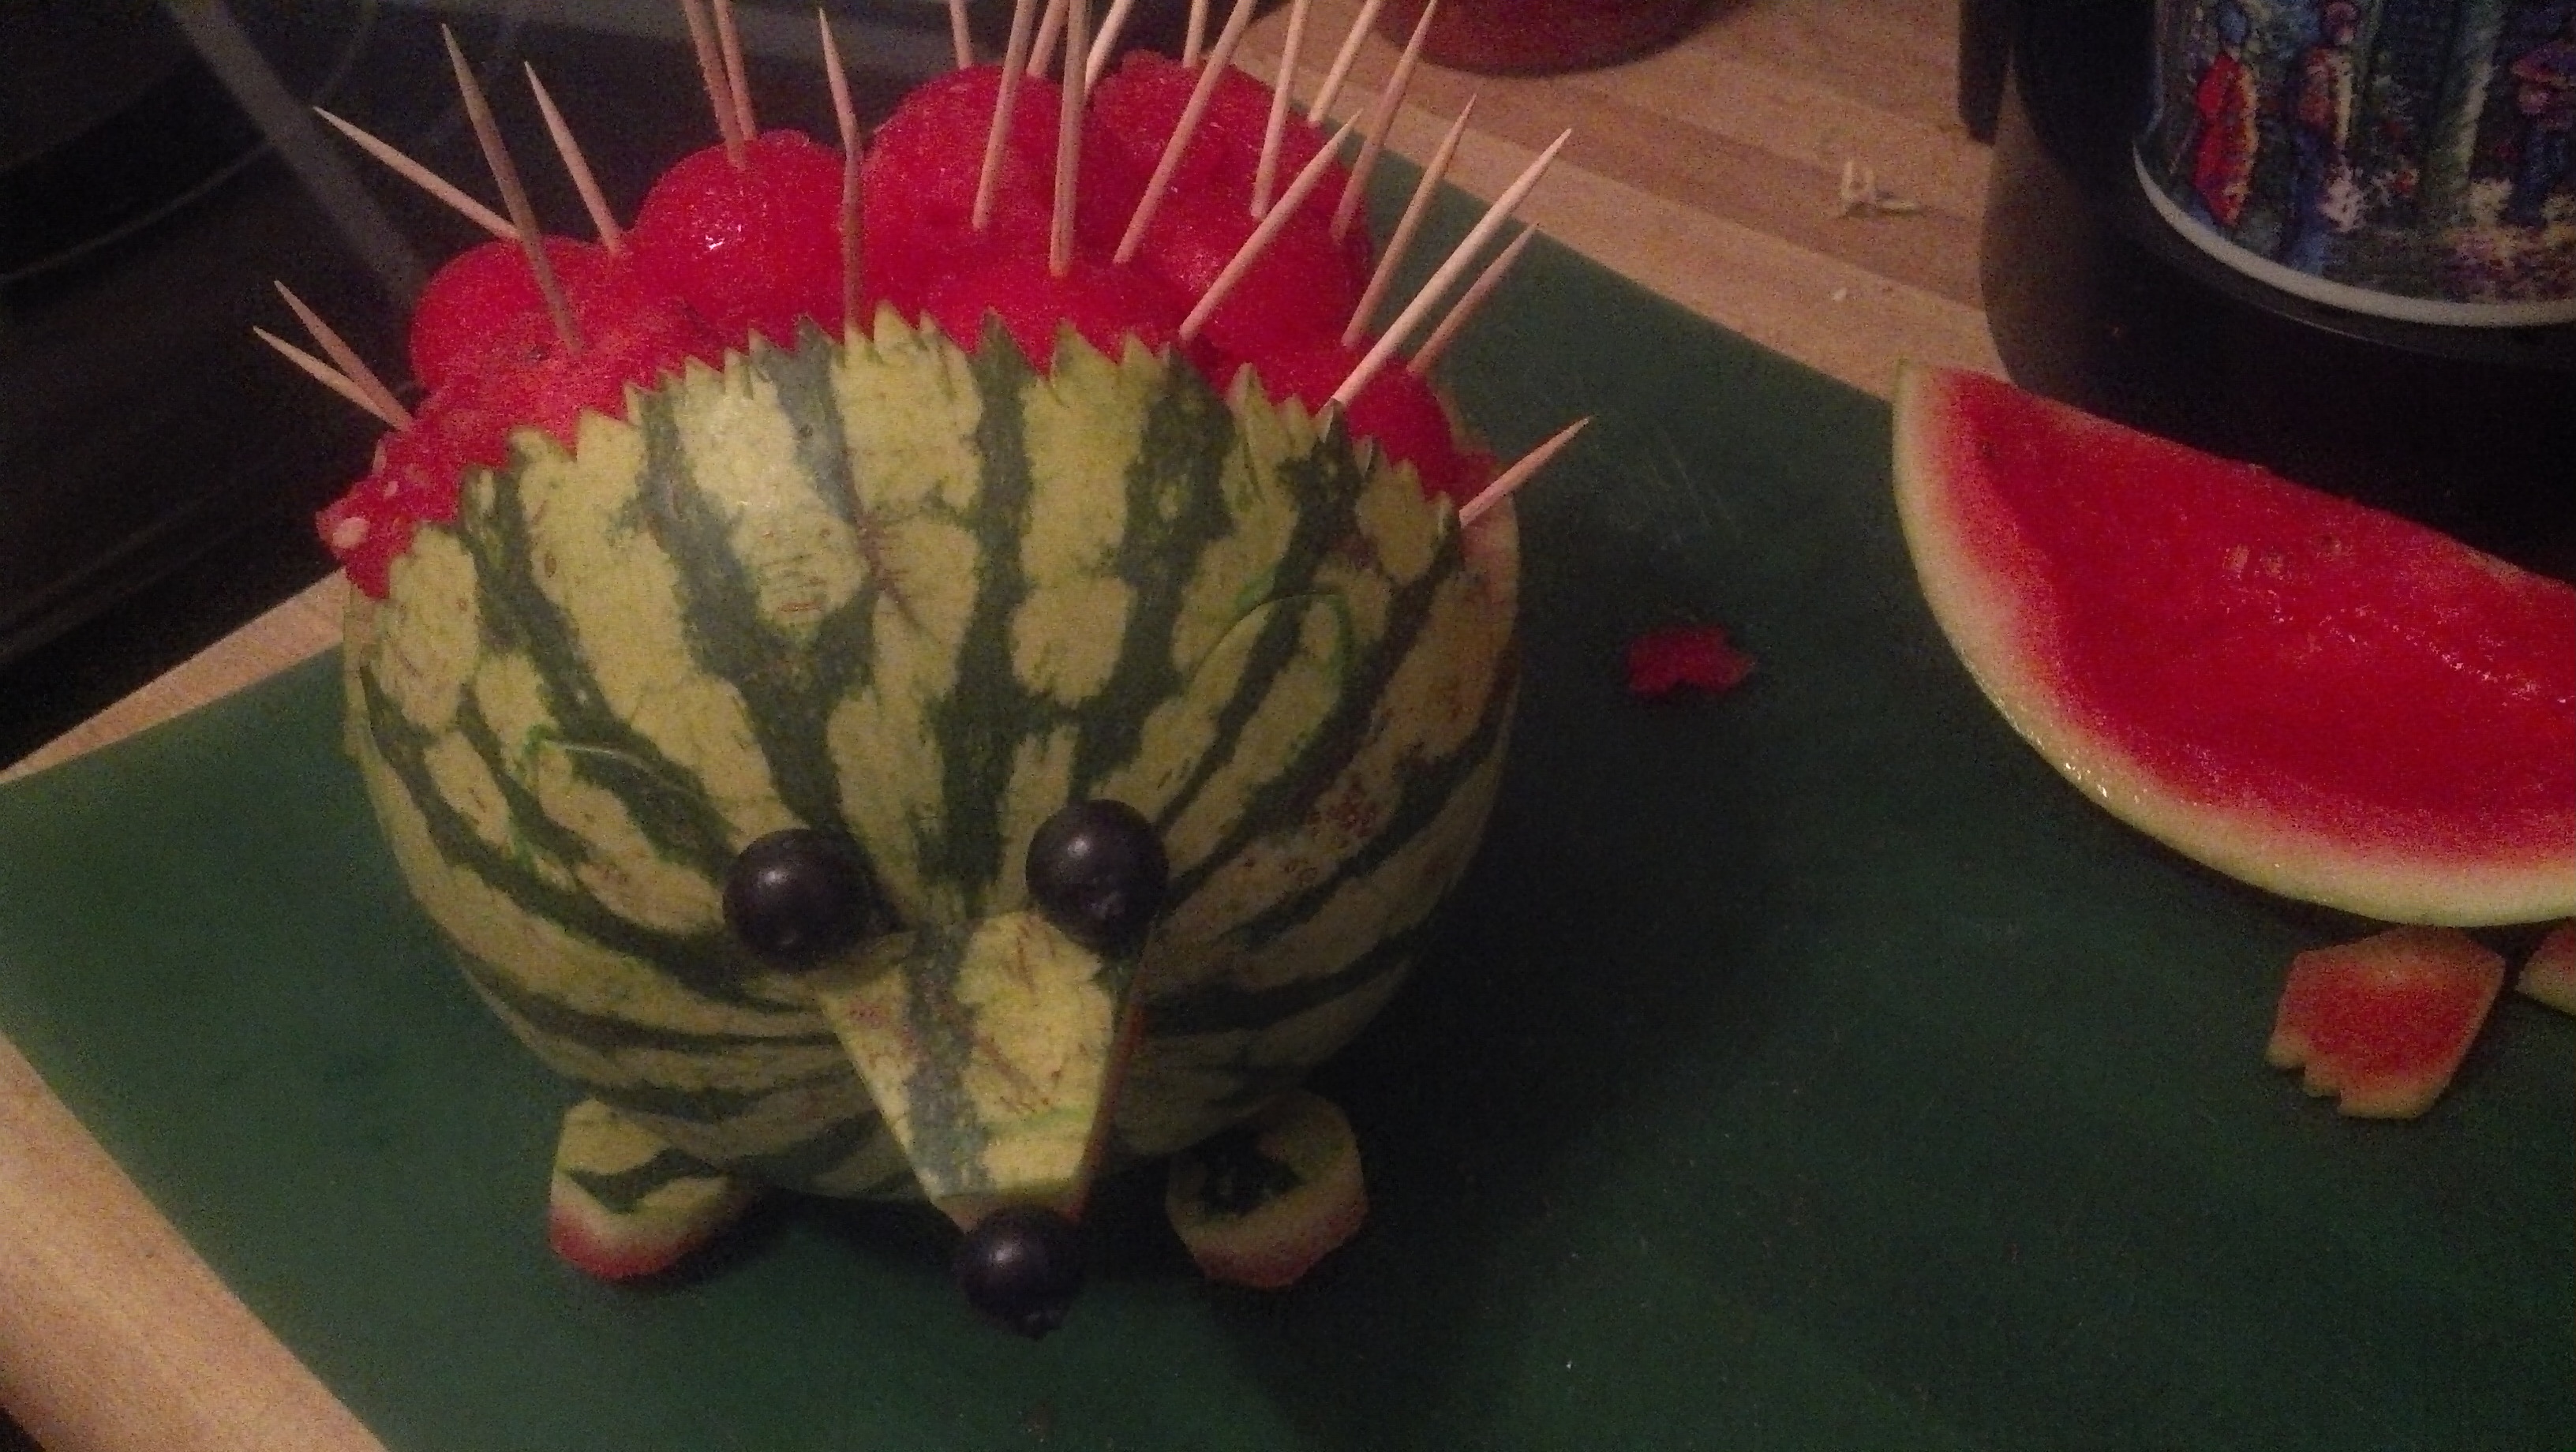
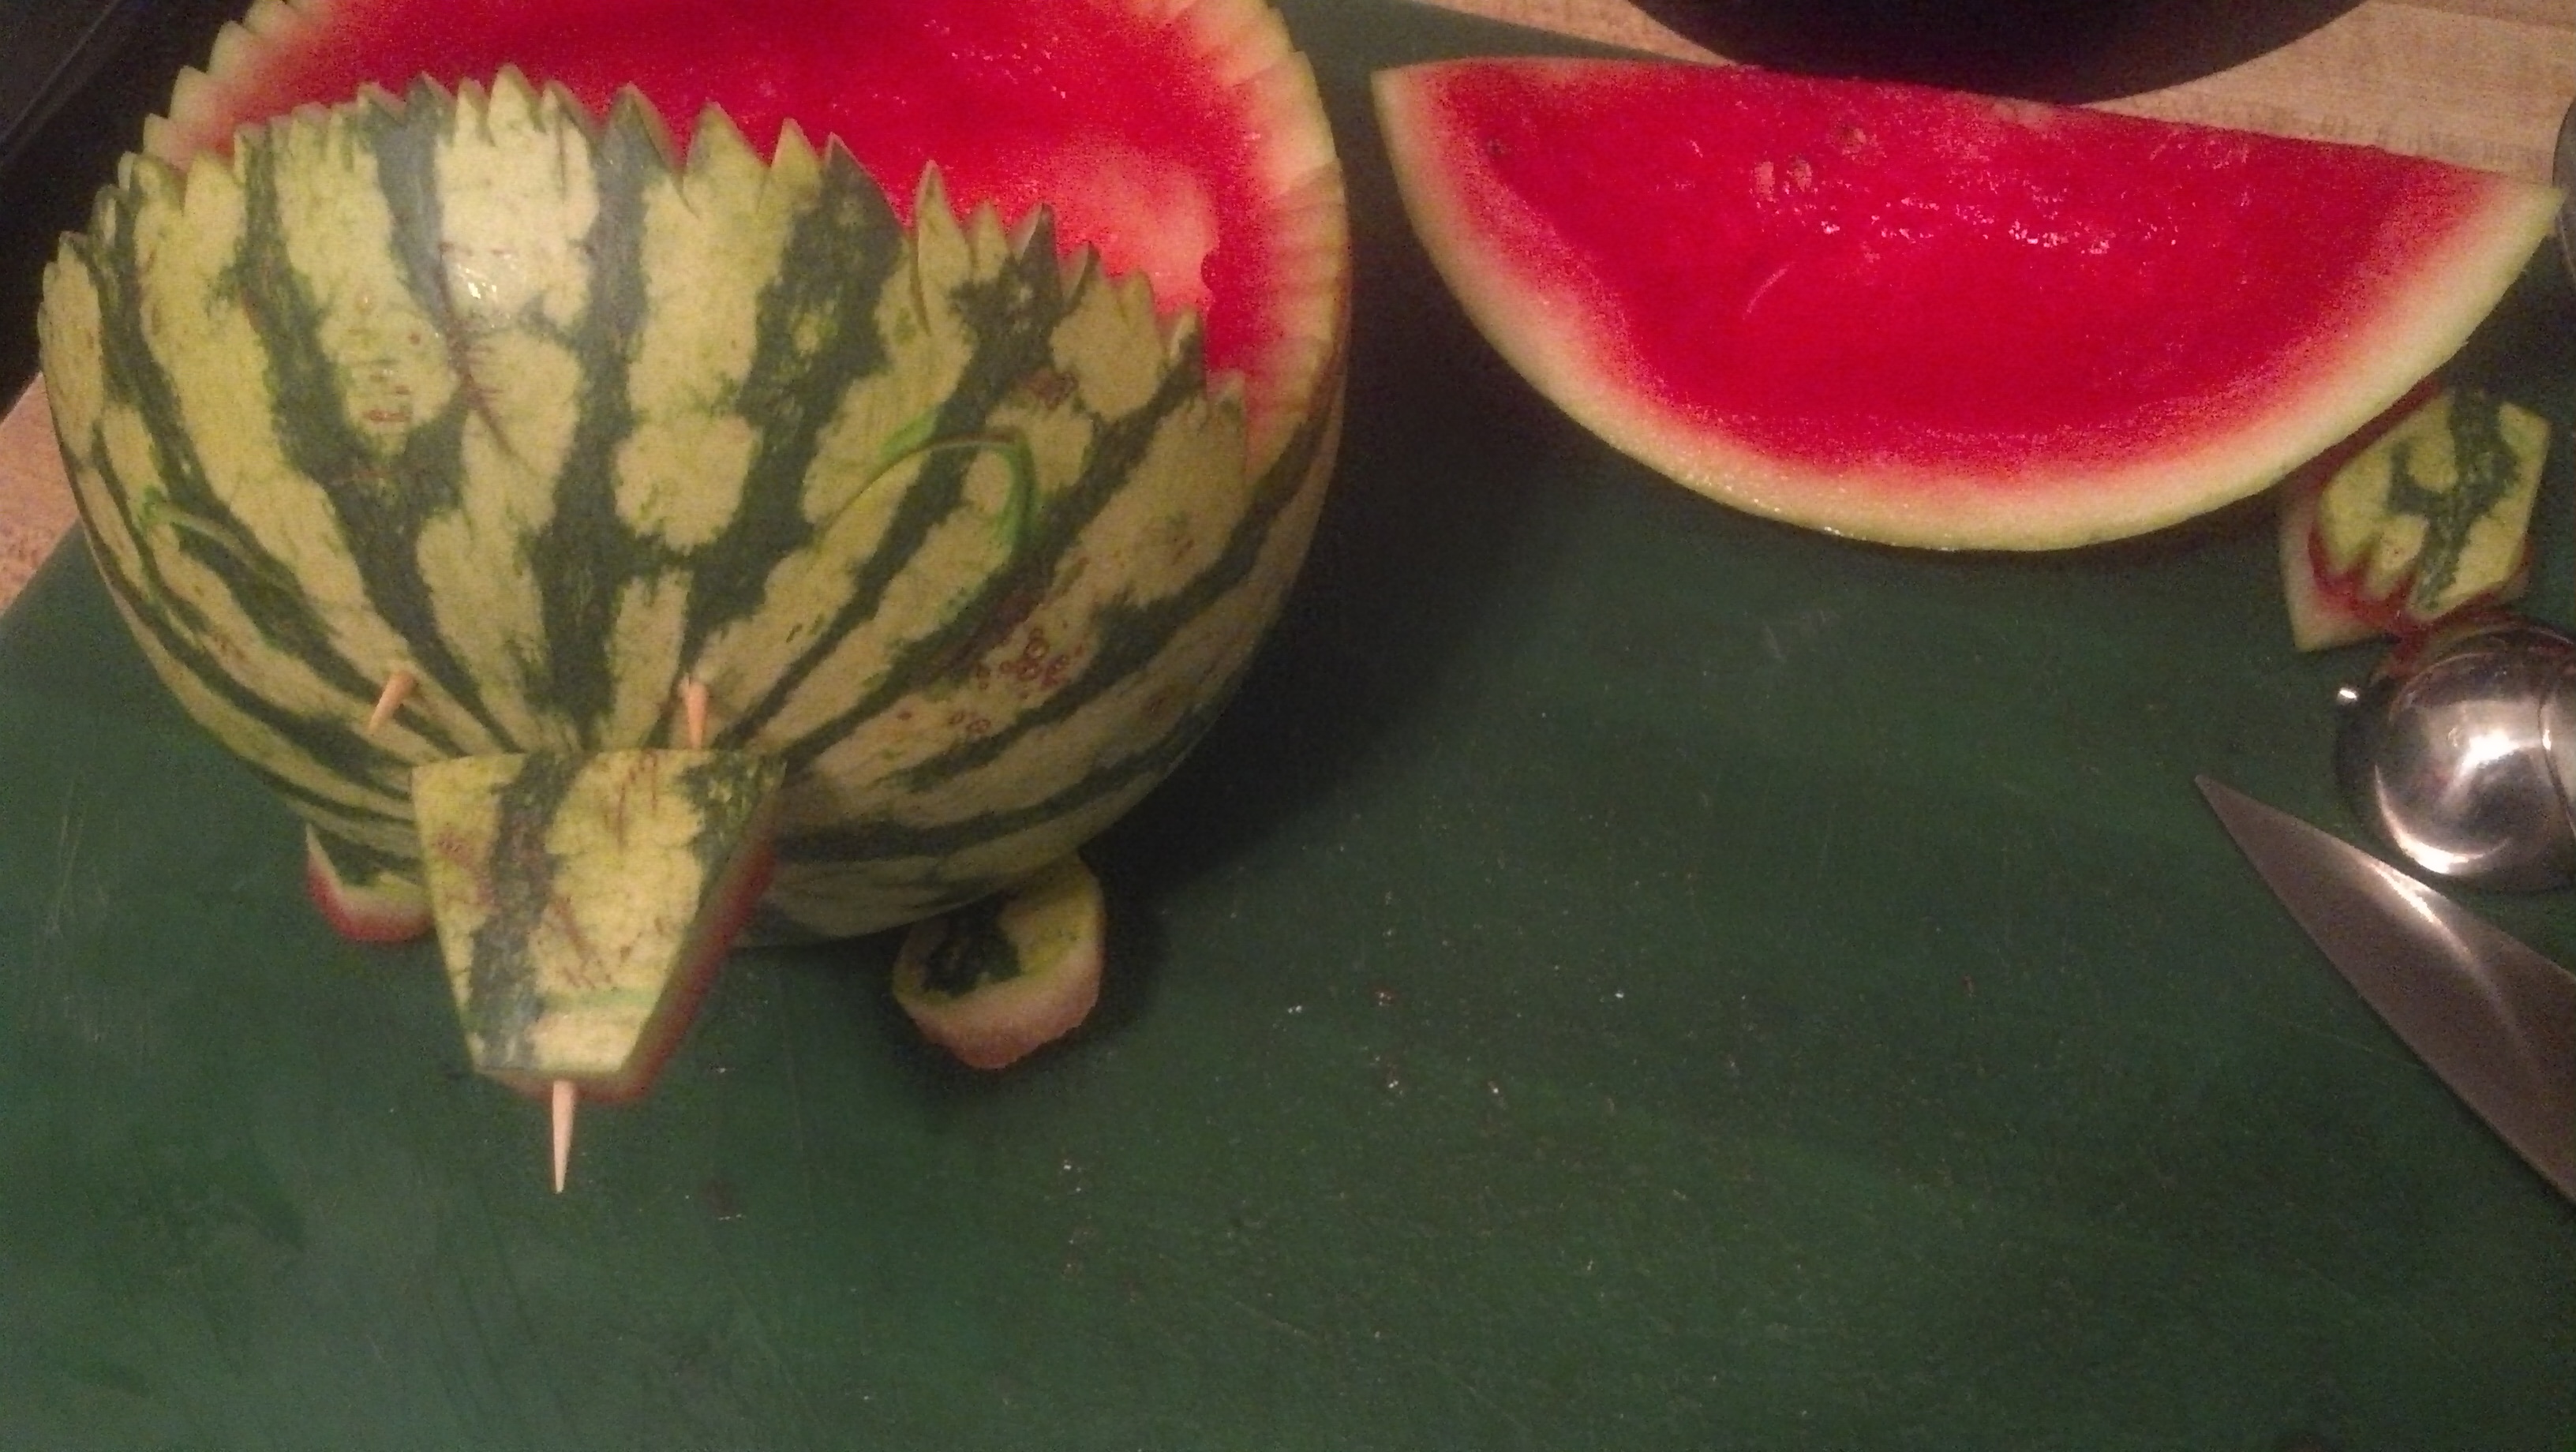
OK, now comes the tricky part, at least the most tricky part for me. Let’s assemble our creation. Start with the feet. I broke tooth picks in half since the rind was so thin. This helped prevent me having toothpicks poking up into the melon bowl. I positioned the feet in what appeared to me to be the best placement both for looks and to help prevent the melon from rolling if bumped. I then pushed one toothpick in both the foot and the base of the melon. This held the feet in place. I used two toothpicks to hold the nose on. Another half-toothpick in the tip of the nose holds a blueberry, and two half-toothpicks inserted from inside the melon hold the eyes.
Time to finish it up. Fill the melon bowl with the melon balls you cut earlier. Then poke a toothpick into each piece that you can see. This adds to the final look of the hedgehog and makes it almost inedible. I said almost. But please try not to eat too much. I mean really. You’ve gone to all this trouble, don’t you want someone else to see it and appreciate your amazing talent before you devour this poor helpless animal. Fine, go ahead and dig in. But at least take a picture and send it to me first. That way, I can share some of your creations with the world.
I hope you enjoyed my instructions and are encouraged to make your own watermelon carving. It might be a good idea to make one at home, for let’s call it practice, then take your next, better, hedgehog to the party. You’ll be able to stand back and soak in the sun and adoration of everyone there, especially since you’ve already eaten your share of watermelon.
There is very little to help us understand the meaning of the word ‘wonder’ other than gazing at the night sky. Ever since I was a teenager attempting to woo the fairer sex, I’ve been in love with the visions of the night sky. Whether it is seeing a cloudless night from a vantage in the country far from the lights of civilization or through the thin air of a mountain top after a day long hike, I am amazed at the majesty of the stars and their infinite number. I enjoy getting lost in the tales of those we find permanently in the constellations of the stars.
I recently talked my students’ families into staying up to see the Lunar eclipse, and I can tell you it was amazing. If you didn’t see it, boy did you miss out. Well, we have another amazing event coming up. This time should be just as spectacular. Friday night from about 1 am until about 3 am, Earth will be traveling through the tail of a little known comet. The dust trail left by the comet should create quite the meteor shower. For those of you wishing on falling stars, you better bring your dream journal because we may see as many as 50 to 100 meteors an hour. They are expected to be slow, bright, and quite spectacular.
The best way to view the show will be from a reclined position, i.e., a blanket or reclining lawn chair, with a good view of as much of the Northern Sky as possible.
For those of you near Aurora, Grand Island, and Central City, or those willing to drive to Marquette, the Edgerton Explorit Center in Aurora in conjunction with Prairie Plains Resource Institute is offering a Meteor Watch Event from 11:00 pm Friday, May 23rd to 3:00 am Saturday May 24th. You can find more information on the Edgerton Explorit Center facebook page.
If you aren’t able to join the folks west of Marquette, you can join NASA for a live chat and ustream. Information on the live chat and more information on the meteor shower can be found on the NASA site.
As I have shared with many of you, making Easter Egg-shaped chalk was one of my family’s most favorite ways to celebrate. We enjoyed making these eggs so much that we made a lot of them. It has been several years since we made eggs and we still have quite a few left.
The three things that we liked best about this project were that it was a quick, easy and a relatively clean project, the kids could be involved in the whole process and it helped us to celebrate Easter during the whole season, from planning through to Easter Morning and for days, well years, after. It also makes a great art project for spring through summer and fall, keep this in mind while planning chalk colors.
I don’t have the specific directions we used, but I have found links to several other blogs with basically the same instructions, or at least as I remember them. I’ll share those as we go along. First, let’s start with what you need to make these colorful eggs.
A Printable for working with Primary, Secondary, and Tertiary colors.
Items Needed:
Plastic eggs
Petroleum Jelly
Plaster of Paris
Powder Tempura Paint
Empty egg carton (helpful but not necessary)
The plan is incredibly simple. I like to start by having the kids liberally coat the inside of the eggs with petroleum jelly. It’s fun for them. They are sure to adhere to the ‘liberally applied’ policy which makes getting the eggs out of the plastic later much easier, and I enjoyed it when my wife found door knobs slathered in the jelly later. <She didn’t though; yes, I’m a little cantankerous.>
SkipToMyLou’s Egg Shaped Sidewalk Chalk post
While the kids are busy with the eggs, I mix Plaster of Paris with water per instructions on the Plaster of Paris. Then I have the kids join me as we add Powdered Tempera Paint until we get the color(s) we are looking for. This can be a great activity to aid in understanding the color wheel.
Next, move the colored plaster mix into each half of the plastic eggs filling the halves almost completely. We filled matching halves of the eggs with the same color of plaster mix so each egg was a single color. This is where the egg cartons come in handy, especially if you have twice as many cartons as you do eggs, because you let these eggs sit half filled until the plaster starts to set up into a muddy consistency. The egg cartons hold the eggs up nicely during this step and make a great place for storing the eggs as they dry and later when they are not in use.
Disney’s Spoonful Ballpoint Eggs post
Since we made more of each color than would fit any one egg, we had some eggs that were half and half colors. As with almost anything we do with the kids, I like to let them experiment. Maybe combine two different colored halves, then you would have a dual colored chalk. You could event try combining different colors in the same egg and only stirring them once or twice to create a swirl. I know that is so crazy. Have Fun. Once they have set up a little, you will, quickly, piece the two halves together to complete the egg. It is good at this point to shake the eggs so the plaster of the two halves mix into one egg, otherwise you may end up with two half-egg chalks. Let the eggs sit overnight to set up.
Finally, whatever you do, DO NOT POUR THE EXTRA DOWN YOUR DRAIN, think cement in the pipes. I think this would be a no-brainer, but we often disconnect our brains until after we do something, so I’m putting it here for people like me.
LINKS:
If you haven’t talked about mixing colors yet, Mr Printables has a nice, well, printable that you can use to show kids how colors mix, then let them mix their own as they make chalk.
Three Egg Chalk Links I liked are Disney’s Spoonful Ballpoint Eggs post. It is clean, concise and easy to follow.
I also liked SkipToMyLou’s Egg Shaped Sidewalk Chalk post. It goes a little more into detail and they use the liquid tempera paint which seems to work quite well too.
Finally, I like Amber’s SaltTree Easter Egg Sidewalk Chalk post. Amber fills her eggs a little differently and doesn’t use the petroleum jelly at all.
It’s time to start thinking about summer again, that means registering for camps and thinking about trips to the pool, the park, the baseball diamond…. and the library. I hear a lot of teachers talk about the summer slide. That’s the idea that, over the summer, kids forget what they’ve learned a teachers have to start all over again in the fall. Well, I’ve come across a great resource to help keep your kids engaged in reading and thinking about what they read, over the summer.
Children’s Book author, Lauren Tarshis has written of series of books about major events in history. In her books, she inserts a young boy into the event and writes the book from his perspective. I think giving kids another child’s perspective is a great way to familiarize kids with major events. The series, written from the first person perspective, is called I SURVIVED. There are currently nine books in the series. Events range from the Battle of Gettysburg and Shark Attacks in 1916 to the San Francisco Earthquake and the Attacks on September 11th. Right now you can get them from Scholastic for $3 each. You can also choose from four different packs; Mother Nature ($8 for 3 books), Deadly Wars ($8 for 3 books), American Tragedies ($15 for 6 books) or Complete Set ($18 for 9 books).
One of my favorite parts is that you can access a complete Educators Guide filled with fun and engaging resources. Resources include a video interview with the author, comprehension questions, tools to write your own newspaper article and headline, even a play about the Titanic that the whole family can read aloud together. All of these resources are free. They are so well put together that even as a parent, you’ll feel like a teacher.
Here’s a quick, teacher’s college, tutorial.
You’ll find the Educator’s Guide for the series here as well resources for individual books. Be sure to start with the Educator’s Guide though as there are several resources not listed individually. The next page of resources breaks things down into content areas like Comprehension, Literature concepts like Character Traits, Identifying Types of Conflict, and Distinguishing Fact from Fiction, Writing Activities, Word Studies, History and Science even Technology Connections. If knowing how all this relates to standards is important, this is the page for you.
For the kids, there is a great website for the series that includes information about the books, specific facts about each event and even a survival skills quiz for them to take. There are links to other books and online resources about each subject too.
I am delighted to share with you an activity I just did in one of my classes. This is a basics activity. That means that I use this activity to teach basic principle and skills. We will later use these principles later to do a bigger project.
For this project, you need paper, scotch (clear) tape, binder clips, copper foil tape, 3volt button cell batteries and LEDs. I found adafruit.com a great place to get the Copper Foil Tape and 3V Button Cell CR2032 batteries. Makershed had a great collection of 100 LEDs for about $10. I did find it interesting that adafruit also had a rechargeable button cell battery. Of course, you also need the charger. If anyone has used the rechargeable battery and charger, I would love to hear how they work.
A couple things that you want to cover right away is that electricity is unpredictable. We can guess what it will do and where it will go, but we can’t always be sure. Just try to predict a lightning strike. So, talk about safety and talk about polarity. Talk about Positive and Negative or Anode and Cathode. This becomes very important when working with direct current. The battery will only work when connected correctly and the LED will only light when connected correctly. Batteries are clearly marked + or – but LEDs, not so much. So, how do you tell? Sparkfun does a great job of explaining polarity.
It is always good to have everything put together in packs for the kids to make things go smoother. Another thing that made things go smoother was I had the circuits already printed on the paper for them. First, we started with a simple circuit. Then, we did a second circuit that includes a switch. You can print the pages I used by clicking on the image and downloading the pdf. These are simple drawings that I just had the kids tape the copper foil over the black lines. While I drew these up myself, I can’t take credit as there were basically of mashup of a couple sites. I’ll list some of my favorites at the end of the post.
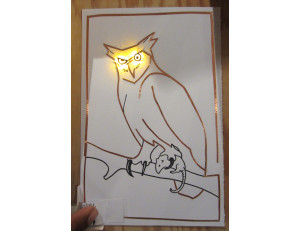
To make things a little more fun, have them sketch a fun drawing with a component that will light up. We used a Christmas tree for our simple circuit and a light house for the circuit with a switch.
hackademia – I love the way they integrated the circuitry into a pop up card.
exploratorium – had two links Paper Circuits and Tinkering with Paper Circuits. High-Low Tech – a research group at the MIT Media Lab had some very useful information including diagrams and an informational handout. Just check out the owl at the top of the post. This led me to… The Fine Art of Electronics – there are some awesome Tutorials and an amazing gallery, here are some of my favorites, and links to circuit notebooking.
OK. For all my English-loving word nerds, this one is for you. But, first, a little background. Anyone who knows me knows I love books. I love to read and we, my English teacher wife and I, promote reading every chance we get. So, when I became a teacher and found out I could start ordering books from Scholastic, I jumped in with both feet. (You have no idea how much Scholastic does.)
My kids are at the ages when everything and anything that is on the “edge” of what is appropriate makes them crack up into a million pieces. – Amy Mascott
Anyway, I can’t remember if it was off the Scholastic Parent or Scholastic Teacher Facebook page, but one of them led me to this Post by Amy Mascott about having your kids write limericks. Amy writes about how anything and everything that is on the “edge” of appropriateness makes them crack up into a million pieces. She also gives a shout out to books with potty talk. I love word play of any kind and, if you can add in a little potty humor, you are sure to find me grinning from my ears. And, my wife has concluded that anything that includes the words poop, fart, or any derivative of these words will be funny to all males of any age. So, you can imagine that I jumped, much to her chagrin, at the chance to bring some fun limericks into the classroom.
Amy does a good job of explaining the AABBA and 88558 rhyming and rhythm patterns of limericks. Amy shares a Limerick Fill-in Sheet for us to use, err I mean for us to give to our students to use in creating their own favorite limericks. Needless to say, there wasn’t a man from Nantucket or any of the other limericks I learned in college.
Here is one I came up with while driving with my children.
There once was a brilliant barn cat,
who bragged that he’d grown so darn fat,
He’d built him a trap,
that closed with a clap,
and lazily feasted on rat.
I’d love to read what you and your kids come up with. Please share them with me. I’d love to share some of the best with my readers.
It is the first day of summer vacation and what are the kids and I doing? SCHOOL! I know, I know. It is a bit crazy. But there are several things that have gotten me to this point. One is this thing called 39 Clues. 39 Clues is a series of mystery books for children that has the characters traipsing across the world looking for clues to their ancestry and power of their family.
My children are super excited to read the books. As I pre-read several of the books I realized that knowing some information would make reading the books more enjoyable. The first one involves Benjamin Franklin. So I decided that before the kids could read the books, they needed a little schooling.
I recently found a very nice curriculum about Benjamin Franklin from the Benjamin Franklin Tercentenary. This recent discovery mixed with the need to find something to keep this kids busy as my wife, the teacher, is working all week has led us to attempt a summer school of sorts.
My hope is that the kids will have fun learning as we embark on this journey. They will be busy and I will get some work done. This will be a log of the things we do and learn as we proceed through this curriculum and study Benjamin Franklin. I hope you have fun reading about our experiences and I hope we have more fun than you.
We’ve heard a lot about Volunteering and Community Service. You’ve heard phrases like “Give back” or “Lend a Hand.” You’ve also heard about giving a “Handout” or a “Hand Up.” Well I prefer to take a different perspective. These all seem to place one person in a different position then another. For example, If I were to give you a ‘Hand Out”, or a “Hand Up” it would seem I am in a better position than you are. I don’t necessarily think that or believe that.
Instead, I think we are all in this together. While we have different roles to play at this time we all have the same role. We are all on the same team. If we are on the same team, then there is not anyone in a position of superiority. If we are on the same team, then everyone is expected to pull their own weight. This doesn’t mean that everyone is in it for themselves. It means that everyone does what they can.
The underlying idea behind several popular thoughts in America right now is, ‘From each according to his ability, to each according to his need.’ This sounds like a wonderful thought. It even sounds very much like what I am saying. In fact is is very much like what I am saying. It is not, however, what I am saying. This ‘From each..to each..’ idea is from a government, overseeing organizational, perspective. This is the idea that the overseeing body has the authority and should take (read squeeze) from everyone what they have, according to their ability, and redistribute this pile of goods back out according to each person’s “need” (read ‘as determined by the overseers’). This seems like a great idea.
The problem is that it removes the value of the individual. It separates the efforts of the person from the fruit of his labor. He no longer sees what his mind and hands can create and accomplish. He no longer sees the good that he does for his family and his community. When he cannot see that his efforts make a difference in the world, he stops striving to make a difference.
This basic idea is why NGOs are so successful. In America you can’t swing your checkbook, if you still even have one, and not hit a dozen Non-Profit Organizations that are directly benefiting your community. If you give even $10 you can immediately see the impact in you community. I live in a community of around 200,000 people. I can not name all the organizations that are integral parts of making this a GREAT town to live in.
This is not meant to be a political statement, though by it’s very nature it is. This is not a Republican or Democratic, conservative or socialist agenda. It is however an activist, anti-government statement. Simply put we solve our own problems better when we work together here.
I am encouraging Activism. I want you to get fired up and hit the streets. I want you to take your husband, wife, brothers, sisters, kids, neighbors, friends, coworkers, and anyone else you can. Get up. Get out there and make a difference. Volunteer. Give some of your time and money. Encourage others. Let someone else encourage you.
I call this the ‘Be In’ campaign. ‘Be In’volved in the community! ‘Be In’touch with what’s happening! ‘Be In’terested in the people in your community! ‘Be In’vested in the future of your neighborhoods, parks and schools! ‘Be In’gaged in the lives of the people around you! Most of all, what I’m saying is turn off the entertainment box and Go! ‘Be In’ your community. You’ll be glad you did.